
|
|
|
|
|
|
||
|
|
||
|
|
 29th October 2016, 20:07
|
#1 |
|
Gets stuck in
Rover 75 Connoisseur 2.5 V6 auto Join Date: Jan 2008
Location: Chatteris, Cambridgeshire
Posts: 914
Thanks: 320
Thanked 159 Times in 127 Posts
|
Today I've done the full ATF change as detailed above, thanks for the info. Car has only done 220k and had one part change about 3 years ago so I think it was time! It was suffering from a bad thump between gears on occasions, and sometimes a slip before engaging top. I haven't been too far since changing the fluid, but overall it does seem better. If need be I'll attack the solenoids (have a full set spare) and hydramount.
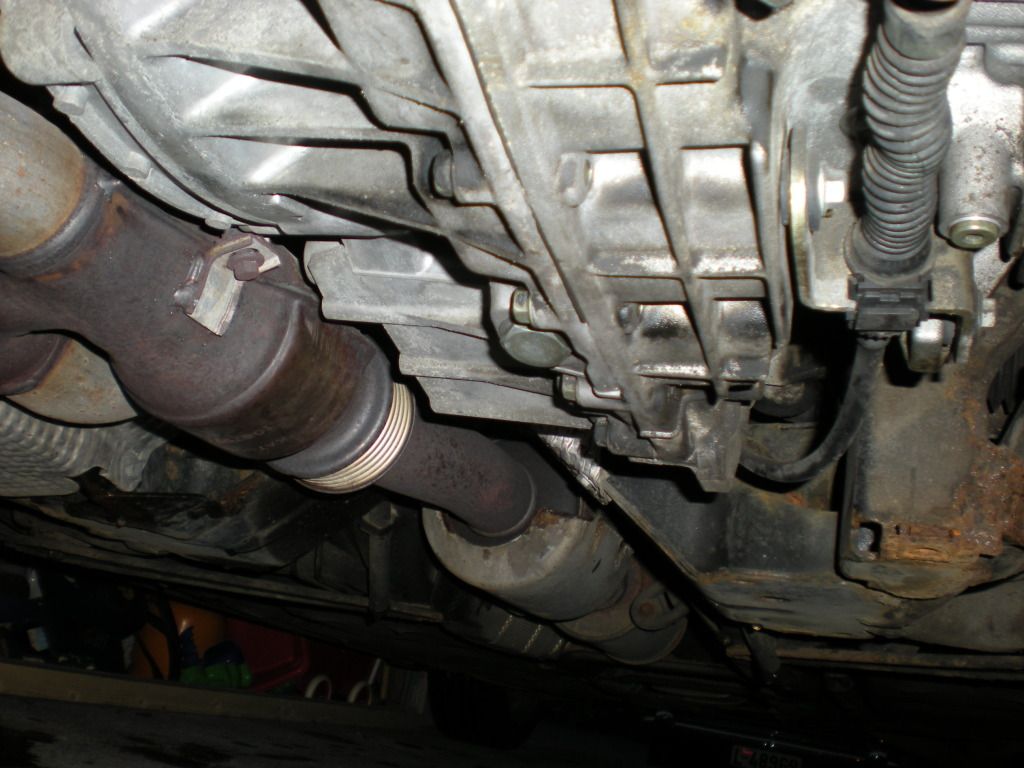
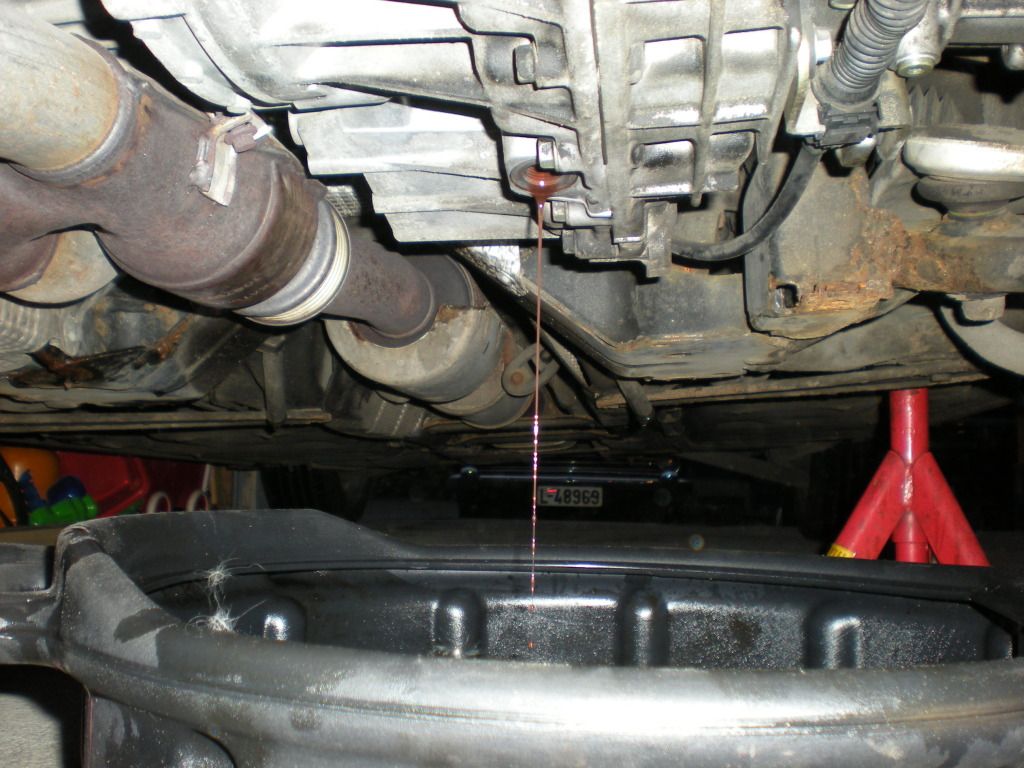
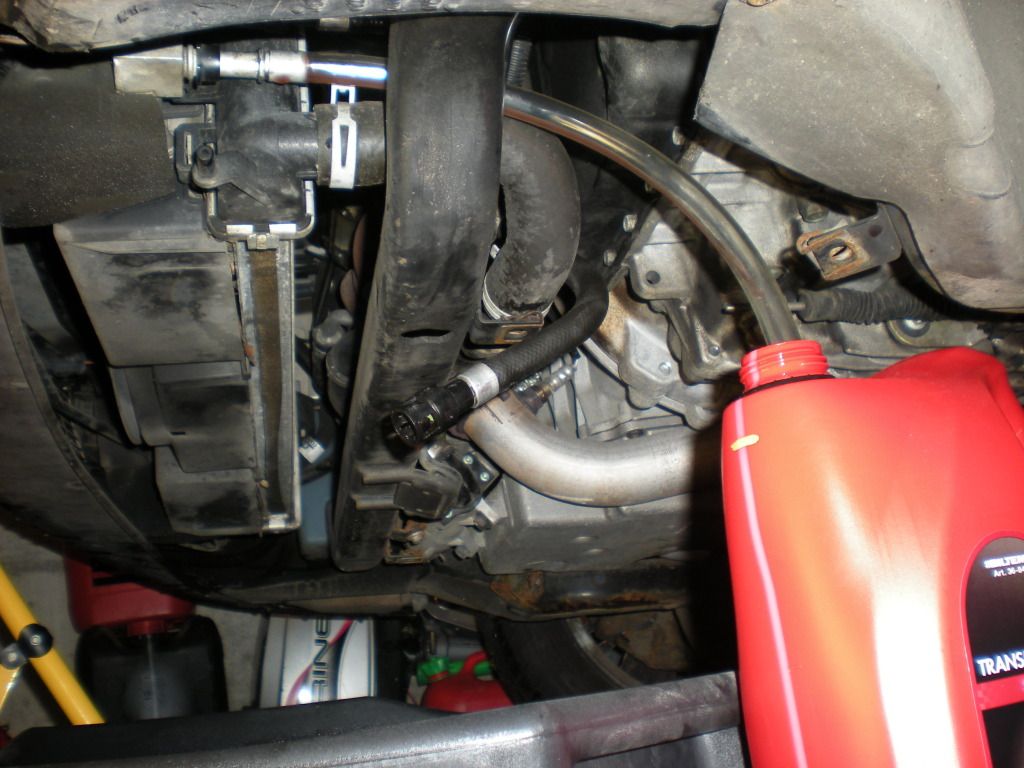
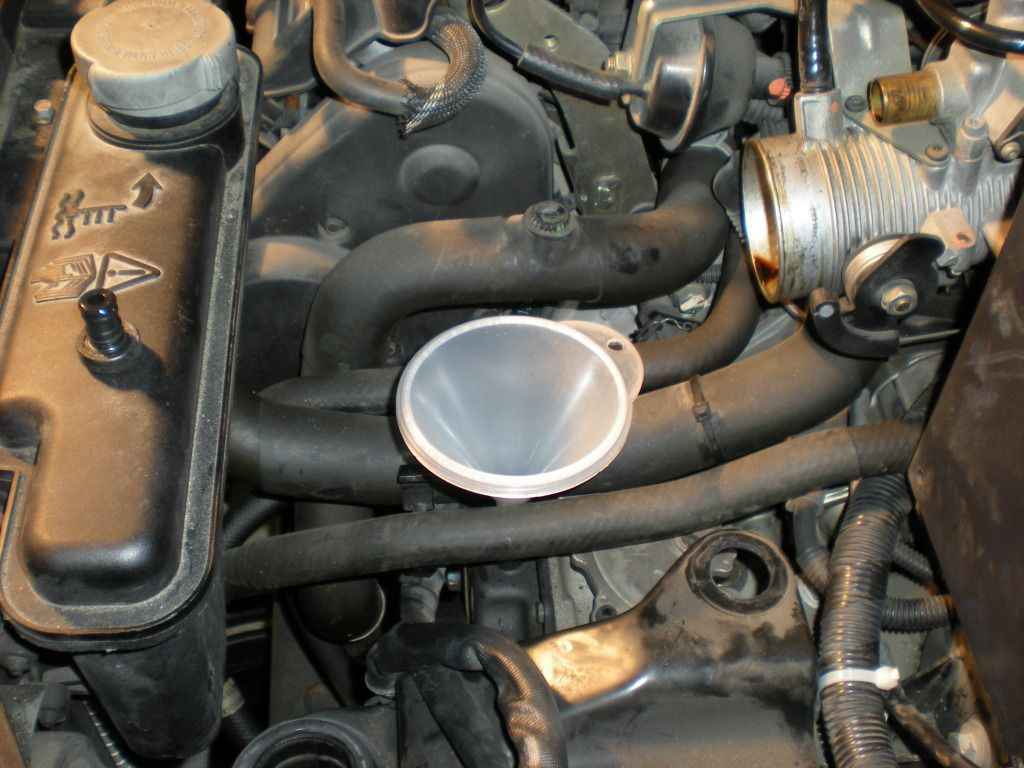
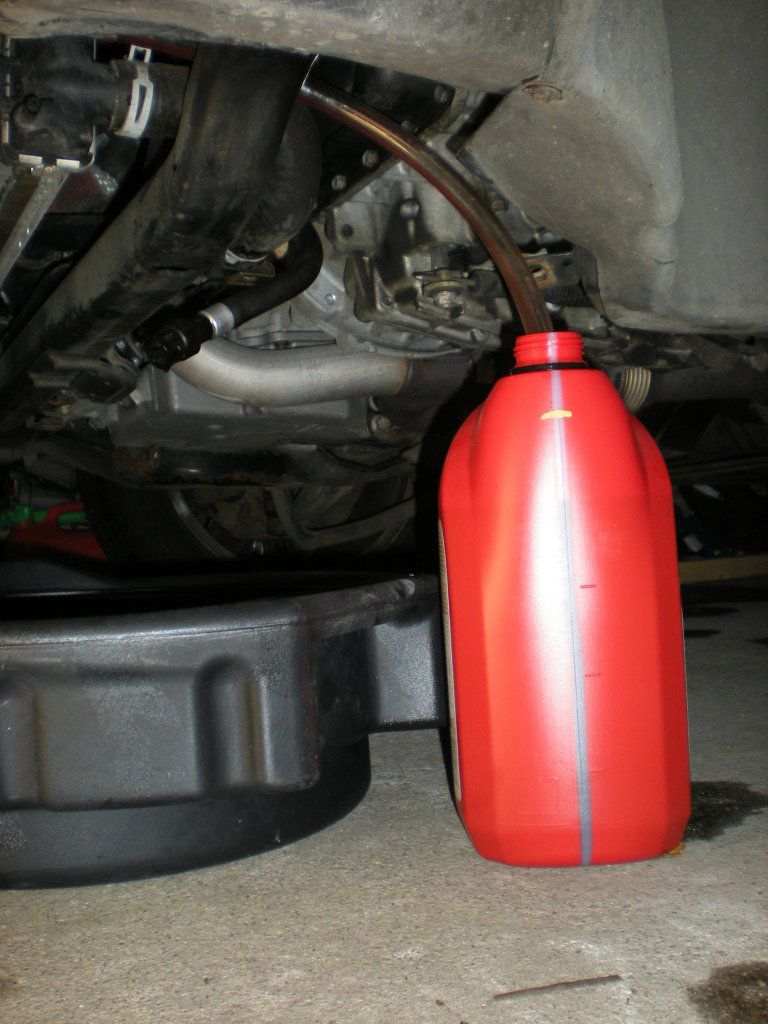
One thing though, I spent ages trying to get the push-on connector free from the oil cooler, without success. Nearly broke it in the process so gave up there. I traced the hose back up to a large union (like a brake pipe connector). A 19mm spanner here soon got it off, and the hose of course was easy to direct into my bowl on the floor. No need for a garden hose! Stewart |

|

|
|
4th March 2017, 14:28
|
#2 | |
|
Gets stuck in
Rover 75 tourer Join Date: Mar 2007
Location: Plymouth
Posts: 809
Thanks: 472
Thanked 116 Times in 85 Posts
|
Quote:
__________________
 Why weather the storm when you can learn to dance in the rain. Why weather the storm when you can learn to dance in the rain.Jobs done: Purchased 52 plate V6 connie Wedgewood blue,one owner,42000 on clock ,Virtually pristine.2017 service,new Goodyear tyres,Discs and pads all round,new battery,New cam and timing belts (3rd fitting in life of car),plus full normal service.exhaust 2016.First mod was to bonnet catch .Latest mod,triple heart pace maker. All brake lines changed for copper, all brake hoses changed for Pagid hoses. Last edited by Caskin; 5th April 2017 at 12:12.. Reason: spelling |
|
|
|
|
|
5th July 2017, 11:38
|
#3 |
|
Newbie
Rover 75 Tourer Join Date: Sep 2016
Location: Towcester
Posts: 3
Thanks: 0
Thanked 2 Times in 2 Posts
|
Beinet 1
I know this post is very old but I've not long been a member. Given photobucket's quest for even more money now, any chance of reposting the pictures using another programme as they no longer show. Thanks Steve Last edited by benrolljagrover; 5th July 2017 at 11:43.. |
|
|
|
|
14th July 2017, 19:59
|
#4 |
|
Posted a thing or two
Rover 75 2.0 V6 Auto Join Date: May 2011
Location: Sandnes - Norway
Posts: 1,560
Thanks: 64
Thanked 283 Times in 174 Posts
|
Hi all,
Glad to see that this thread is still useful for the forum members. It is a while now since I wrote it. I have to admit that I do not visit this forum often any more after my daily driver was sold. I still have the V6 and enjoy now and then on lovely days. I will see if I can get the pictures back for you all! P.S. Thats bad. I am not paying Photobucket $6/month for an upgraded membership. Are there any other photo sharing services that works well? Last edited by beinet1; 14th July 2017 at 20:04.. |
|
|
|
|
14th July 2017, 20:46
|
#5 | |
|
This is my second home

MG ZT CDTi Join Date: Jan 2014
Location: carrick
Posts: 7,859
Thanks: 3,494
Thanked 2,657 Times in 1,973 Posts
|
Quote:

__________________
It is not gloss primer .............. it is duct tape silver! |
|
|
|
|
|
14th July 2017, 21:06
|
#6 | |
|
Posted a thing or two
Rover 75 2.0 V6 Auto Join Date: May 2011
Location: Sandnes - Norway
Posts: 1,560
Thanks: 64
Thanked 283 Times in 174 Posts
|
Quote:
I am not sure what I will do. What photobucket is doing is blackmailing!! It pi$$es me off!! I have shared hundreds of photos of my experience via photobucket on several forums which is now unaccessible!! |
|
|
|
|
|
14th July 2017, 21:52
|
#7 | |
|
This is my second home
MG ZT CDTi Join Date: Jan 2014
Location: carrick
Posts: 7,859
Thanks: 3,494
Thanked 2,657 Times in 1,973 Posts
|
Quote:
I would save some of the how tos to allow me to view them whilst at the car, and accidentally discovered I could save them as PDFs using google's chrome browser. Which meant I could view them easily using my tablet or phone. To save as a PDF in Chrome, right click on a blank area of a web page, select 'print' (ctrl +p will also work), then in the dialogue that opens, click on change, and 'save as pdf' will be an option. Select that, and the rest is obvious 
__________________
It is not gloss primer .............. it is duct tape silver! |
|
|
|
|
|
23rd September 2017, 23:41
|
#8 | |
|
Posted a thing or two

Rover 75 saloon, manual. Rover 75 Tourer, Auto. Join Date: Jan 2013
Location: Newry
Posts: 1,782
Thanks: 574
Thanked 443 Times in 371 Posts
|
Quote:
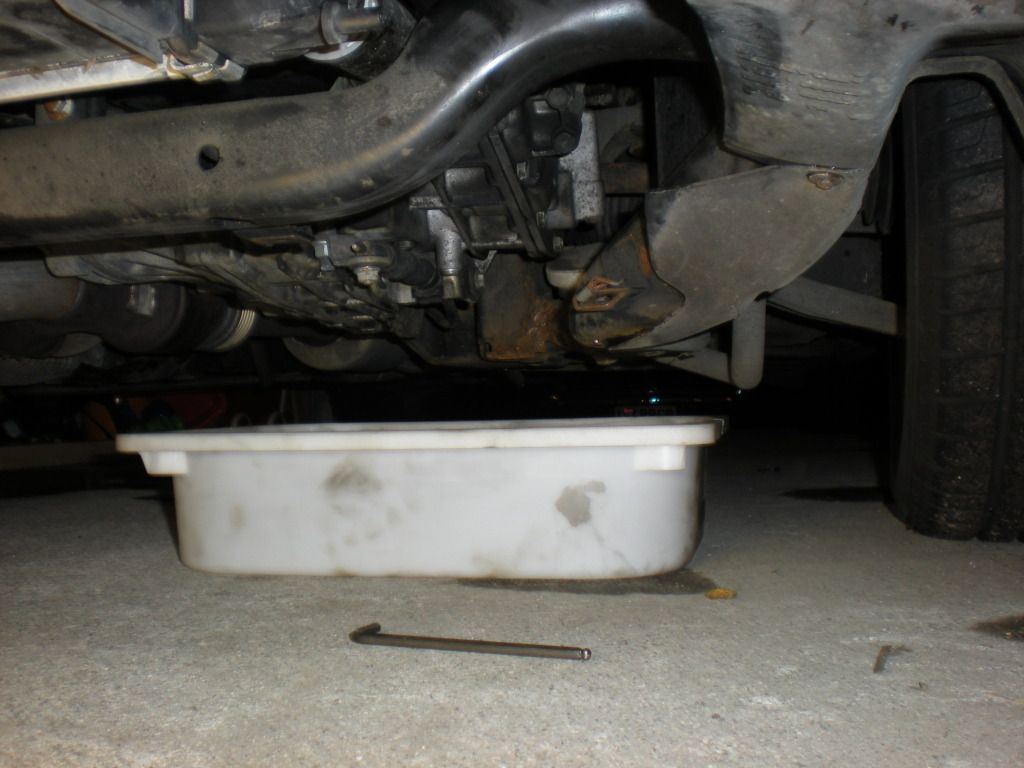
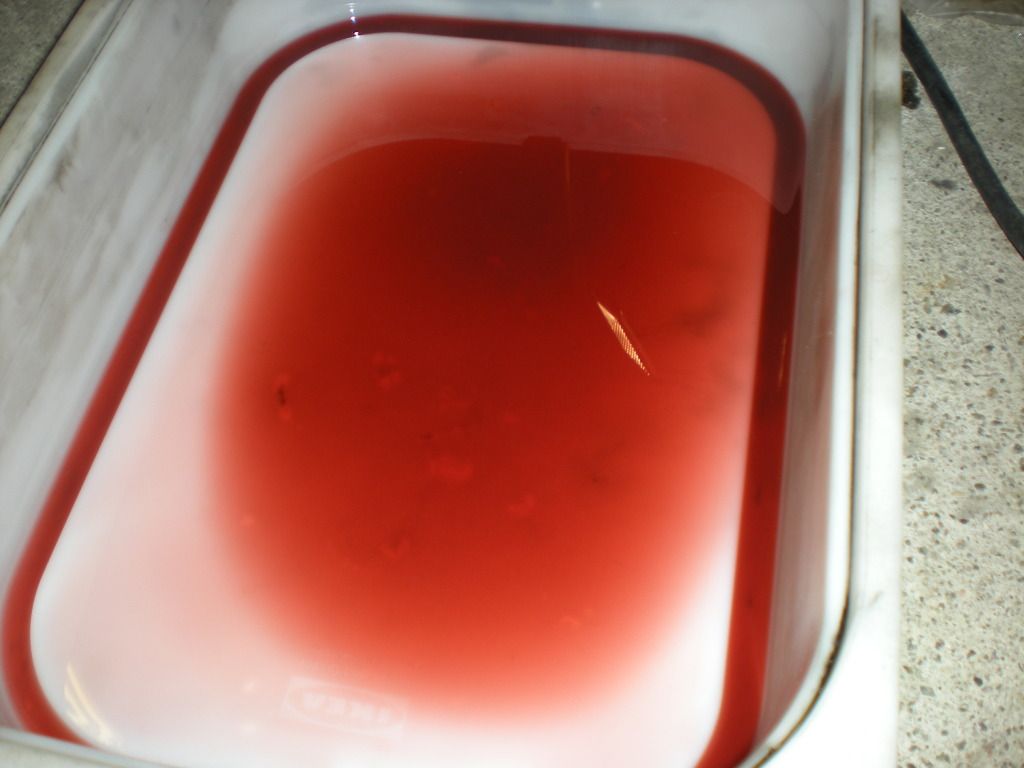
Thank you beinet1 for this "how to", and CLF for re-posting as PDF with pictures. Well, I thought I'd give it a go, seeing as the ATF in my tourer was changed by previous owner, 45k ago, at 30k miles. I didn't previously have any problems with gearbox as such, but just thought I should do the change, as father in law was going to do his, and wanted to watch a guinea pig first.😨 Out of curiosity, I 1st checked the fluid level, before draining anything, and approx 200ml came out. It looked like this:😱  That made up my mind to follow beinet1's procedure, (almost) to change as much as possible, rather than the "normal" drain procedure. I didn't take temperature measurements at any stage, but done all drain/ level checks, within 20 mins of taking out for a run, and getting up to "normal" temperature, say 84C. I used this, purchased from rimmers...  . .OK, we probably all know what it looks like, but for comparison with photo 1, it looks like this:  Fluid amounts at various stages were as follows: Level plug overflow: 200ml Drain: 3050ml Fluid in: 3500ml Fluid out  via cooler). 3050ml (till it stopped pumping). via cooler). 3050ml (till it stopped pumping).Spillages, 😱: 600ml, yes, there were some😬, mostly caught (500ml) but made allowance for 100ml escapees. Fluid in: 3400ml So excluding initial overflow from level plug, that was OUT: 6700ml IN: 6900ml At that point, there was no sign of anything coming out of the level plug, so added another 100ml, and then about 50 ml came out. Hardest bits: - separating the collar on the oil cooler - having to rig up a variety of hoses and tun-dishes - having the patience to fill the thing... it took an age.😤 Having only driven the 15mile home from FIL house, the only difference I can note is that it doesn't change down a gear, as readily as before. Nothing major, just different, but then again, it was fine before the change. 🤔 So, my only query to put out there....... What do you make of the colour of the fluid that came out, seeing as it has only down Approx 45k.? Previous owner was a gentleman, so I've no reason to assume it wasn't changed, or that correct spec fluid wasn't used. (He had posted a bit about using N402 spec, back in the day.) Sent from my iPad using Tapatalk
__________________
2006 75 Contemporary SE diesel manual (#1 )2003 75T Connoisseur SE diesel auto (For Comfort  ) )2005 75 Connoisseur SE diesel auto (Marmite duotone  ) )2006 75 Connoisseur SE diesel auto (The last one?  ) )2009 E220 (For a change) 2018 L200 (For Big & Heavy Things) 1976 W114 250 Manual (For Sundays) Last edited by 75driver; 24th September 2017 at 08:35.. |
|
|
|
|
|
16th October 2017, 13:03
|
#9 |
|
Moderator / RS North East

MG ZT T 180,MGF Freestyle, Jaguar XKR Convertible and XF Join Date: Jan 2008
Location: Newton Aycliffe
Posts: 6,397
Thanks: 1,329
Thanked 2,231 Times in 1,309 Posts
|
This is a great how to, and thank you Beinet1, i followed your procedure and once everything ready did the change in about 1 - 2 hours, and the stuff that came out was also black like think treacle, so not sure if it has every been done. I just need to finish off by checking the levels, I reckon that i have put in about 7 - 7 1/2 litres of new ATF, so think I got most of it out.
One very small question as I am was lying on my back in the man cave, where exactly is the 5mm allen key check level, as I cant seem to find it Many thanks Stuart |
|
|
|
|
16th October 2017, 13:24
|
#10 | |
|
Posted a thing or two
Rover 75 CDT Auto Tourer Join Date: Mar 2014
Location: Glasgow
Posts: 1,056
Thanks: 274
Thanked 165 Times in 129 Posts
|
Quote:
Check the picture in the pdf http://download849.mediafire.com/5rf...ic_Gearbox.pdf |
|
|
|
|
 |
|
|


 #
#
 Hybrid Mode
