
|
|
|
|
|
|
||
|
|
||
 10th April 2016, 20:21
|
#31 |
|
This is my second home
Hyundai i10 998cc Join Date: Mar 2012
Location: Kilmarnock
Posts: 6,602
Thanks: 2,088
Thanked 2,298 Times in 1,349 Posts
|
Hi.
I did the flush and change on MFL last year. I found the instructions clear and precise, I had no trouble at all and was rewarded with nice smooth gear changes, well worth the hour it took.
__________________
Cheers from Trevor  MM0KJJ |

|

|
|
22nd August 2016, 15:09
|
#32 |
|
I really should get out more.......

ZT-T+180 Auto & ZT-T+1.8T in Trophy Blue, ZT-T CDTI+135 Auto in Ignition Blue, ZT-T+190 in Typhoon, Join Date: Mar 2013
Location: Walsall
Posts: 2,035
Thanks: 1,435
Thanked 600 Times in 467 Posts
|
It's looking very much like I will be needing to do this job this week after a problem this weekend.
 Tom.
__________________
 Remember a Typhoon is for life not just Christmas! Now plus the Yellow Peril. Remember a Typhoon is for life not just Christmas! Now plus the Yellow Peril. |
|
|
|
|
12th September 2016, 12:50
|
#33 | |
|
Posted a thing or two
Rover 75 CDT Auto Tourer Join Date: Mar 2014
Location: Glasgow
Posts: 1,056
Thanks: 274
Thanked 165 Times in 129 Posts
|
Quote:
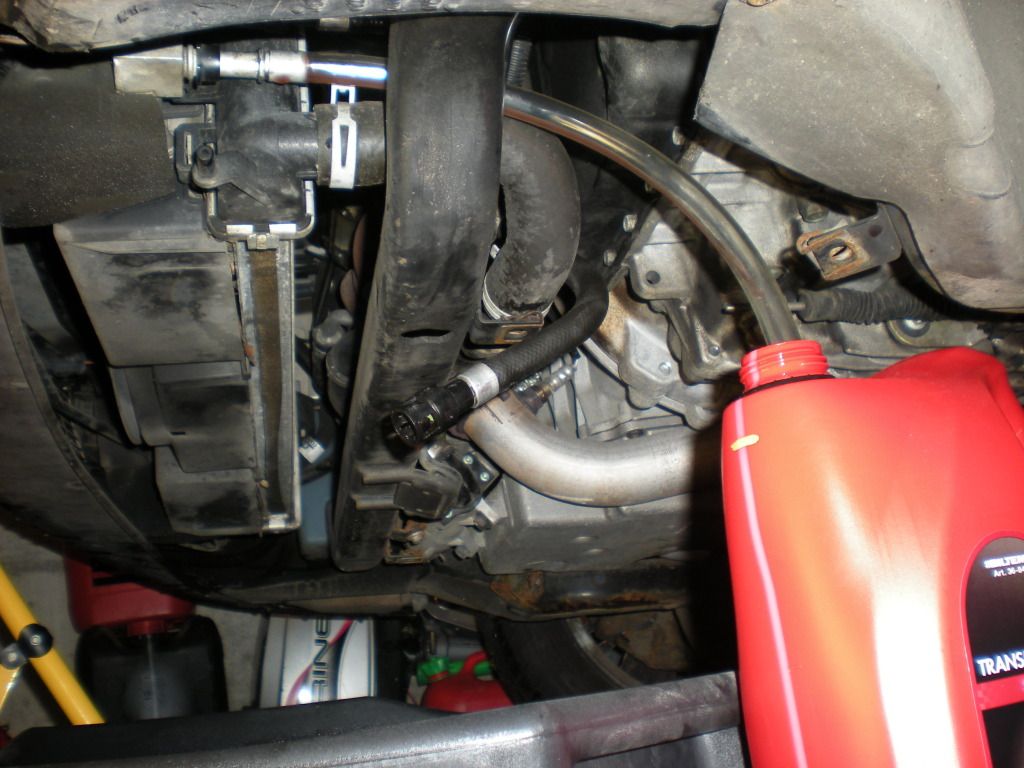
May be a silly question. How do you unplug/ remove the hose from the cooler ? |
|
|
|
|
|
12th September 2016, 14:03
|
#34 | |
|
Posted a thing or two
MG ZT Join Date: Jul 2014
Location: Hornchurch
Posts: 1,255
Thanks: 176
Thanked 352 Times in 272 Posts
|
From the great pictures on the first page of this thread :
Quote:
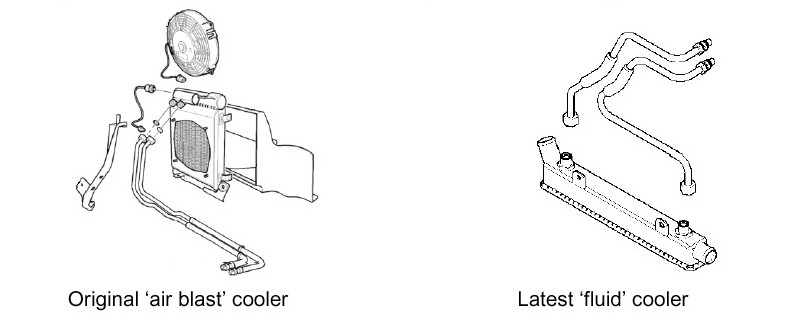
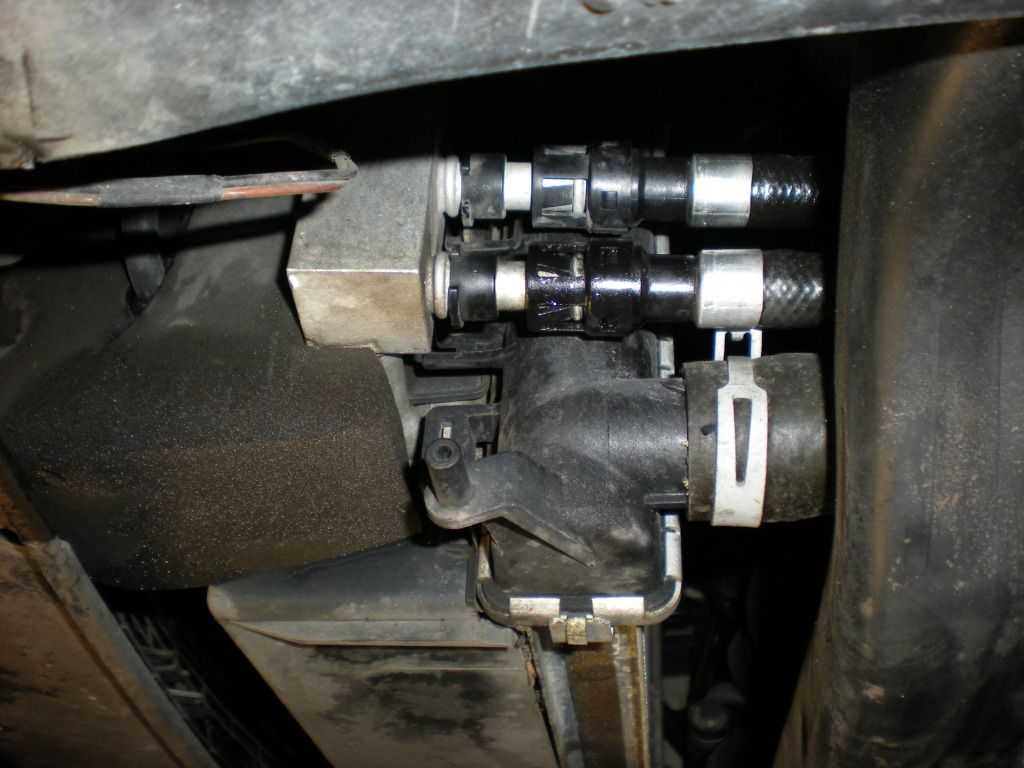
For the later cooler the same push fit connector is used, but the pipe is vertical, so you slide the collar upwards to release the tabs. You will probably find it is quite stiff to move, due to corrosion of the alloy stud the host connects to, after all these years. Mine needed a little gentle clean up and a little WD40 (wipe off excess) to help lubricate. May even need a plastic tool or something equally gentle to help get it moving. |
|
|
|
|
|
12th September 2016, 14:43
|
#35 | ||
|
Posted a thing or two
Rover 75 CDT Auto Tourer Join Date: Mar 2014
Location: Glasgow
Posts: 1,056
Thanks: 274
Thanked 165 Times in 129 Posts
|
Quote:
Quote:
Thanks , Mine have later type with alloy bit . Will give a try tomorrow |
||
|
|
|
|
4th October 2016, 02:30
|
#36 |
|
Newbie
Rover 75 Join Date: Sep 2016
Location: Morwell
Posts: 1
Thanks: 0
Thanked 0 Times in 0 Posts
|
Thank you Simondi, just what I required, so I can print it and give it to the mechanic.
Joe |
|
|
|
|
29th October 2016, 20:07
|
#37 |
|
Gets stuck in
Rover 75 Connoisseur 2.5 V6 auto Join Date: Jan 2008
Location: Chatteris, Cambridgeshire
Posts: 902
Thanks: 320
Thanked 159 Times in 127 Posts
|
Today I've done the full ATF change as detailed above, thanks for the info. Car has only done 220k and had one part change about 3 years ago so I think it was time! It was suffering from a bad thump between gears on occasions, and sometimes a slip before engaging top. I haven't been too far since changing the fluid, but overall it does seem better. If need be I'll attack the solenoids (have a full set spare) and hydramount.
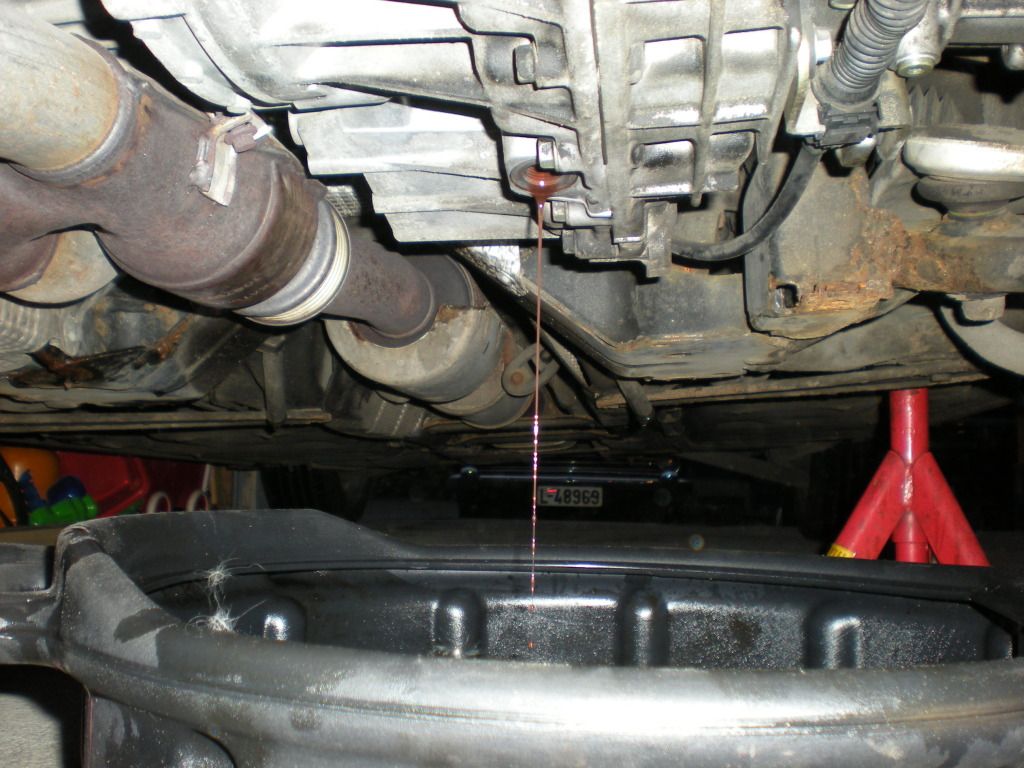
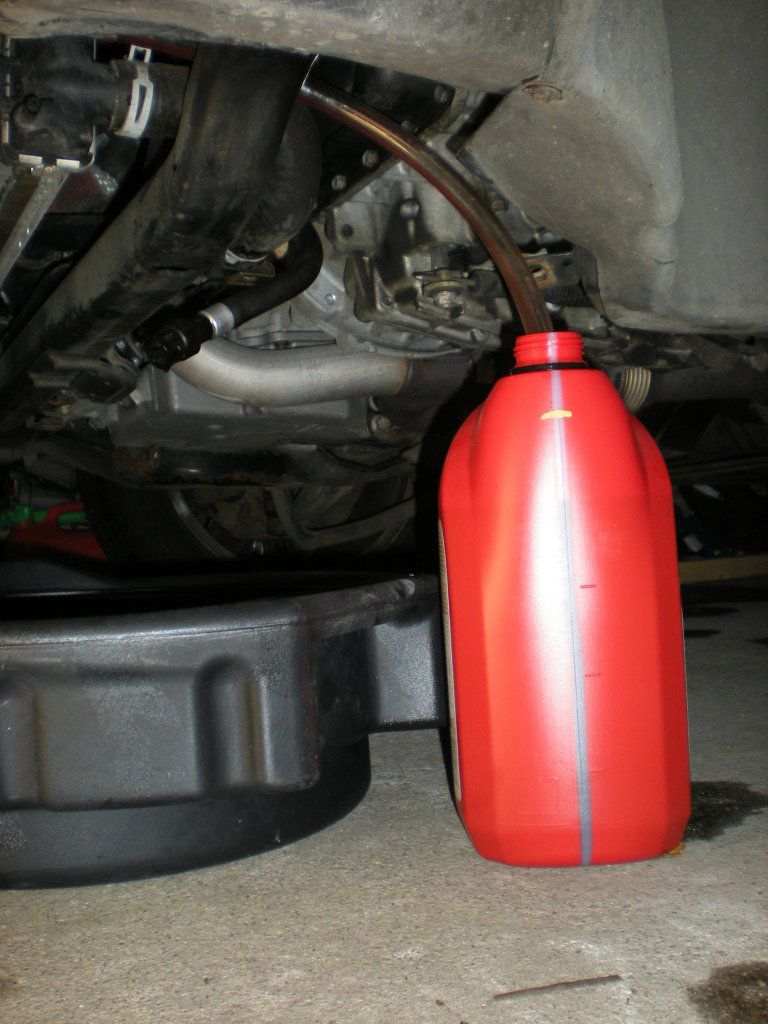
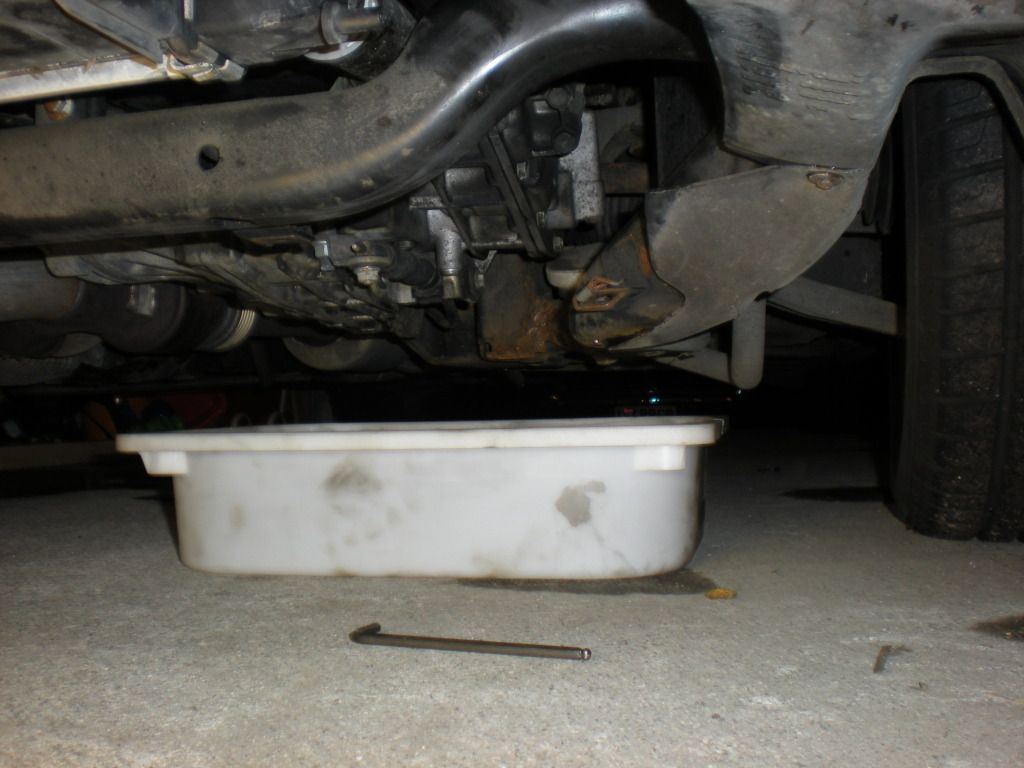
One thing though, I spent ages trying to get the push-on connector free from the oil cooler, without success. Nearly broke it in the process so gave up there. I traced the hose back up to a large union (like a brake pipe connector). A 19mm spanner here soon got it off, and the hose of course was easy to direct into my bowl on the floor. No need for a garden hose! Stewart |
|
|
|
|
23rd January 2017, 07:10
|
#38 |
|
Newbie
Rover 75 tourer Join Date: Aug 2016
Location: Runcorn
Posts: 13
Thanks: 0
Thanked 3 Times in 2 Posts
|
When I bought my cdti auto tourer the gear change was sharp,clunky and when cold the car was barely moving but once warm would work better,so,I followed these instructions and wow what a difference!.On test drive the car was warm but I could instantly feel the difference,Today was a frosty start this is when it would be at its worst,not anymore, no slipping no clunking,nice smooth responsive gear changes,I can't Thankyou enough for this step by step guide,although Im pretty good with a box of spanners I wouldn't normally mess with slush boxes.
Please don't worry about trying this out,it's easy and effective Tony |
|
|
|
|
4th March 2017, 08:47
|
#39 |
|
Regular poster
Rover 75 connoisseur se auto 2005 Join Date: Feb 2011
Location: Birmingham
Posts: 30
Thanks: 21
Thanked 9 Times in 8 Posts
|
Thanks Einar,
I have done a auto transmission flush thanks to beinets how to using 8 litres of ravenol jf506E £77 for x2 4 litres inc postage from Germany only 3 days to get here cheaper than anywhere in uk for ravenol. This how to was easy to follow Very clear & precise and excellent pictures Im sure many on this forum have used this And I intend on Using this guide again for the New Ski Blue Auto Diesel I am purchasing next week. Ive just checked Ravenol UK and you can now purchase 8 Litres posted for £77.87 with postage but Only in 1L bottles Or 20 l for £169 Last edited by Andyc02; 4th March 2017 at 09:14.. Reason: uk pricing of Ravenol |
|
|
|
|
4th March 2017, 14:28
|
#40 | |
|
Gets stuck in
Rover 75 tourer Join Date: Mar 2007
Location: Plymouth
Posts: 807
Thanks: 472
Thanked 116 Times in 85 Posts
|
Quote:
__________________
 Why weather the storm when you can learn to dance in the rain. Why weather the storm when you can learn to dance in the rain.Jobs done: Purchased 52 plate V6 connie Wedgewood blue,one owner,42000 on clock ,Virtually pristine.2017 service,new Goodyear tyres,Discs and pads all round,new battery,New cam and timing belts (3rd fitting in life of car),plus full normal service.exhaust 2016.First mod was to bonnet catch .Latest mod,triple heart pace maker. All brake lines changed for copper, all brake hoses changed for Pagid hoses. Last edited by Caskin; 5th April 2017 at 12:12.. Reason: spelling |
|
|
|
|
 |
|
|


 Linear Mode

