
|
|
|
|
|
|
||
|
|
||
 2nd April 2010, 19:36
|
#1 |
|
Regular poster
ZT260 Join Date: Jun 2007
Location: B'Ham
Posts: 48
Thanks: 0
Thanked 5 Times in 2 Posts
|
Originally Posted over at Two-Sixties. Long and Pic heavy thread.
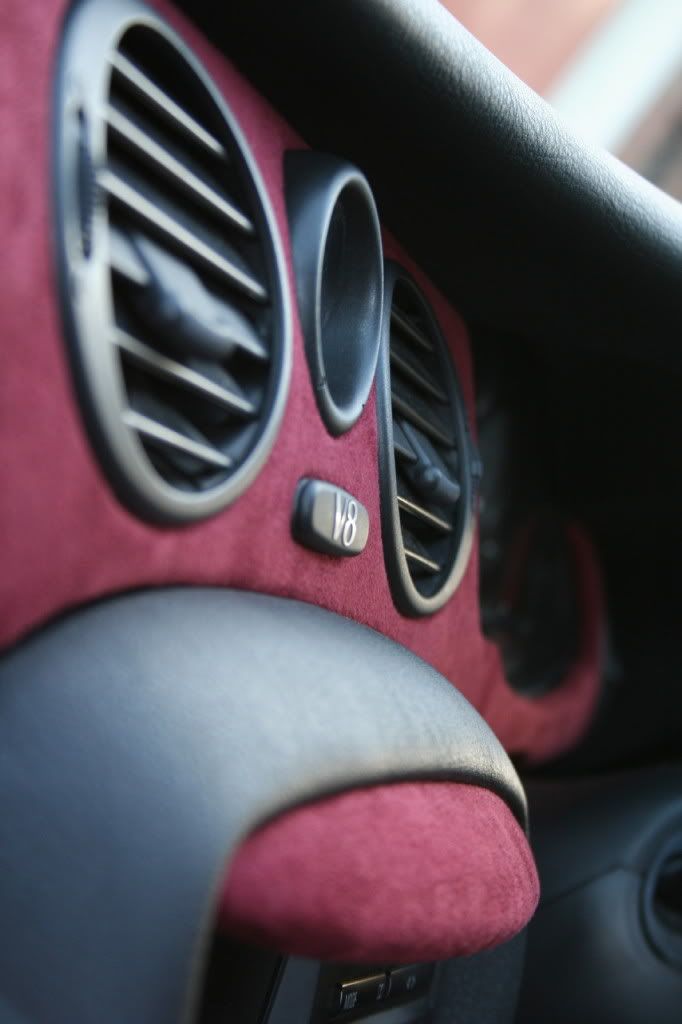 I swapped out the dull technical grey dash panels in my 260 to a burgundy/wine/ruby red suede. I originally wanted alcantara, but had issues sourcing that. So on a whim, while ordering some leather to reupholster some headphones, I ordered some suede from http://www.buyfabric.co.uk/index.php. It ended up being about 6 quid for a strip of material 0.5m wide by 1.5m long. Also ordered some spray on heavy duty carpet glue off ebay for 3 quid. Equipment used was just scissors and scalpel. Had a little play at first but it went rather well, I was quite surprised how good they actually turned out... I used a complete spare dash as I wasnt 100% sure on how good it was going to look, but really happy with the results in the end. The suede was probably a little thinner than the alcantara I was after, I think this actually was a bit of a blessing, as it was very easy to work with, plus it didn't close up the gaps around the dash too much, however it did fill in the unsightly gaps around the vents and between the panels. Anywho... pic overload: Testing 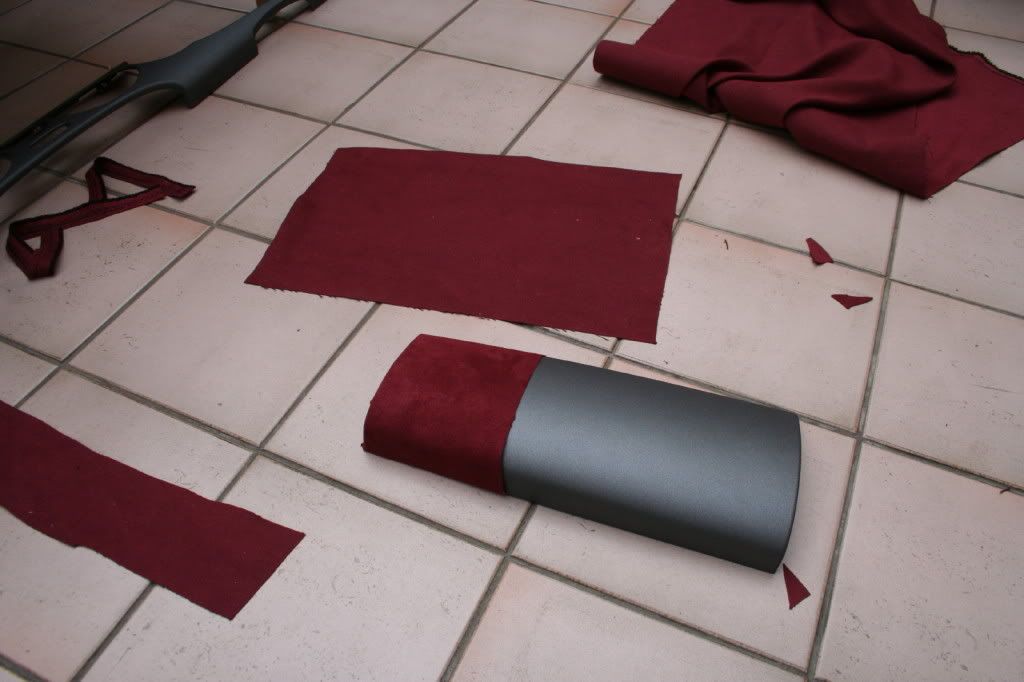 Testing overlapping 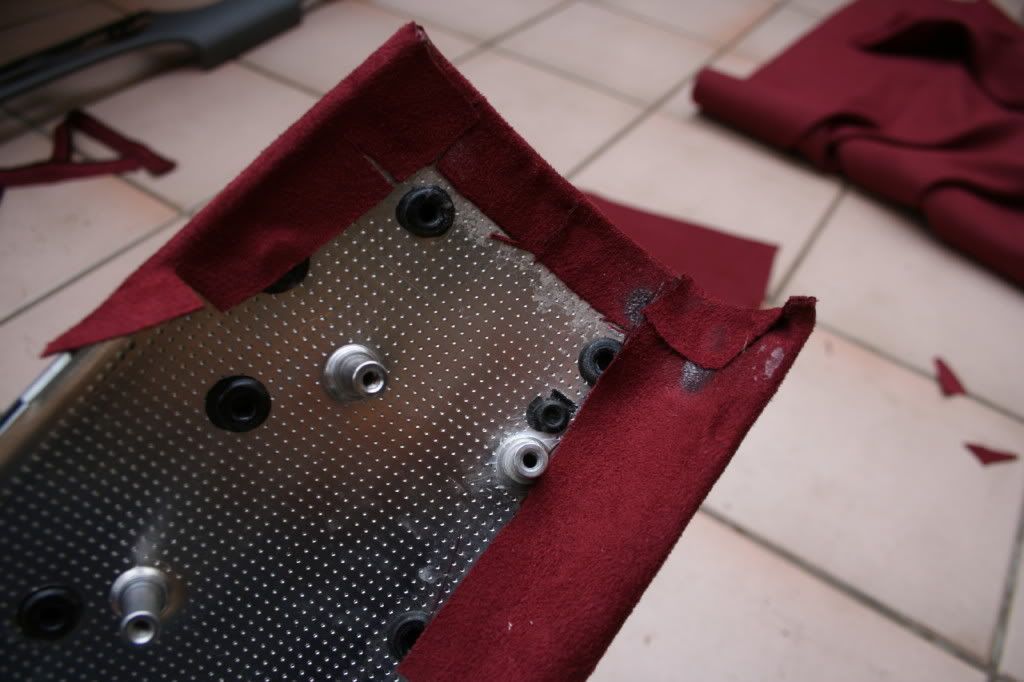 Completed Air bag panel 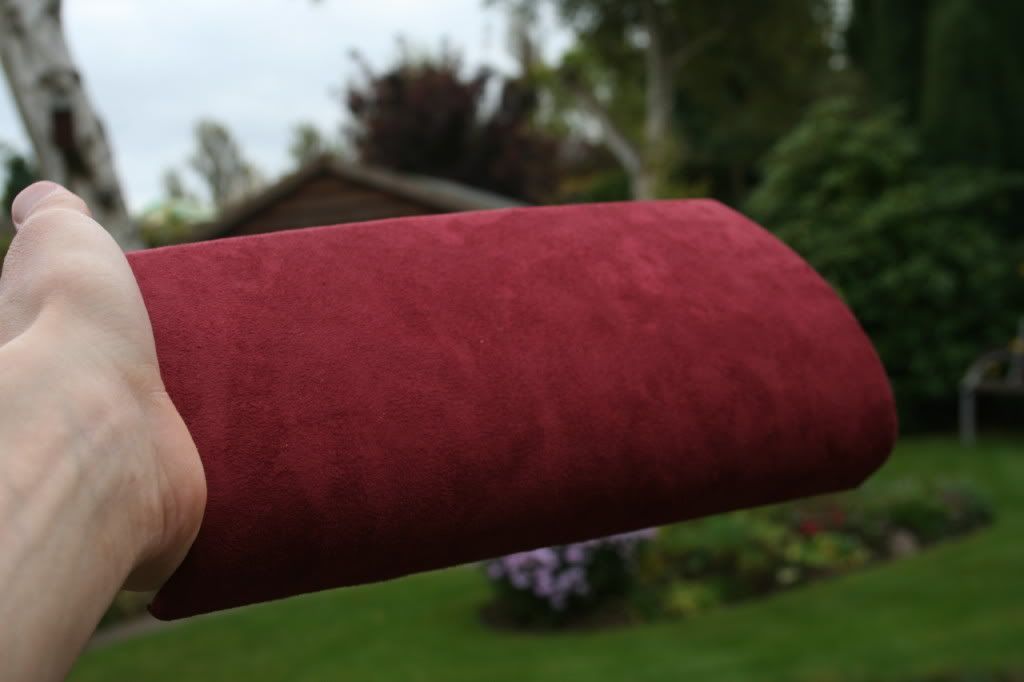 Rear 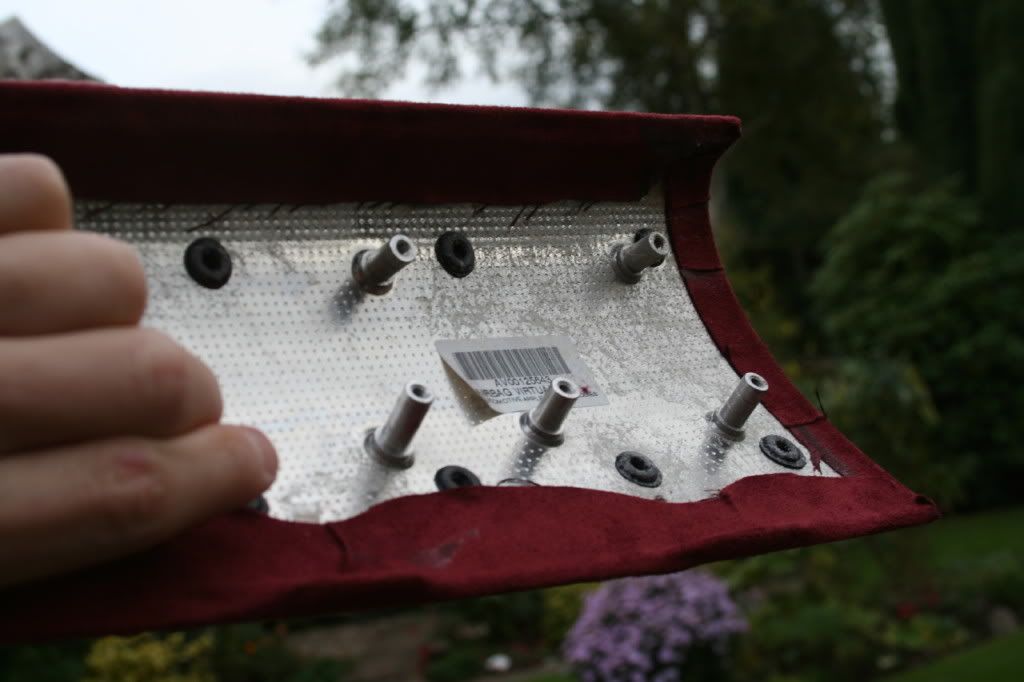 Vent panel mocking up 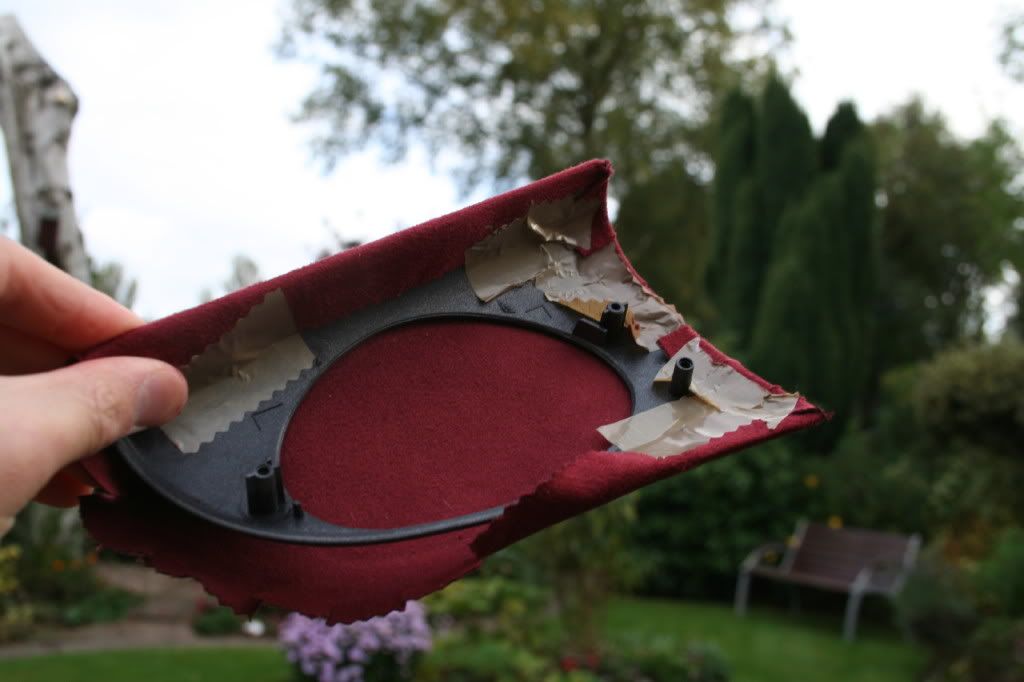 The glue! It comes out like spiders web, didnt soak through the material so I could cover the panel in the stuff without too much worry. This helped remove creases and bubbles etc. Needed just over 2 cans in the end. 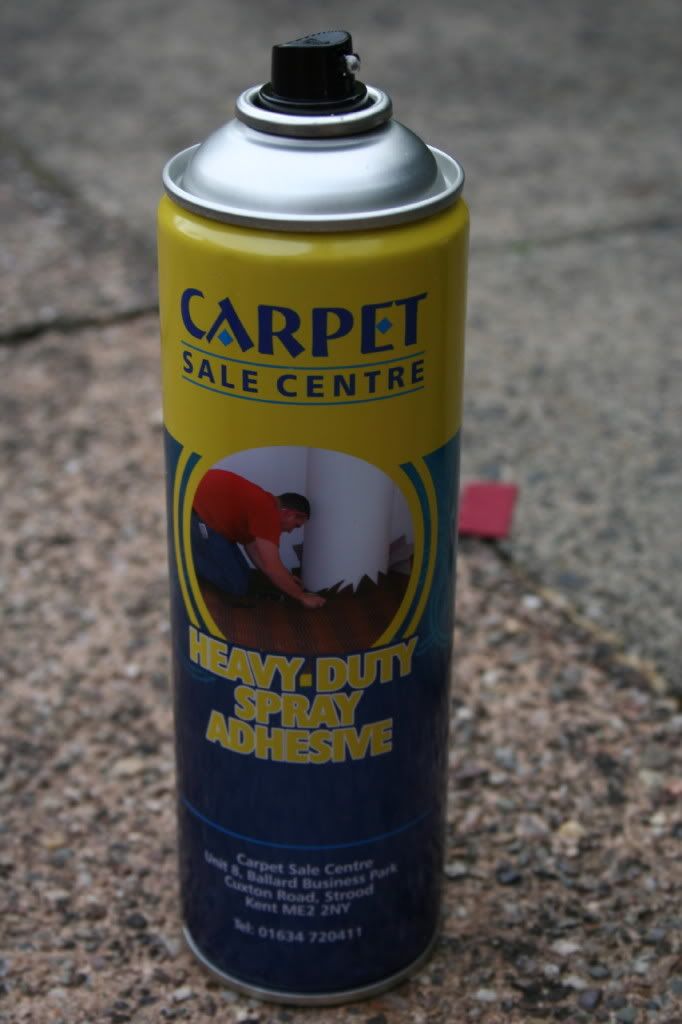 I covered the entire panel first, then cut the holes for the vents. 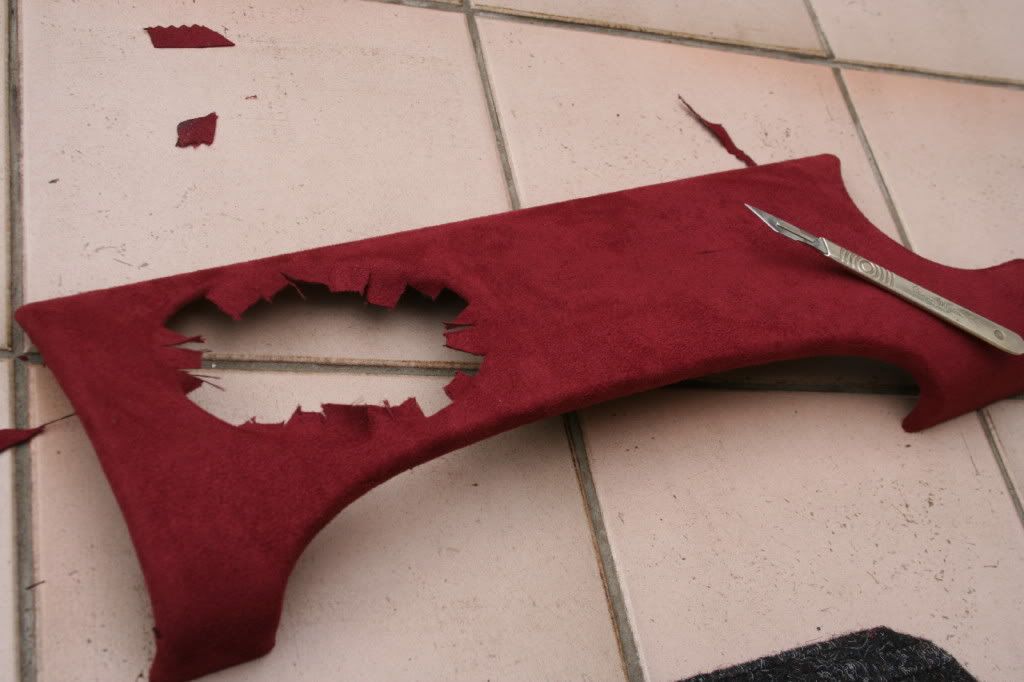 This is what the rear looks like. 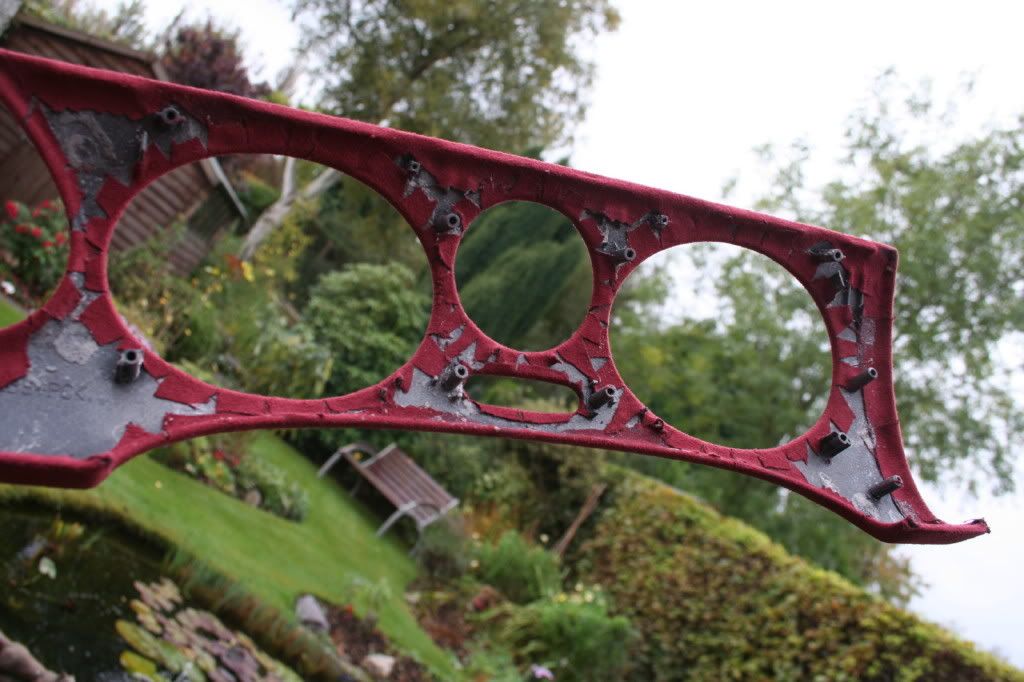 Completed front side 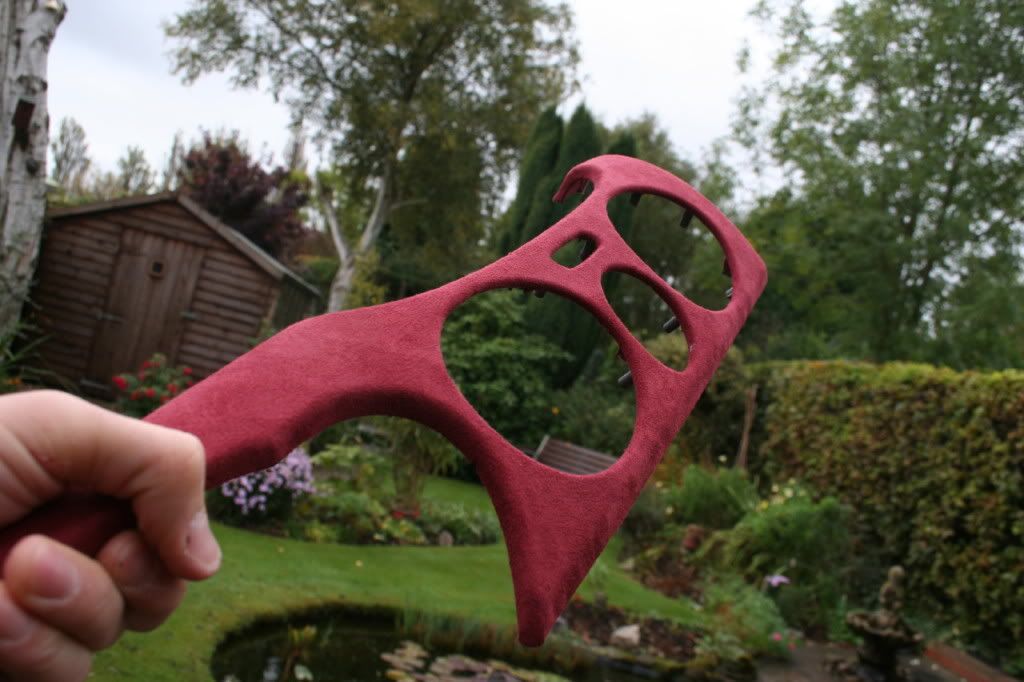 Comparison with original dash 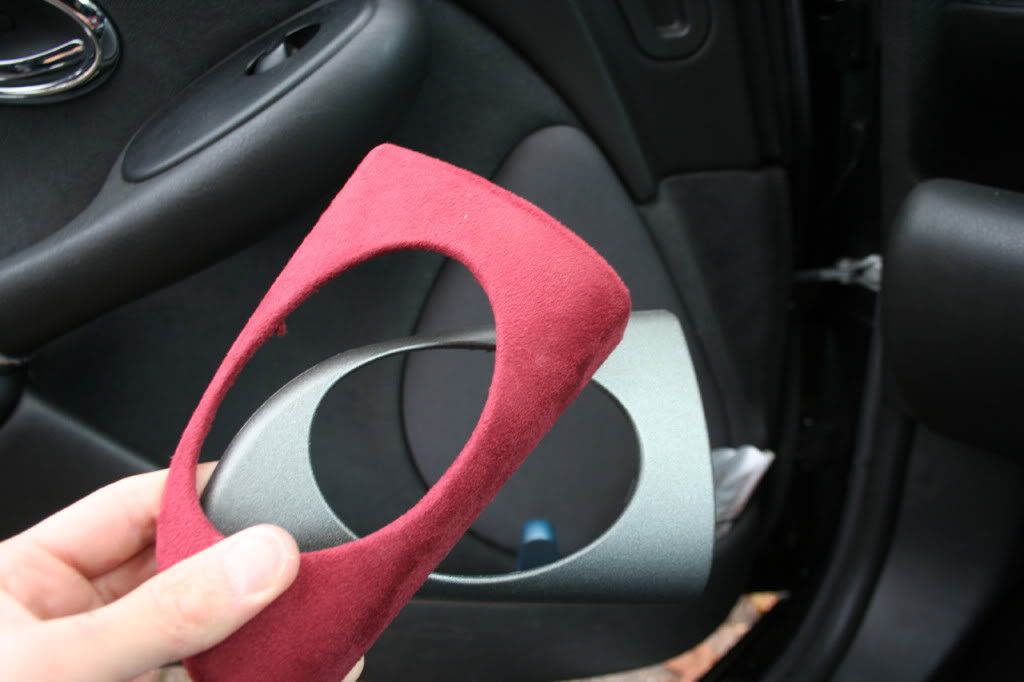 Before and Afters of the dash installed! Before 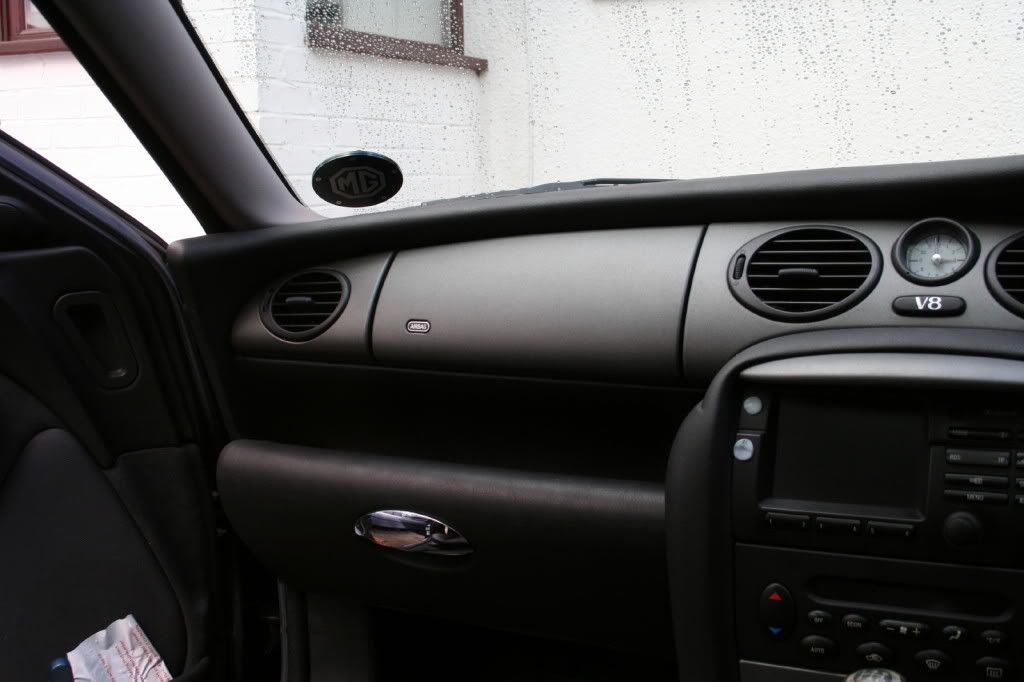 After 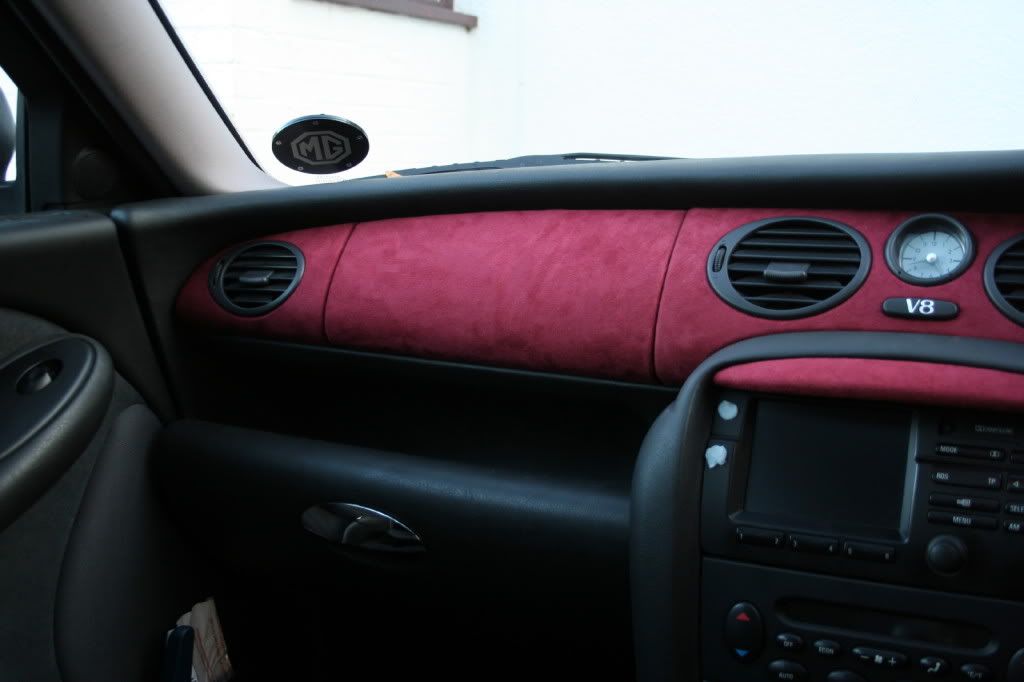 Now a few more of the completed dash installed:  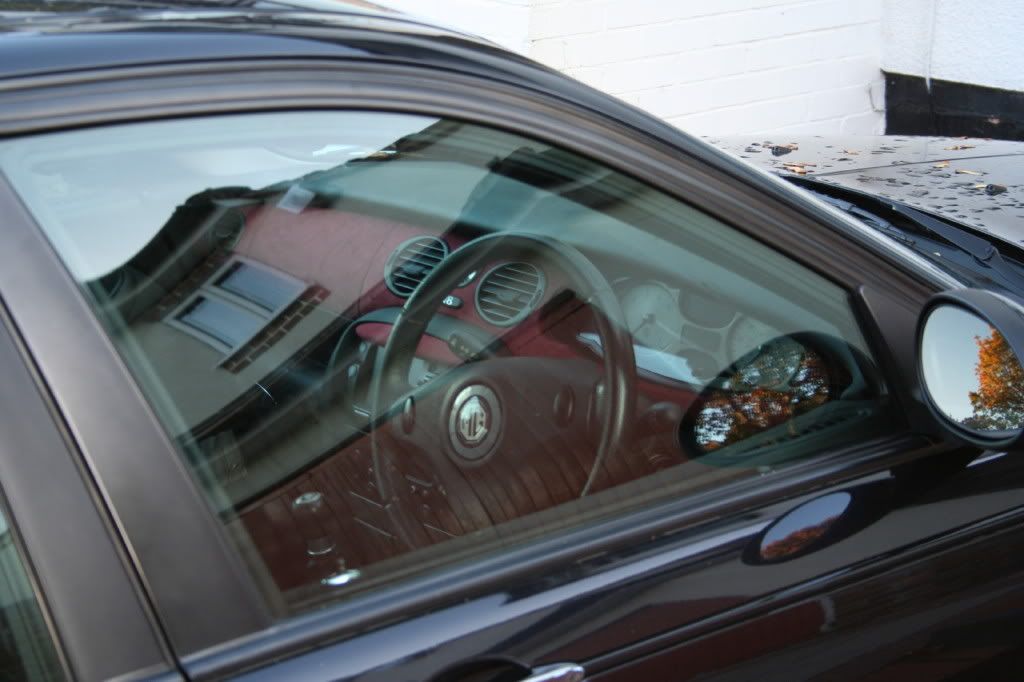 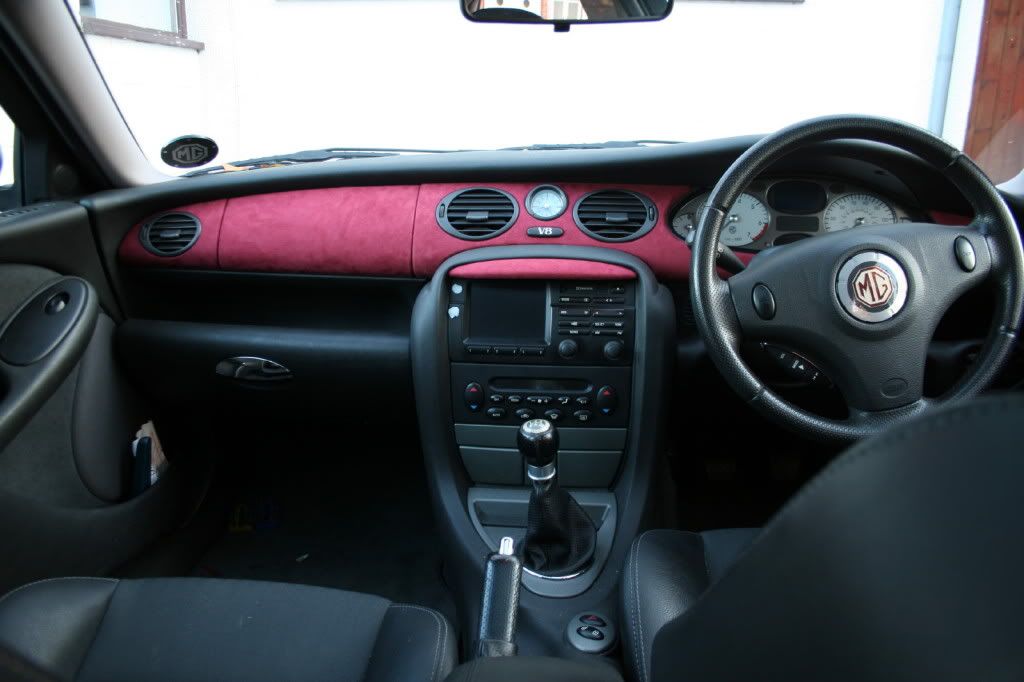 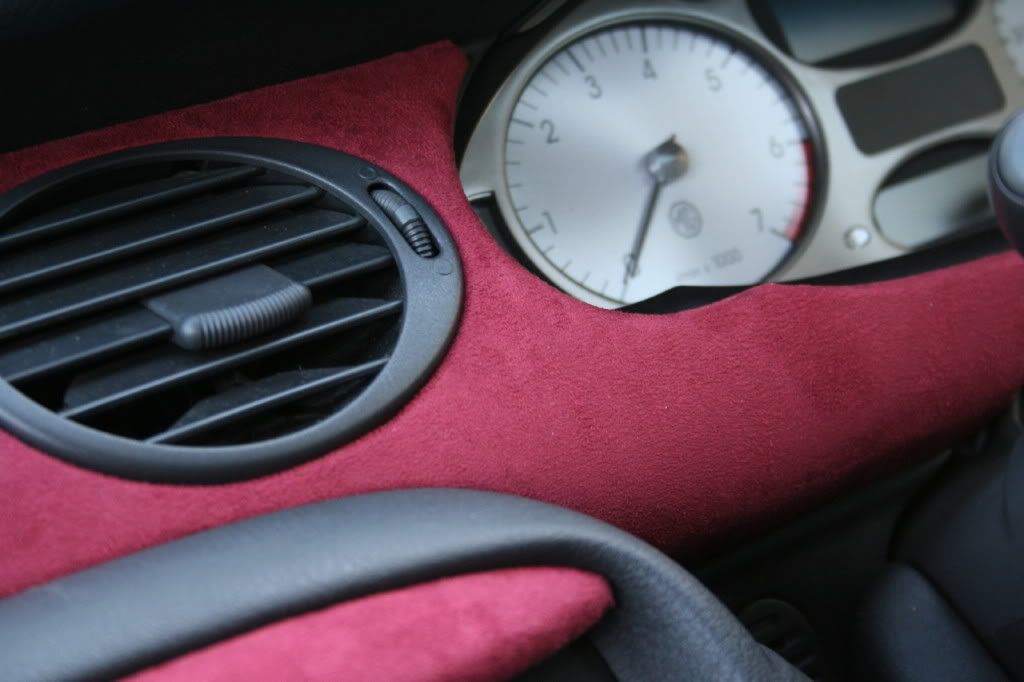 There are a bunch of behind the panel shots plus a lot more just various stuff taken while making etc in my gallery, if anyone is interested and wants to see more: http://s193.photobucket.com/albums/z...ods/?start=all Next on the agenda were the door cards. Just the dash on its own looked a little out of place so the fleece door cards were the obvious choice to retrim, especially because of the way the dash 'flowed'. So I covered the fleecey door cards with the same material. Ragman was kind enough to supply me with some spares so I could keep my originals if things didn’t turn out. Also covered the gear surround and hazard button piece. I didnt have spares of these though, so these are the only pieces that ive modded that I cant revert back to stock. However, I think with a little work the glue could be cleaned off without much trouble. The vertical cupholder and button bar panel I am going to leave alone. Would be difficult to hide the overlap and glue when these are open. I originally wanted some red alcantara seats, but considering the rarity and cost at which these go for I decided I would keep my originals. Now with the dash and doors in place, getting some red seats would probably be a little too much red so happy with the mix at the moment. The door cards where originally plastic welded together, The tops chiseled off easily, I just used small self tappers and washers to screw the panel back together. I glued the fabric directly to the previous material so it has a squidgy feel to it. 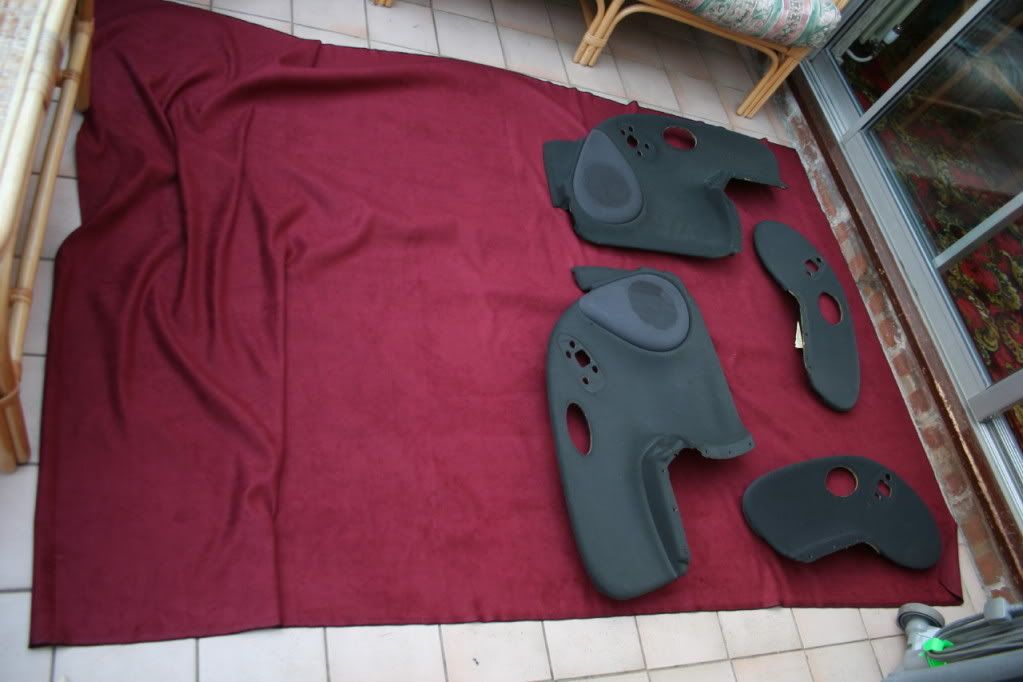 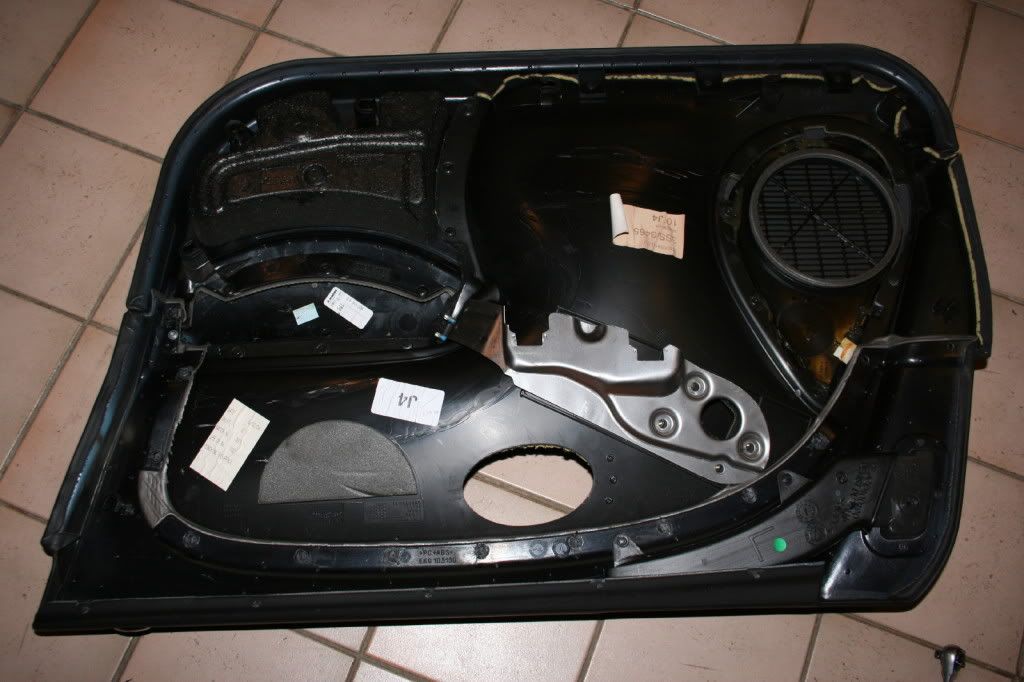 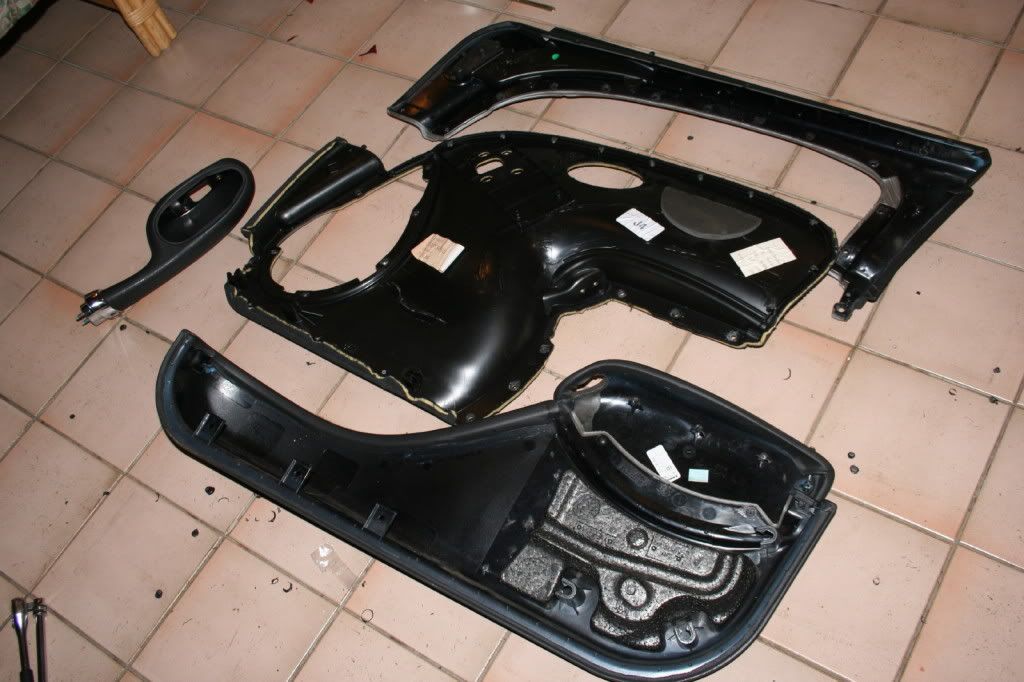 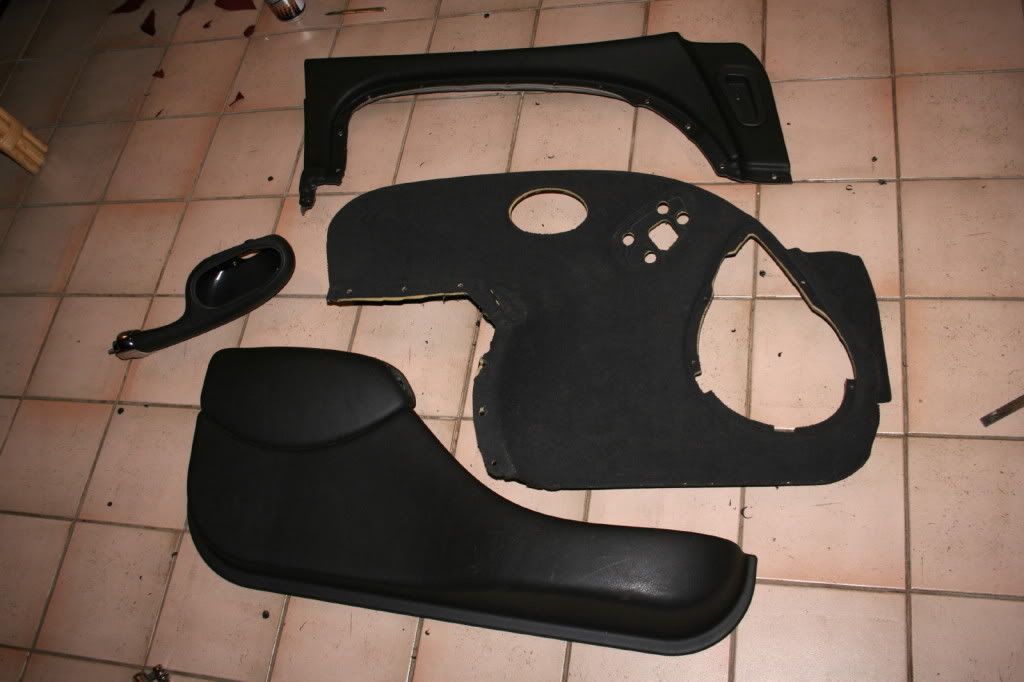 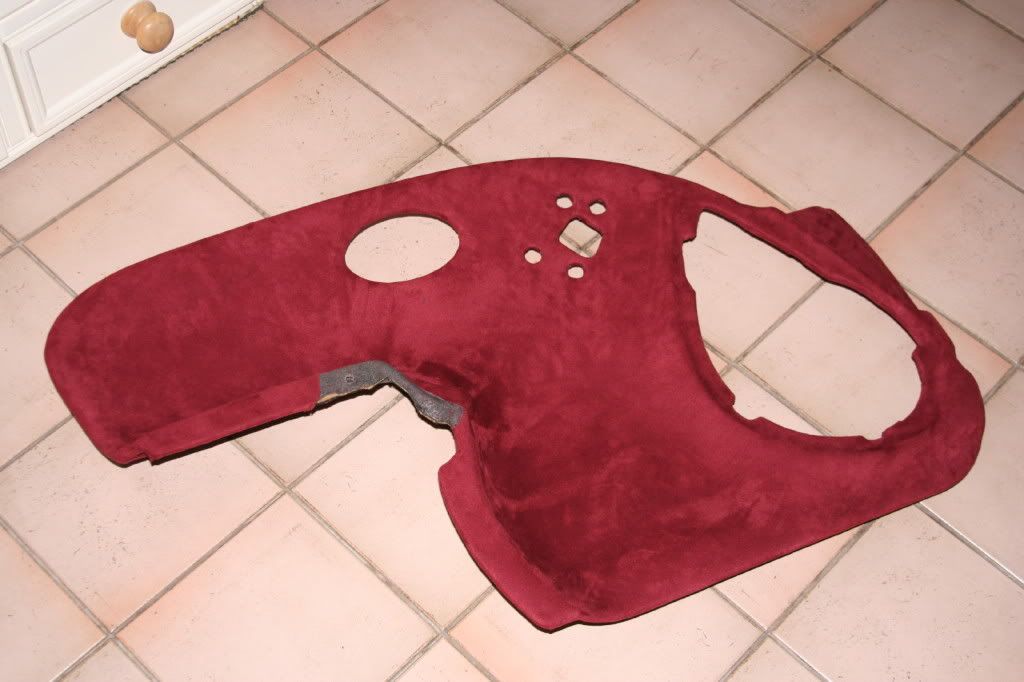 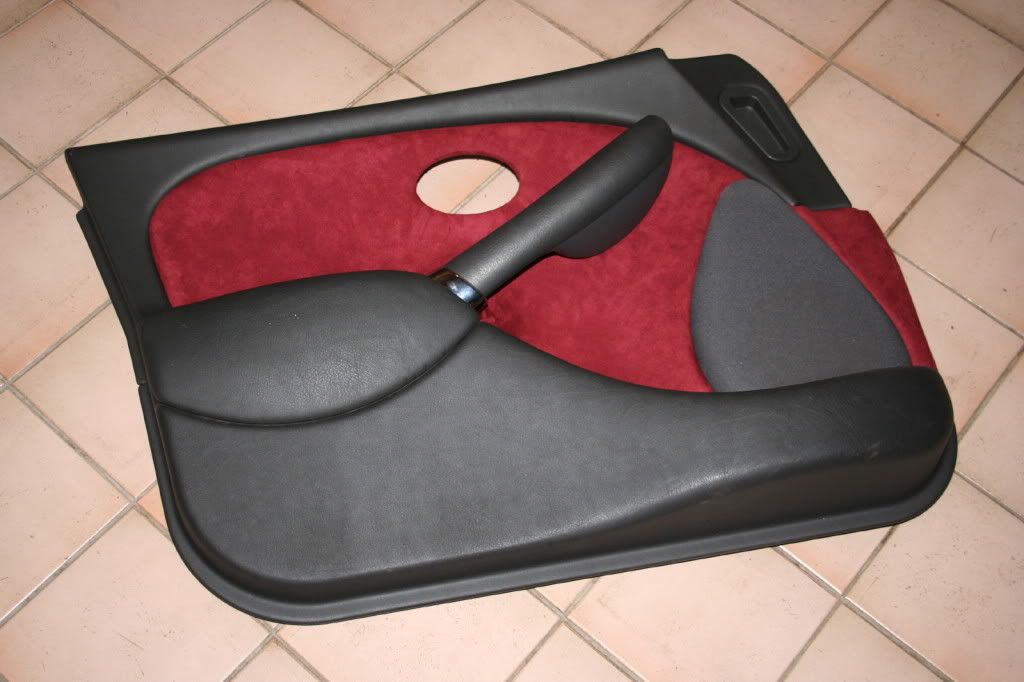 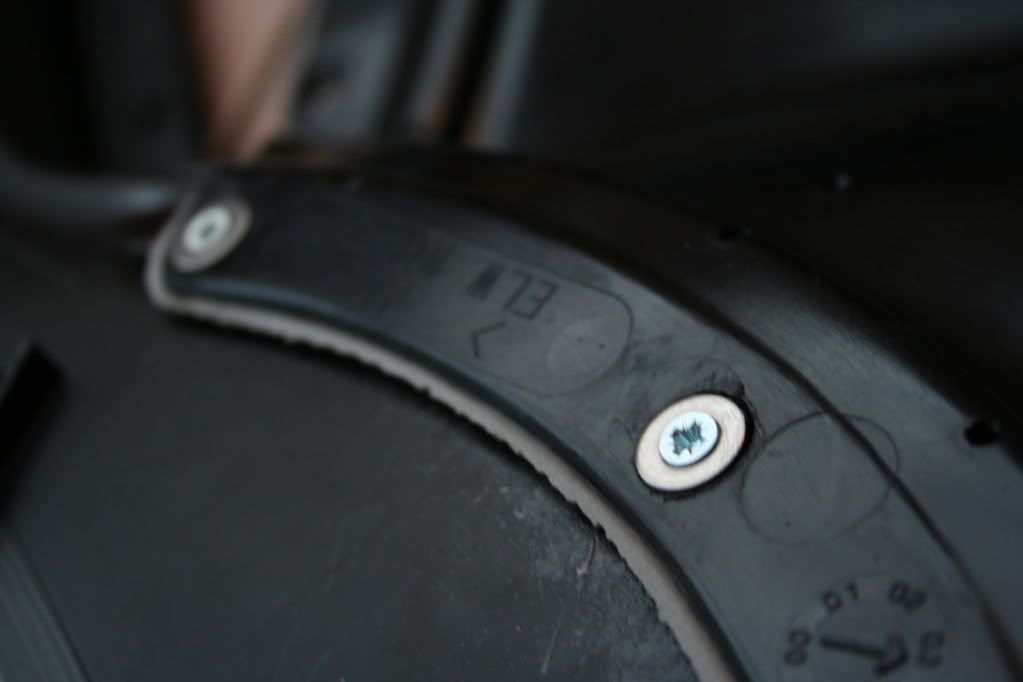 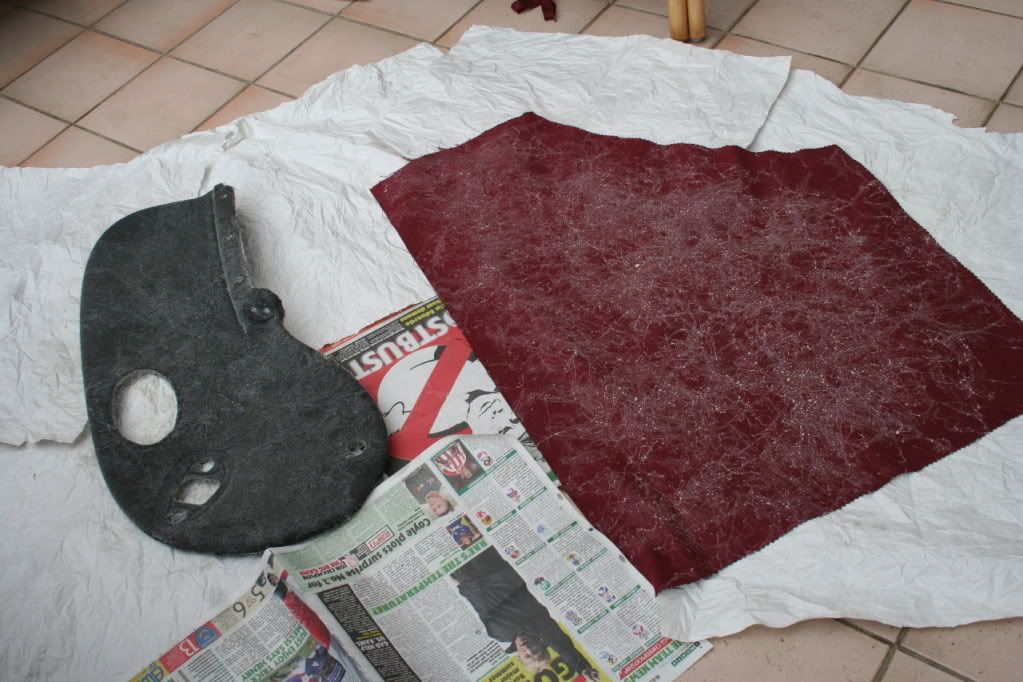 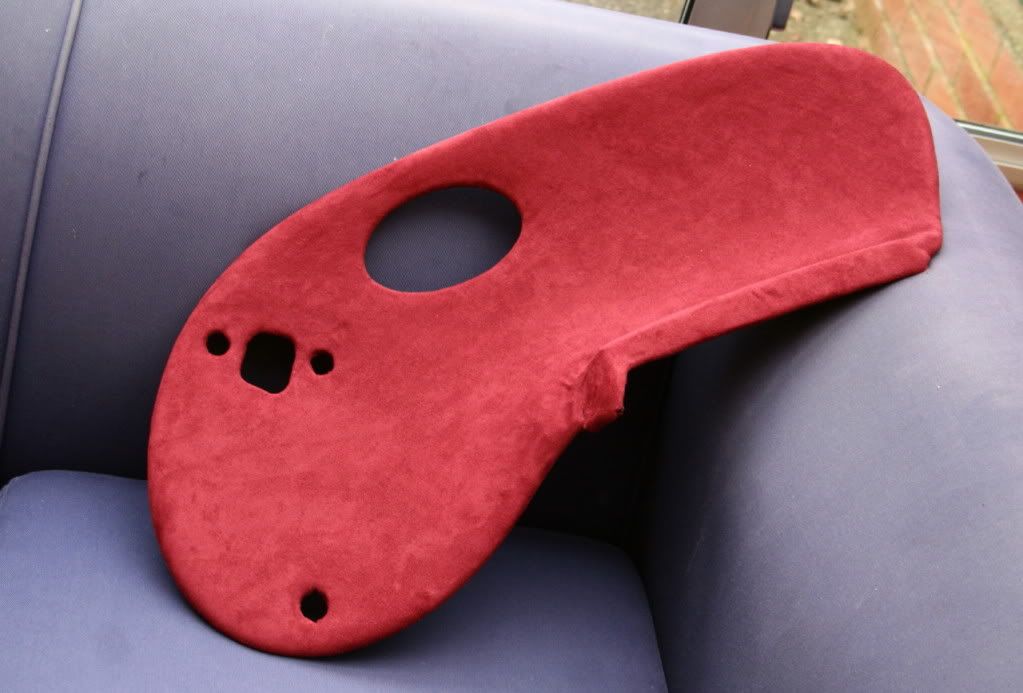 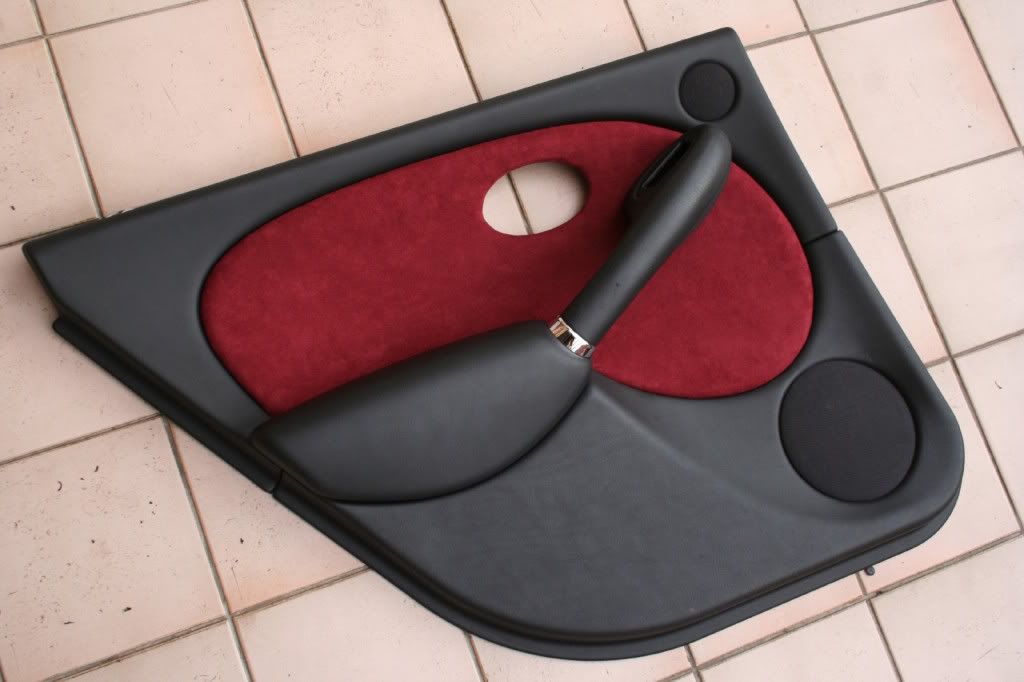 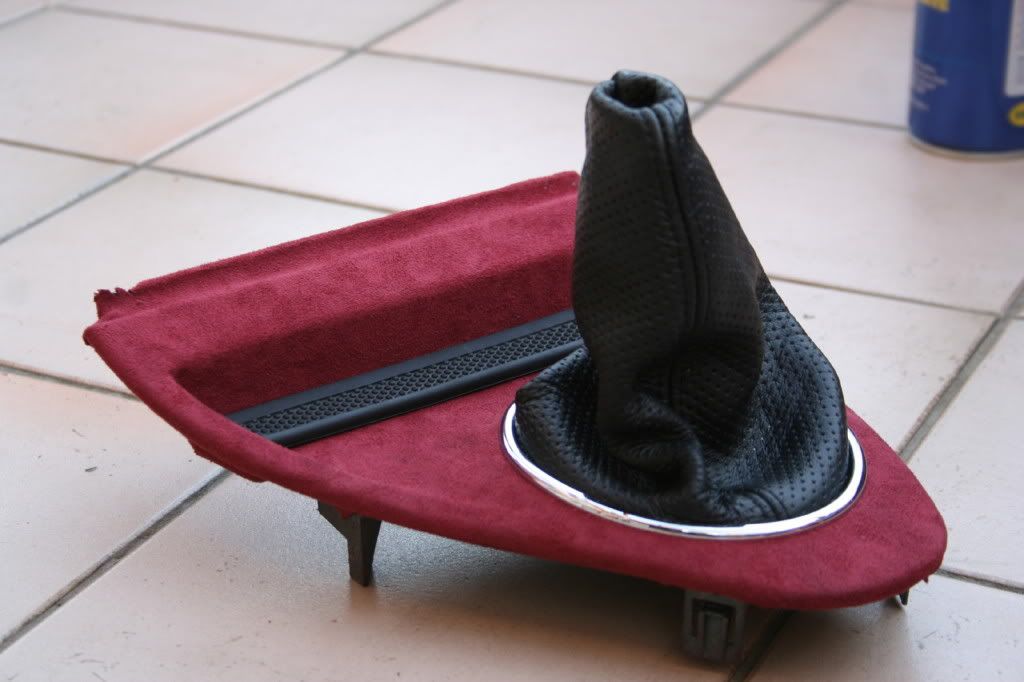 Very happy with the door cards. I think its a nice amount of colour, and not too overpowering. Happy with the gear surround bit too. In the end I had to cut the material and have a bit of a visible seam, but it was the only way I could get it to work without ripples. Minor and not too visible. Anywho, Finally finished:  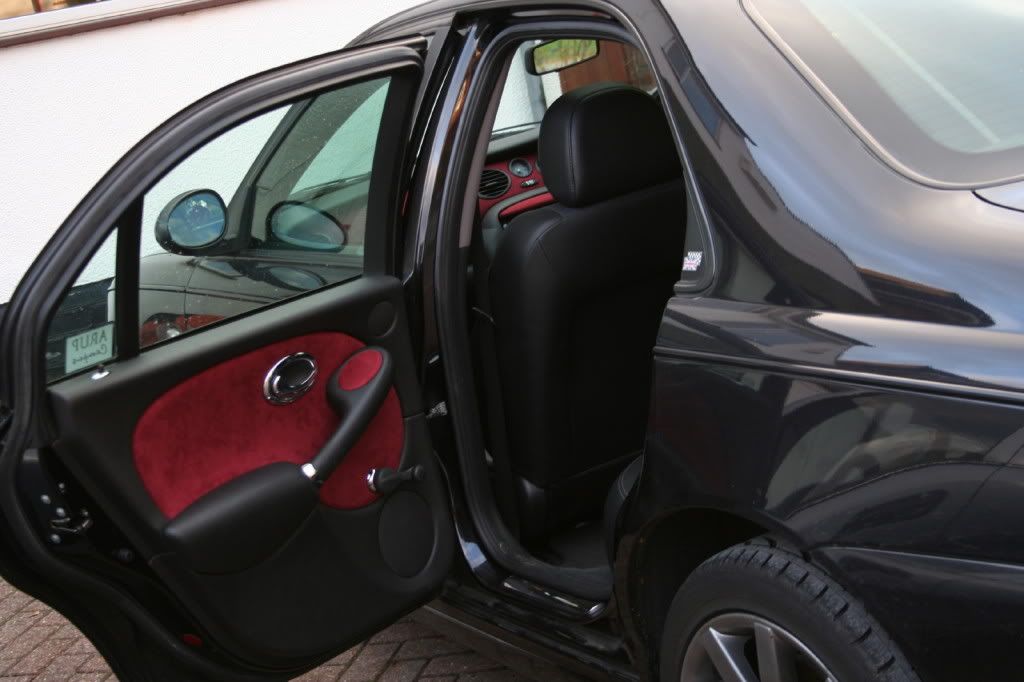 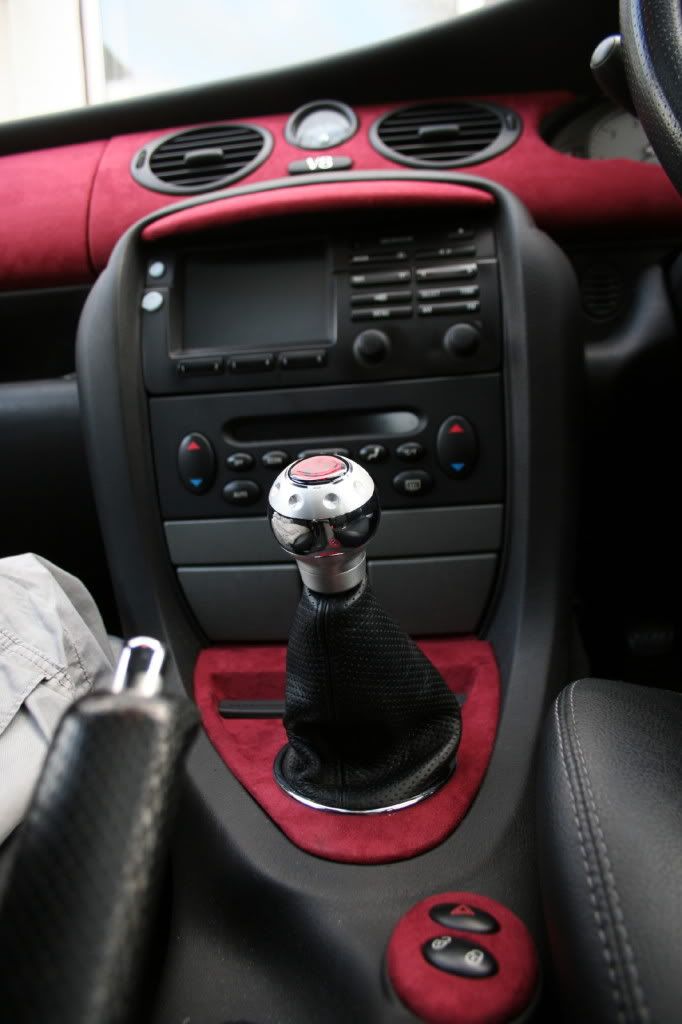 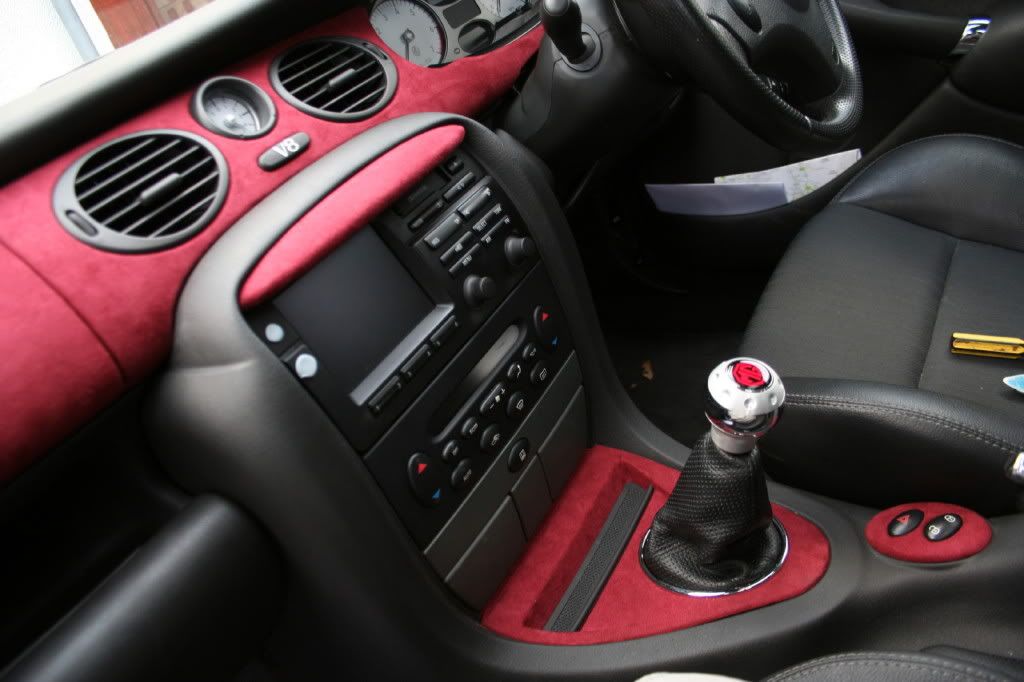 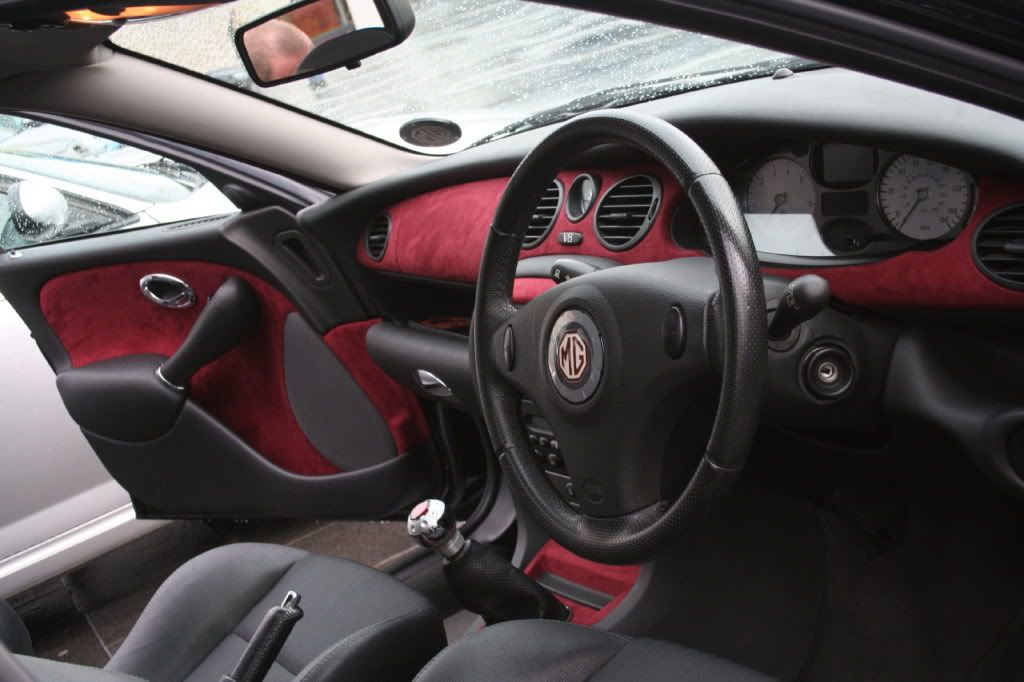  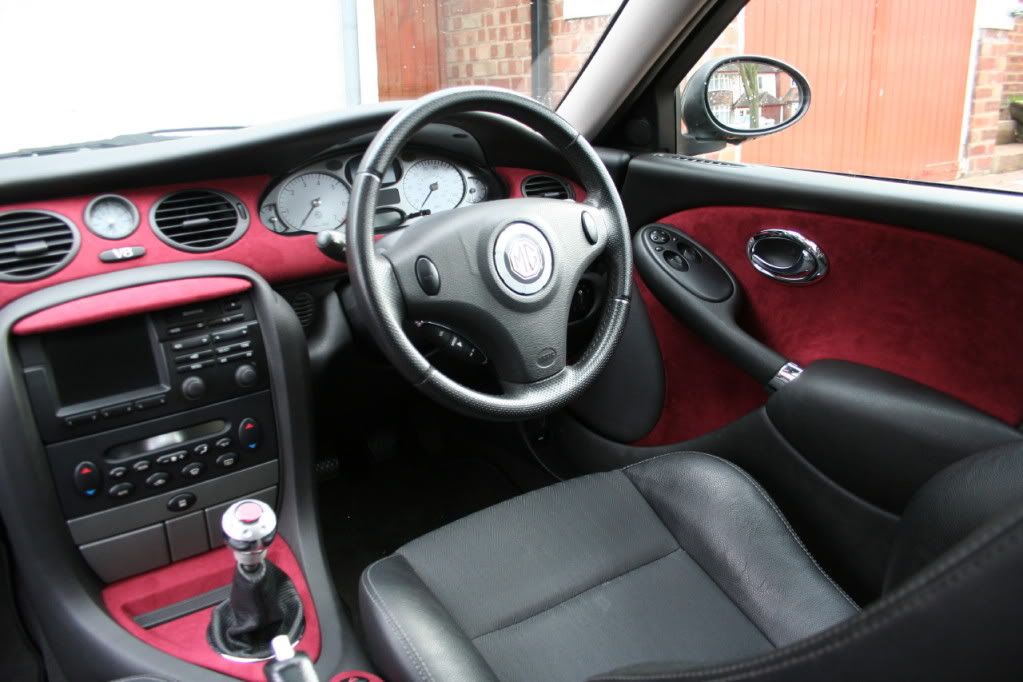 Notes: Update about the stuff thats been living in the car; The door cards are generally fine, no noticeable issues so far. The airbag cover part of the dash, however, bubbles very slightly in the very cold weather. It sorts itself out as soon as a little heat gets in the cabin. Could be a few factors which cause it... Curious to see how it holds up to the extreme heat we sometimes get in the summer. I imagine it should be fine, its been wrapped around the panels so its kinda pinned in place and as cold can cause some air bubbles to appear (probably due to the glue becoming less effective) the heat should keep the glue tacky. Its also a big area without additional holes that help pull the material like the rest of the dash. No biggy if anything major does happen though, I have loads of material left to retrim panels and now I have that proper car interior glue with heat resistance rather than just the carpet glue I used before. And still have all the original dash panels to swap too. As for living with it - I'm very happy. The colour suits the black car well and it breaks up the dull grey wall that was there before. I wont be changing it back to standard for as long as I own the car at least. Original idea from ‘The Monk’. Thanks to Steve Childs useful Door removal Guide over over on MG-Rover forums, Peter Essling for the dash, and of course Ragman for kindly giving me some spare door cards! Last edited by SH4RKY; 3rd April 2010 at 12:49.. |

|

|
|
2nd April 2010, 19:41
|
#2 |
|
This is my second home
MG ZT-T 190 Monogram Typhoon Join Date: Jan 2009
Location: Oxfordshire
Posts: 4,707
Thanks: 328
Thanked 557 Times in 443 Posts
|
Very impressive upgrade! I would love to do my door cards , put personally prefer my dash panels painted, but certainly improves the look of the interior. Great job.
 |
|
|
|
|
2nd April 2010, 19:42
|
#3 |
|
This is my second home
Rover 75 Saloon 2.5 V6 British Racing Green. 81,000 miles and counting Join Date: Apr 2008
Location: Crawley, West Sussex
Posts: 6,183
Thanks: 0
Thanked 2 Times in 2 Posts
|
I like it.. Well done.
__________________
[SIGPIC][/SIGPIC] Rover 75 2.5 2000 Club SE. British Racing Green. MEMBER NUMBER: MMMDCCXXVI Looking for: 7 seater
  |
|
|
|
|
2nd April 2010, 19:48
|
#4 |
|
I really should get out more.......
2005 Monogram Atmosphere ZT CDTI Auto + 2010 BMW 123d Convertible + 2005 MG TF 160 Join Date: Feb 2010
Location: Winchester, Hampshire
Posts: 2,202
Thanks: 37
Thanked 194 Times in 159 Posts
|
Now that is very nice. I've been considering doing my doorcards in yellow suede for a while now but still thinking on it.
|
|
|
|
|
2nd April 2010, 19:49
|
#5 |
|
This is my second home
N/A Join Date: Feb 2010
Location: Suffolk
Posts: 6,867
Thanks: 0
Thanked 397 Times in 302 Posts
|
It's not my thing at all, but the finish looks *superb*. Literally OEM standard from the pictures, especially the door cards. Saying that tho, I was expecting a Red care like the Press 260 that got a repainted red interior, rather than a black car!
|
|
|
|
|
2nd April 2010, 20:03
|
#6 |
|
I really should get out more.......
mgzt, 135 cdti , manual , in solar red.also own a mgtf. Join Date: Jan 2010
Location: notts.
Posts: 2,105
Thanks: 28
Thanked 40 Times in 39 Posts
|
what a cracking job you have done , that looks very nice , and you would think it was a factory fit. how much did it cost to do ?
 |
|
|
|
|
2nd April 2010, 20:10
|
#7 |
|
Posted a thing or two
2000 (W) Rover 75 CDT Connoisseur SE (manual) Join Date: Sep 2009
Location: Cornwall
Posts: 1,050
Thanks: 0
Thanked 3 Times in 3 Posts
|
I think that is absolutely brilliant, great job that man!!

__________________
"Plus It's not a man purse, it's called a satchel...Indiana Jones wears one"
|
|
|
|
|
2nd April 2010, 20:13
|
#8 |
|
Posted a thing or two
MG ZT 135 CDTI+ Auto Royal Blue with Synergy 2. 75 Tourer cdti club Se Auto, Royal Blue, synergy 2 Join Date: Oct 2008
Location: Bancroft, Milton Keynes
Posts: 1,906
Thanks: 0
Thanked 0 Times in 0 Posts
|
I agree with all the comments, it looks great. I really wanna do my door cards to match my blue alcantra seats but obviously need an exact colour match otherwise it will look nasty!
__________________
Chris |
|
|
|
|
2nd April 2010, 20:34
|
#9 |
|
Posted a thing or two
Rover 75 Connoisseur SE CDTi, Porsche 944 Lux, MGF Join Date: Nov 2009
Location: Stamford
Posts: 1,088
Thanks: 4
Thanked 6 Times in 6 Posts
|
That looks great. I'm normally very wary of when people modify interiors because it rarely looks right. This really looks like a finish that could have been an OEM option.
I now have another reason to be jealous of your v8! |
|
|
|
|
2nd April 2010, 20:44
|
#10 |
|
Regular poster
ZT260 Join Date: Jun 2007
Location: B'Ham
Posts: 48
Thanks: 0
Thanked 5 Times in 2 Posts
|
Thanks for the comments
Cost.... 6 quid for glue. probably 30 all in for the material due to a 2nd order for the doors. A couple of days work. |
|
|
|
 |
|
|


 Linear Mode

