Did this very job on my 1.8T last week. It will no doubt be a more fiddly job removing/refitting the pipe in a V6, but you'll need to make as much clear space around the firewall as you can get. The pipes are all clipped to the firewall in two places. There's a set of clips just inboard of the ABS unit where five pipes run vertically. The other set is nearer the centre of the firewall where the five pipes run across horizontally. The pipe going to the RH front brake is the centre one. There's a third clip mounted on the 'chassis' near the wheel arch grommet. Winkling the pipe out and the new one in will be a frustrating task that gets easier as you find all the wrong ways to do it.
The pipe at the wheel arch bracket flexi-connection may be best simply cut through against the union. You need to retain as much length as possible for matching up the new piping. The old connector nut will then respond easily to a standard socket. The vertical pipe section here has to be bent back upwards so it is horizontal and will pass into the engine bay through the two wing panels/grommet.
This end is the easiest part of the job. You need a proper brake pipe spanner (11mm AF) like this:
https://www.ebay.co.uk/itm/Draper-Br...72.m2749.l2649= to undo the pipe union. To make a new union you'll need a 10 x 1mm male pipe connector (short version) like these:
https://www.ebay.co.uk/itm/BRAKE-PIP...72.m2749.l2649
You'll use two of these of course.
This will depend on the state of things under the wheel arch. I renewed everything including the flexible hose. So apart from the male connector nut, I bought the box-shaped spring retainer that holds the pipe connector to the wheel arch bracket. You can get these for £1.98 a pair from your local Andrew Page shop (now Euro Car Parts) or online:
https://www.ebay.co.uk/itm/BMW-MINI-...wAAOSwuh1eyWzF
The centre of the flexi-hose is clipped to the hub with a U-clip which I got from eBay:
https://www.ebay.co.uk/itm/4X-Brake-...72.m2749.l2649
When you eventually get the old pipe in your hands, use it as a template for the new pipe. I found the best metod is to start with a 140cm length of straight pipe. One end should be prepard for flaring according to the supplied instructions. Flare the ABS end now. If you're happy with the flare, slot a connector nut onto the pipe and butt it to the flare and hold in place with a bit of insulating tape. You must do this before shaping the pipe. I have two scapped attempts to prove it!
Starting at the ABS connector, shape the first bend. It's very close to the nut. Once you're happy with this first bend, begin using the old pipe as a template by taping it to the new pipe. This way you don't have to handle separate pipes that seem to have a life of their own. Each time you make a new bend, tape the straight section to the old ppe section. I found it easiet to work two bends ahead of the taped section. Eventually, you'll have the old and new pipes taped together as exact copies. The free end section will be longer than the old one, but that's OK and can be trimmed to the correct length under the wheel arch.
Reverse the pipe winkling excercise to get the thing in position with the ABS connector sitting nicely in place. Clip the new pipe into the firewall clips and remember the one just near the grommet into the wheel arch.
The straight end sticking through to the wheel arch wll require bending carefully down towards the connector bracket. You only get one chance to cut it so ensure the swaged end will sit down into the flexi-pipe receiver. There's about half and inch of tolerance through the grommet, but try to ensure the pipe will sit reasonably well in the middle so it won't rub on the body panel.
Put the connector nut onto the pipe now and tape it out of the way while you prepare to cut and flare the pipe. the rest is pretty obvious and staright forward. Good luck.
EDIT: For geting tight bends (which fit an look better) I used a set of bending pliers like these:
https://www.ebay.co.uk/itm/US-PRO-58...72.m2749.l2649 These seemed to provide a bit more flexibility that the other types of tool (of which there are dozens). But it's up to you.
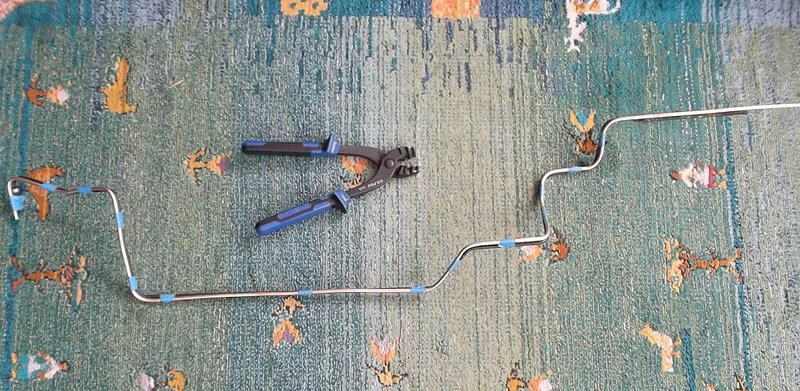
Here's a couple of photos
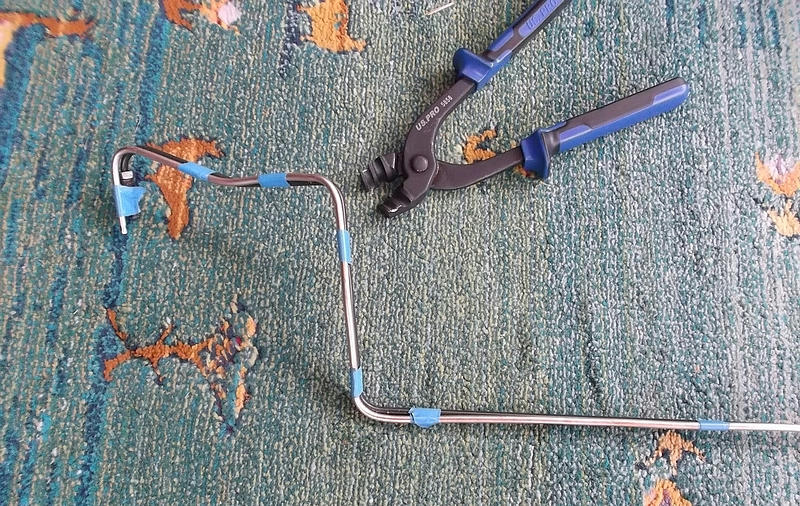
This shows the method I use for duplicating the bends. Note that the ABS end on the left doesn't have the connector nut. Big mistake - there's insufficient room to use the flaring tool.
The next is the new pipe and the old one taped together.
As already noted, I had to repeat all this after first flaring the ABS end and adding the nut and then making the first sharp bend.
The other false start I had was in underestimating the required length of piping. The wheel arch section was an inch short!
TC