Andy Willi was the first person I saw do this the keyhole surgery way and I know a few others have also done it this way too so I can't take any credit for this. I just thought i'd take a few pics as I did mine.
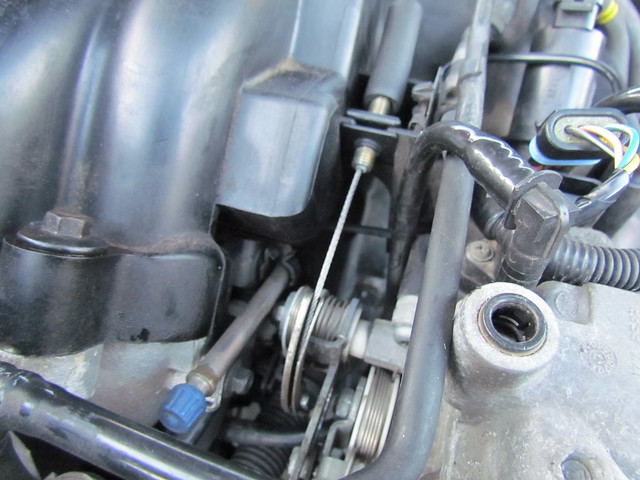
Over the weekend I replaced my thermostat housing due to it having developed a leak where the two parts of the plastic housing are bonded together. You can see below where it is clearly losing coolant.
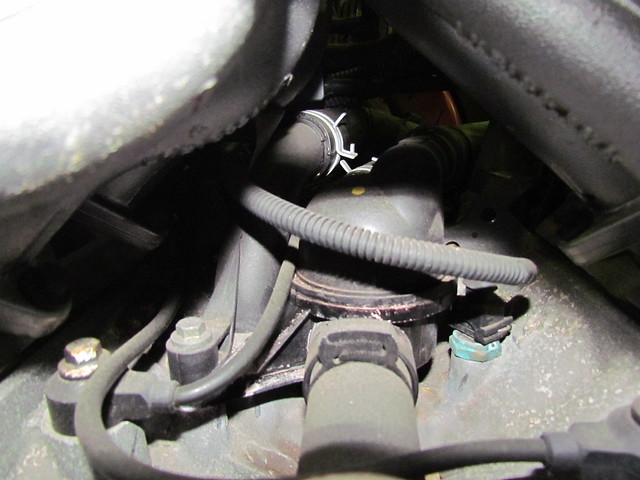
This had been like this for a couple of months, I just kept my eye on it and checked coolant levels and OBD temperatures until one day the thermostat died. After that the coolant temperature failed to get above 70 degrees so it was stuck open and obviously it needed changing.
I have an induction kit on my car but most people will have to remove the airbox. Also for those with sausage fingers like me, access to the stat and pipework is greatly improved by removing the cars battery. (Though unlock all the doors and ensure you have the radio code if you need one first).
You then have 4 torx bolts (T35/T40?) to undo which then allows you to remove the battery box out of the way. This gives a much greater space for arms to lay whilst you're elbow deep inside the V of the engine.
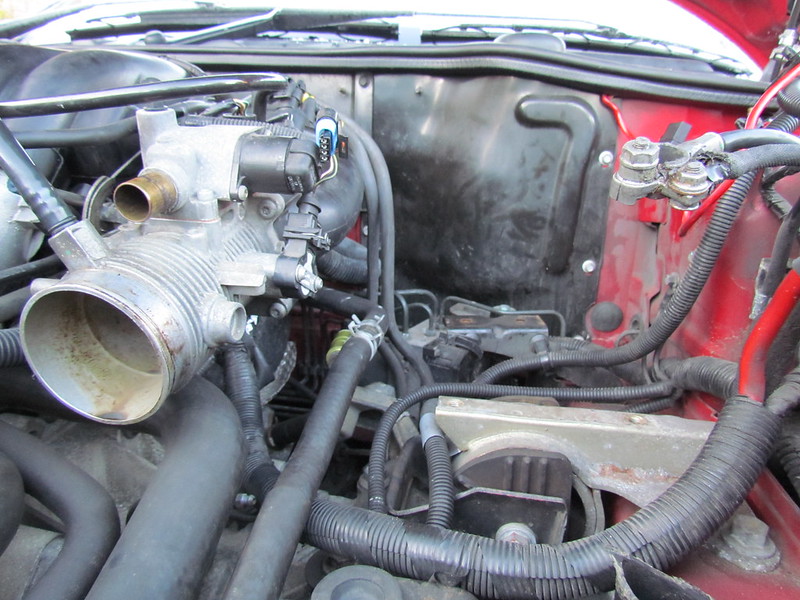
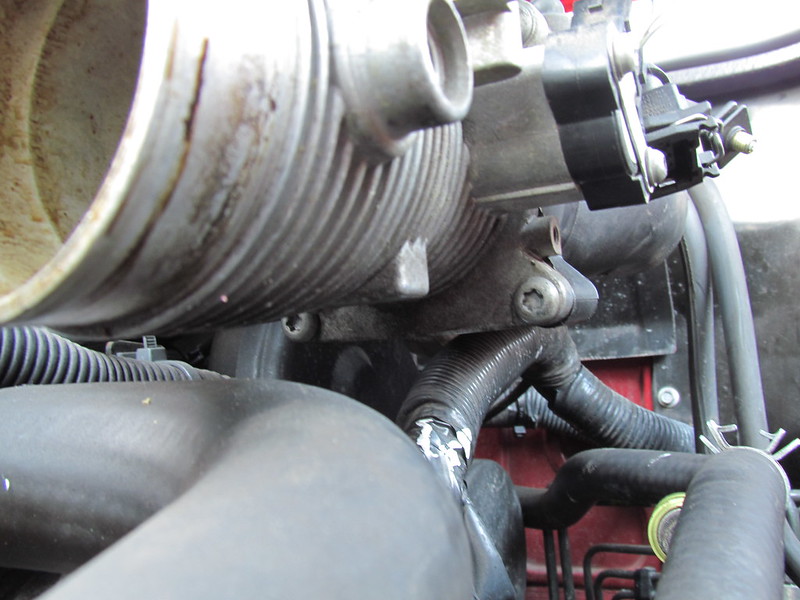
Again, i'm a big guy so felt I needed as much room as possible, so to improve access further, we now need to remove the throttle body which has a number of plugs attached to it and some breather pipes. Be extremely careful removing these as they can be brittle.
Disconnect the two plugs on the side, take caution when teasing the metal retaining clip....they're spring loaded and if it pings off you'll never see it again:
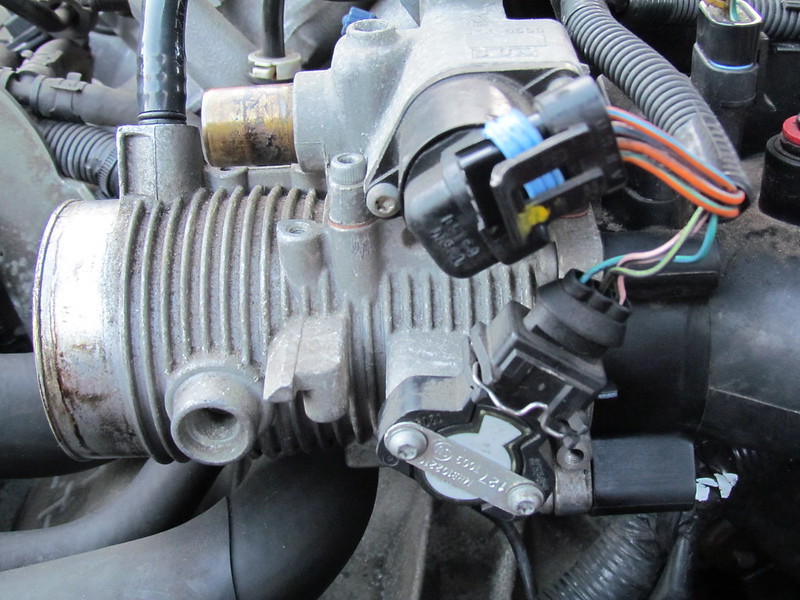
On the top side of the throttle body you'll see two black breather pipes attached. One on the upper side of the intake bore that connects to the airbox, and another on top of the body into the idle air control valve. These are clipped in to a locator, as you pull the pipe you need to hold the locator in the recess with a small flat blade as you ease the pipe out:
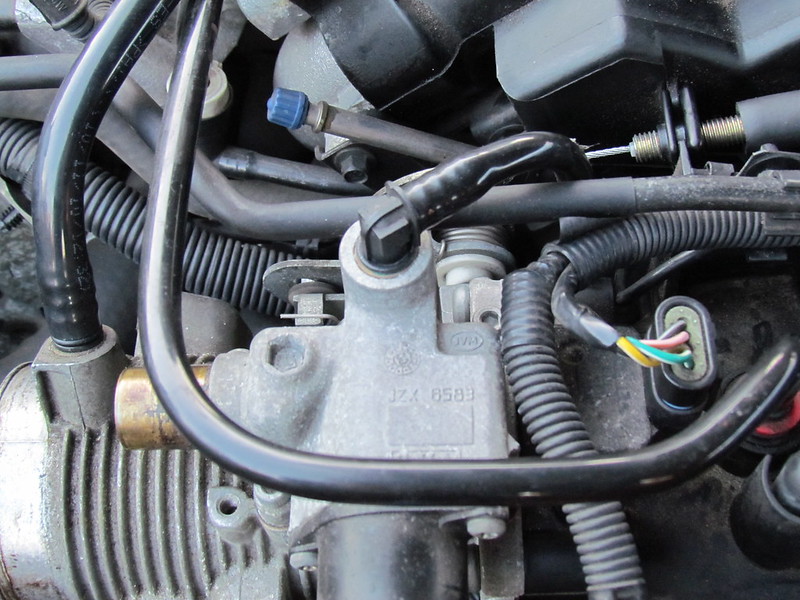
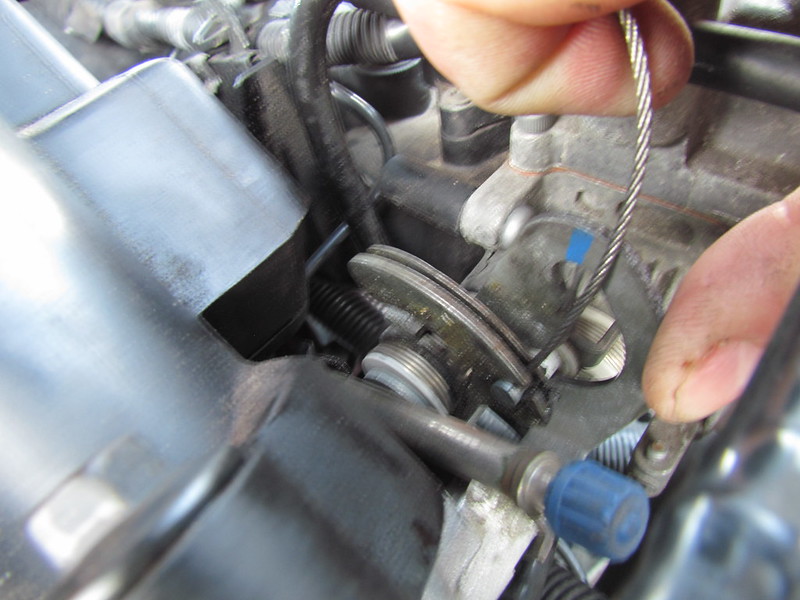
The throttle cable also has to be removed, pop the square clip out which controls the cable tension, then pull the cable upwards to reveal the recess where the cable is secured.
You will see the guide where you slot the nipple of the cable so just ease it out until it's free.
There are four T25 torx bolts securing the throttle body to the plastic inlet manifold.
Two on top of the throttle body...
And two underneath...
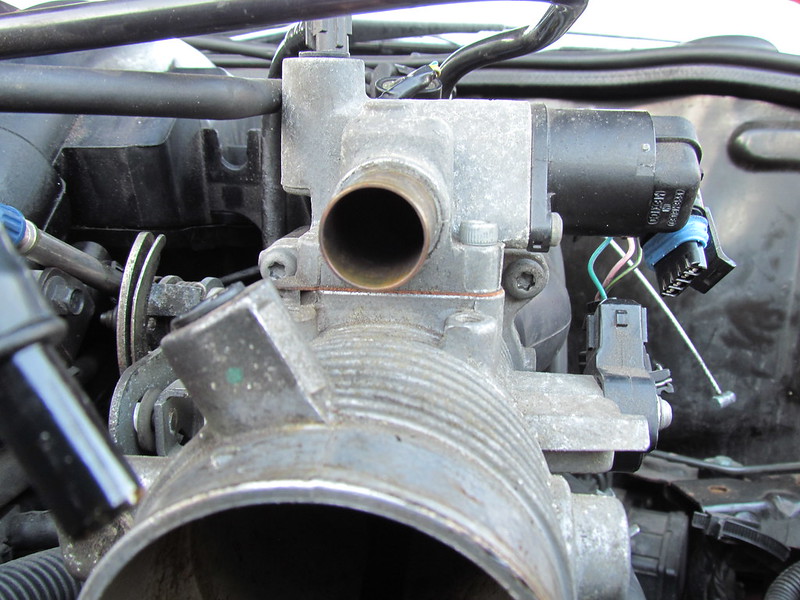
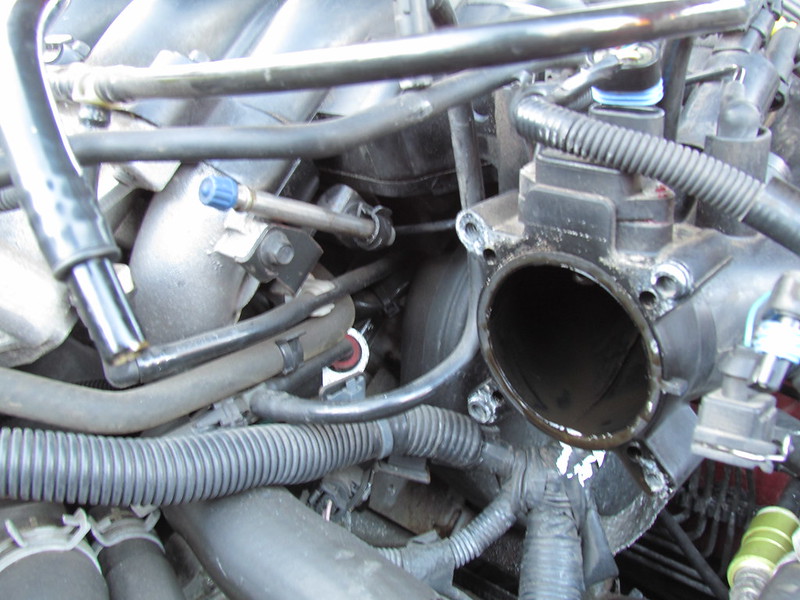
Now with the throttle body removed, its a good idea to clean out the end of the manifold plenum, I wiped it out with kitchen roll then left a rag in there to stop oil dripping:
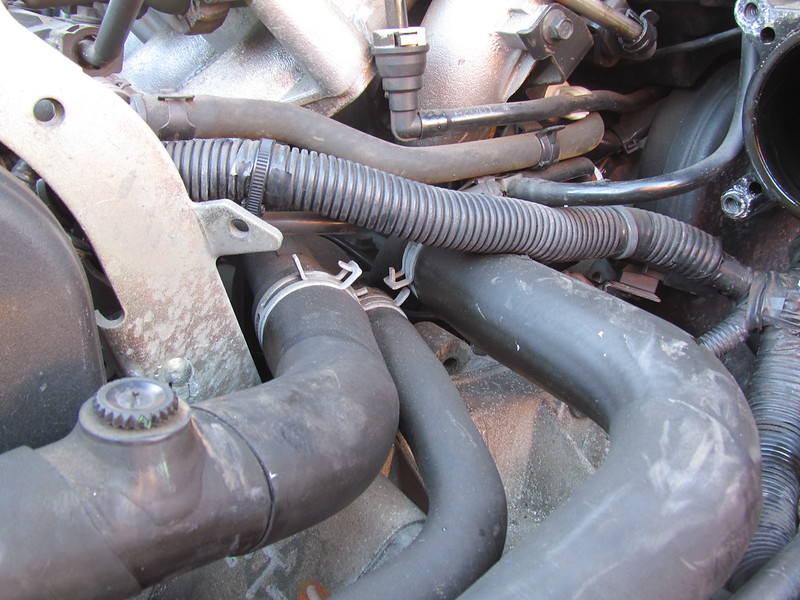
Next up are the coolant hoses. Secured in place by a tight clip, I used a pair of wide grips to loosen them off and guide them down the hose away from interfering, these can be awkward as the jaws of the grips do have to be quite wide, so the tension is high...especially if they slip and you trap the webbing between your thumb and index finger! OUCH!
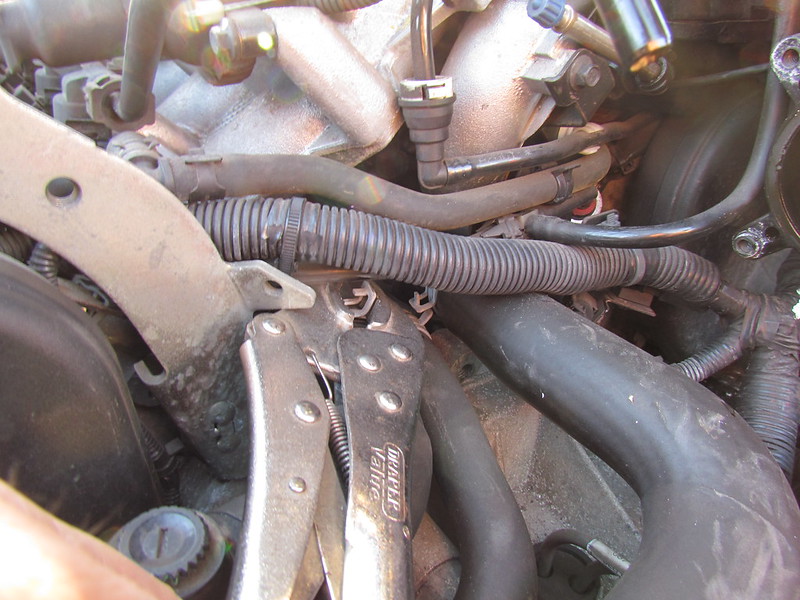
Once the hoses are off you'll get some coolant loss which you can clean up after. You can clamp them or zip tie them shut if you prefer.
Move the hoses out of the way to give the most access as even with the thermostat in situe it will still look tight. I also removed an engine breather too which can be seen in the above pic.
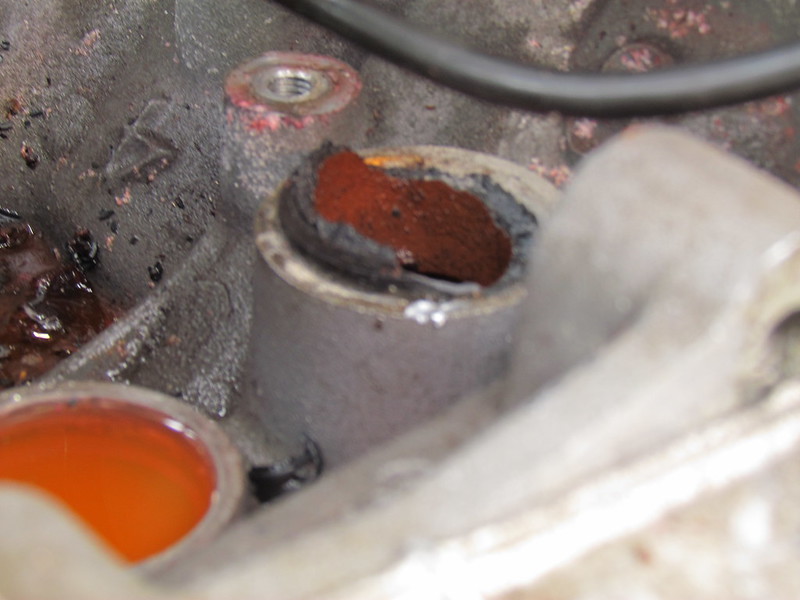
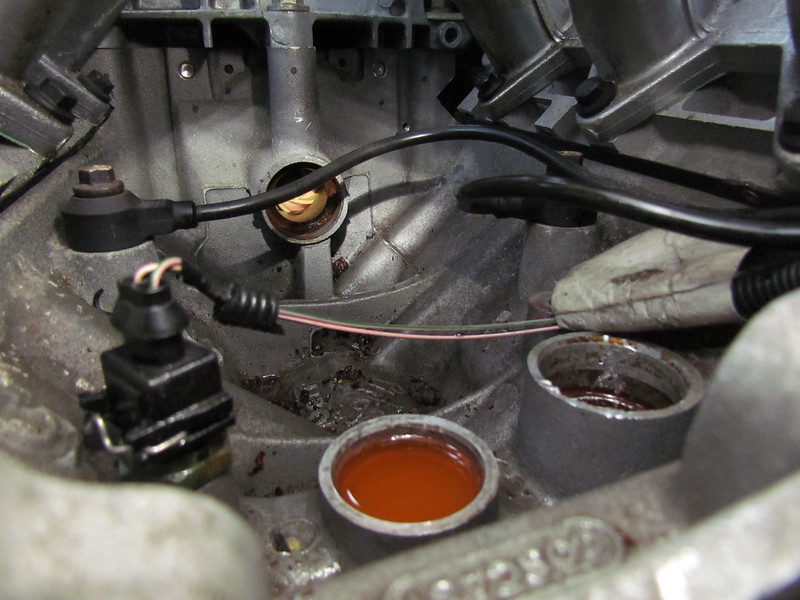
Get in there with a small ratchet and remove the 8mm bolt that holds the elbow piece and thermostat to the engine block. Once removed you can be a bit forcefull and lift up the thermostat, mine was quite stubborn but patience prevails and it slowly eases out and can be moved out of the way. The genuine MG Rover boxed stat kits come with new pipes and clips too, so it makes sense to change these for new items whilst you have the access. The straight pipe came away easily enough but the elbow pipe snapped where it goes into the block, if yours does snap, please ensure you remove any bits or shards of plastic from the coolant:
Once I had gotten that out you are then left with a large cavity of the V which gives you all the access you need to give it a thorough clean and to mop up any coolant. You may even wish to re-insulate any wiring:
As they say in the books fitting is a reversal of removal. Make sure it's all clean and tidy before fitting the new thermostat and pipes, lubricate the seals and make sure the O-rings are seated fully.
Missed a few pics as it was getting late in the day and light was going but after removing it all, you'll be more than familiar and its straight forward enough. Refasten the 8mm bolt on the elbow piece and then reconnect all the hoses fully, ensuring all the clips are moved back up to a firm and secure position.
If you choose not to do a full coolant flush, do ensure you refill properly by raising the expansion tank and bleeding the system before cranking the engine on. Any air locks can cause temporary raised temperatures so it really pays to do this properly.
I replaced all the coolant on my car following the procedures in the Haynes manual, its nice to know that the car is now running at the correct temperatures. I'll keep a check on it as always with DIY stuff. If I can do it i'm sure most people on these forums can do it.
Hope this helps or at the very least shows people what's involved.
