
|
|
|
|
|
|
||
|
|
||
 28th May 2018, 18:53
|
#251 | |
|
Posted a thing or two
MG ZT 190 + and MKIV Supra Join Date: Jan 2009
Location: Plymouth
Posts: 1,551
Thanks: 224
Thanked 493 Times in 359 Posts
|
Quote:
 ) so you should as well. ) so you should as well.Aircon also sorted so now to book the MOT
__________________
Jon C Living the dream  MK IV VVTI Tiptronic TT Toyota Supra MG ZT 190+
BornTuesday, 10th July 2001 @ 09:01:10 259th ZT to run off the production line, out of 18,894 252nd ZT 190 + to be made out of 4,023 101st ZT in Solar Red (code: CEU) to be made out of 1,888 |
|

|

|
|
28th May 2018, 19:20
|
#252 | |
|
This is my second home
1979 Capri 1.6L, 1982 Capri 1.6L, 2016 Dacia Stepway Join Date: Jun 2009
Location: Dorset
Posts: 8,596
Thanks: 3,496
Thanked 3,397 Times in 2,218 Posts
|
Quote:
 I'm better off not having TOAF working, I dont fancy clicking the wrong buttons and killing my car.  |
|
|
|
|
|
7th August 2018, 22:42
|
#253 |
|
Posted a thing or two
MG ZT 190 + and MKIV Supra Join Date: Jan 2009
Location: Plymouth
Posts: 1,551
Thanks: 224
Thanked 493 Times in 359 Posts
|
So after the car was serviced and the repairs were conducted my plan was to get her MOted and take her to Portland.
Hmm forgot one thing. We were having a new roof on the house and I completely forgot about access until I got home from work one evening to be met with this 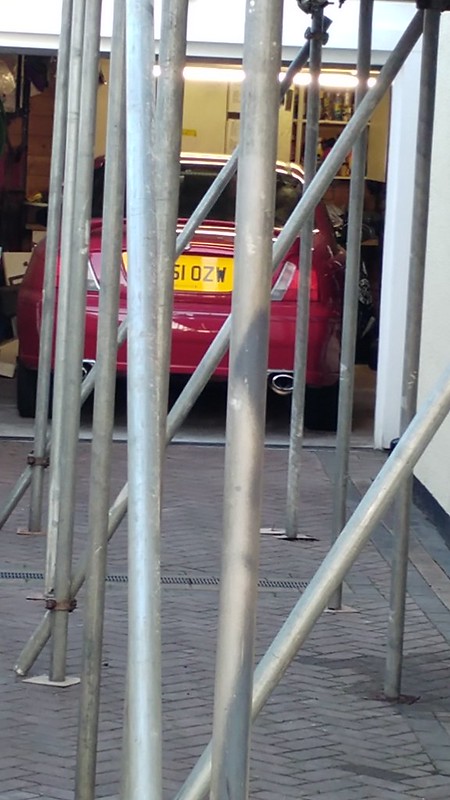 20180701_203737 by Jon Christie, on Flickr 20180701_203737 by Jon Christie, on Flickrboy didnt I feel stupid for not thinking ahead particularly as I was planning to take the car to the Portland meet  Anyway roof complete, Scaffolding struck and a few days off meant I got the MOT done today which was succesful 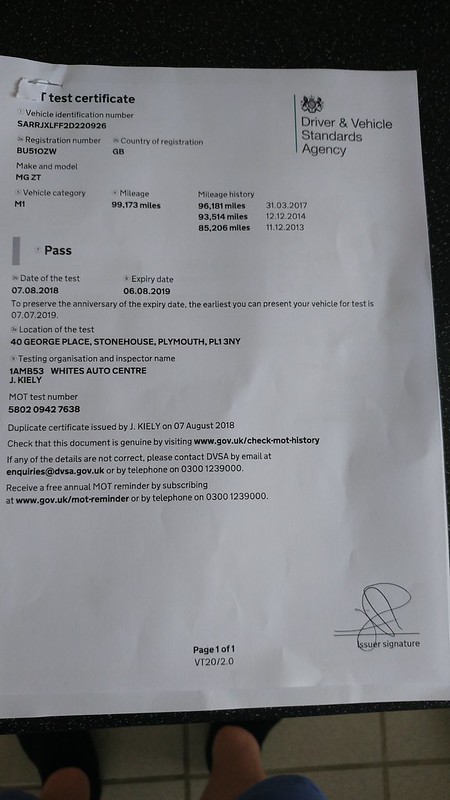 20180807_093812 by Jon Christie, on Flickr 20180807_093812 by Jon Christie, on FlickrGood news all round. The car has just had a deep clean ready for the next 12 months. Pictures to follow
__________________
Jon C Living the dream MK IV VVTI Tiptronic TT Toyota Supra MG ZT 190+
BornTuesday, 10th July 2001 @ 09:01:10 259th ZT to run off the production line, out of 18,894 252nd ZT 190 + to be made out of 4,023 101st ZT in Solar Red (code: CEU) to be made out of 1,888 |
|
|
|
|
8th August 2018, 19:53
|
#254 |
|
Posted a thing or two
MG ZT 190 + and MKIV Supra Join Date: Jan 2009
Location: Plymouth
Posts: 1,551
Thanks: 224
Thanked 493 Times in 359 Posts
|
Pictures as promised now the car is cleaned and ready for another year
 I have pulled all the suspension parts from the shelf in the garage so i could sort through and start work on the parts  Inside the car 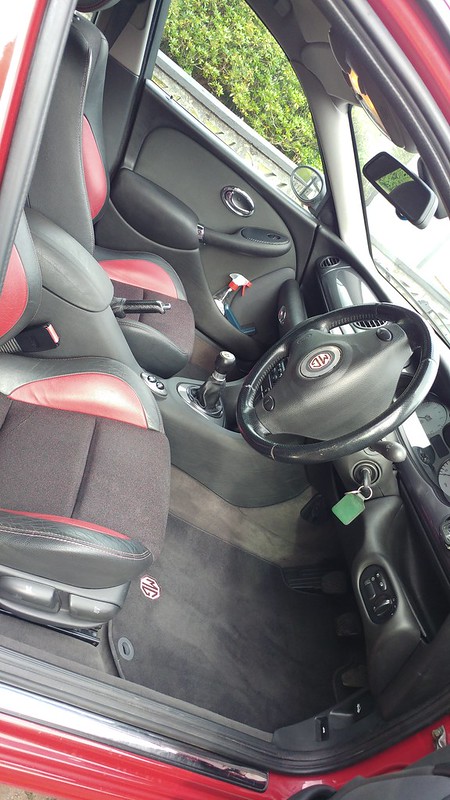 20180808_172439 by Jon Christie, on Flickr 20180808_172439 by Jon Christie, on Flickr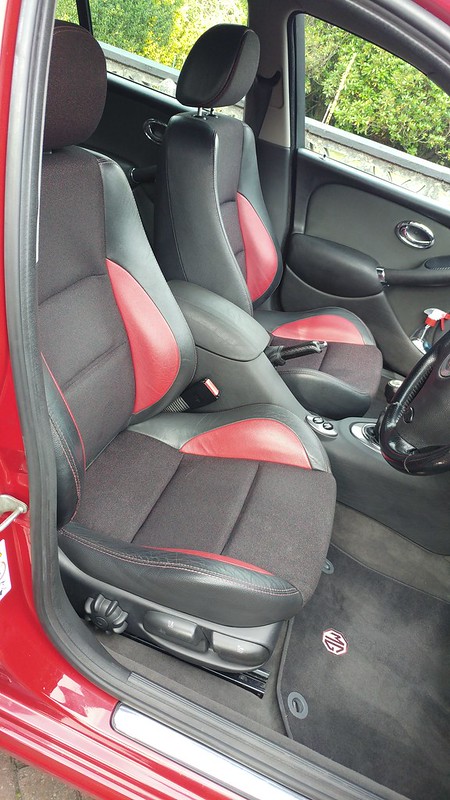 20180808_172444 by Jon Christie, on Flickr 20180808_172444 by Jon Christie, on FlickrFront end with the new splitter. Not sure what the neighbour was looking at 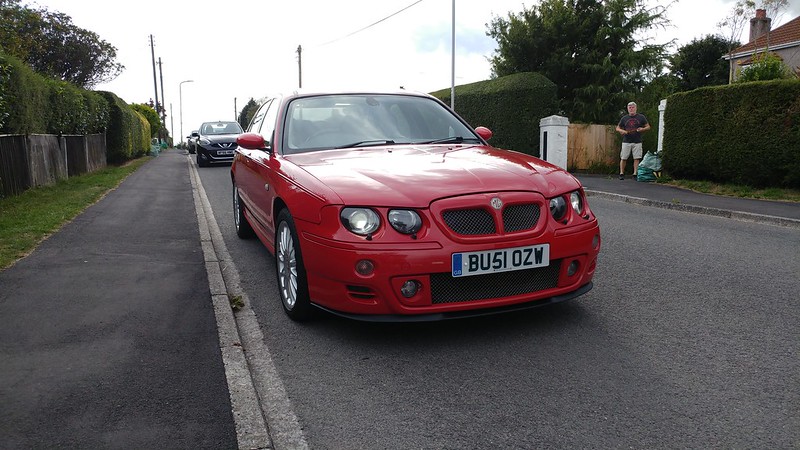 20180808_172612 by Jon Christie, on Flickr 20180808_172612 by Jon Christie, on Flickr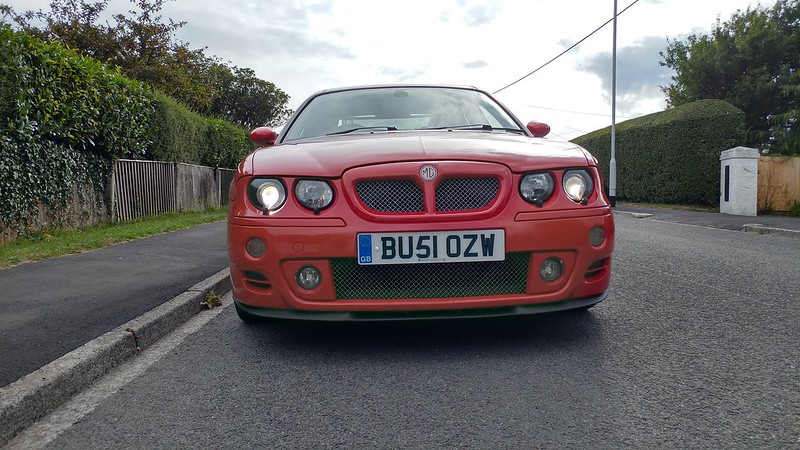 20180808_172808_HDR by Jon Christie, on Flickr 20180808_172808_HDR by Jon Christie, on FlickrAnd the car in all its glory 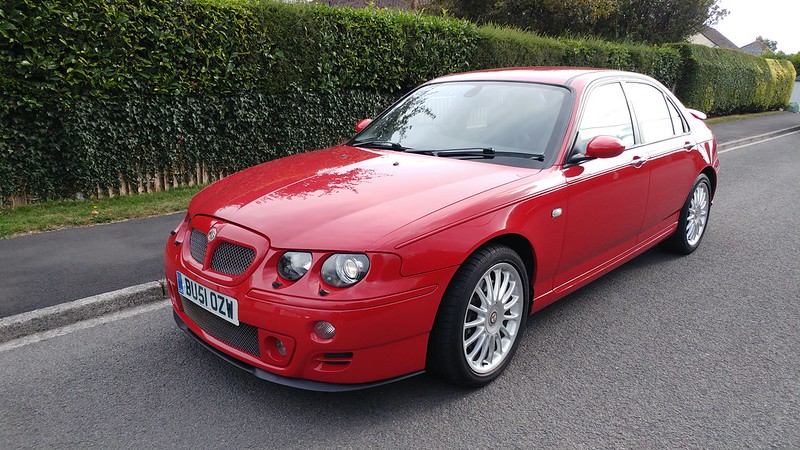 20180808_172630 by Jon Christie, on Flickr 20180808_172630 by Jon Christie, on Flickr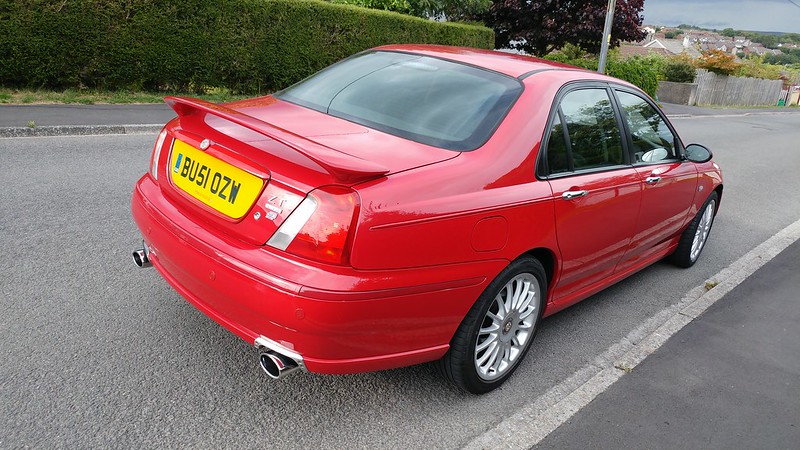 20180808_172650 by Jon Christie, on Flickr 20180808_172650 by Jon Christie, on Flickr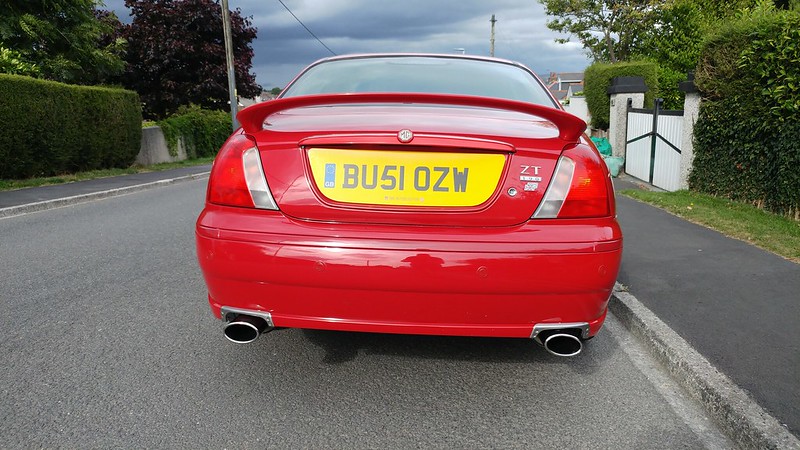 20180808_172706 by Jon Christie, on Flickr 20180808_172706 by Jon Christie, on FlickrLets see what another year of motoring brings up in the ZT ownership world starting with a 320 mile round trip tomorrow
__________________
Jon C Living the dream MK IV VVTI Tiptronic TT Toyota Supra MG ZT 190+
BornTuesday, 10th July 2001 @ 09:01:10 259th ZT to run off the production line, out of 18,894 252nd ZT 190 + to be made out of 4,023 101st ZT in Solar Red (code: CEU) to be made out of 1,888 Last edited by jonc3725; 8th August 2018 at 19:56.. |
|
|
|
|
21st April 2019, 20:11
|
#255 |
|
Posted a thing or two
MG ZT 190 + and MKIV Supra Join Date: Jan 2009
Location: Plymouth
Posts: 1,551
Thanks: 224
Thanked 493 Times in 359 Posts
|
A bit of an update.
Passed through the 100K a couple of months ago. [IMG]  IMG_20190119_174050 by Jon Christie, on Flickr[/IMG] IMG_20190119_174050 by Jon Christie, on Flickr[/IMG]still many more miles in the old girl 
__________________
Jon C Living the dream MK IV VVTI Tiptronic TT Toyota Supra MG ZT 190+
BornTuesday, 10th July 2001 @ 09:01:10 259th ZT to run off the production line, out of 18,894 252nd ZT 190 + to be made out of 4,023 101st ZT in Solar Red (code: CEU) to be made out of 1,888 |
|
|
|
|
21st April 2019, 21:25
|
#256 |
|
Posted a thing or two
MG ZT 190 + and MKIV Supra Join Date: Jan 2009
Location: Plymouth
Posts: 1,551
Thanks: 224
Thanked 493 Times in 359 Posts
|
so what do you do on Easter Sunday once the family have had their time
 Change the sagging headlining So Sonic game up with a really good example from a low mileage so I thought I would swap out today I have done this a couple of times in the past but its still a fair amount of work the sagging and you can see where I glued it up as a temp repair. [IMG]  IMG_20190421_120025 by Jon Christie, on Flickr[/IMG] IMG_20190421_120025 by Jon Christie, on Flickr[/IMG][IMG] 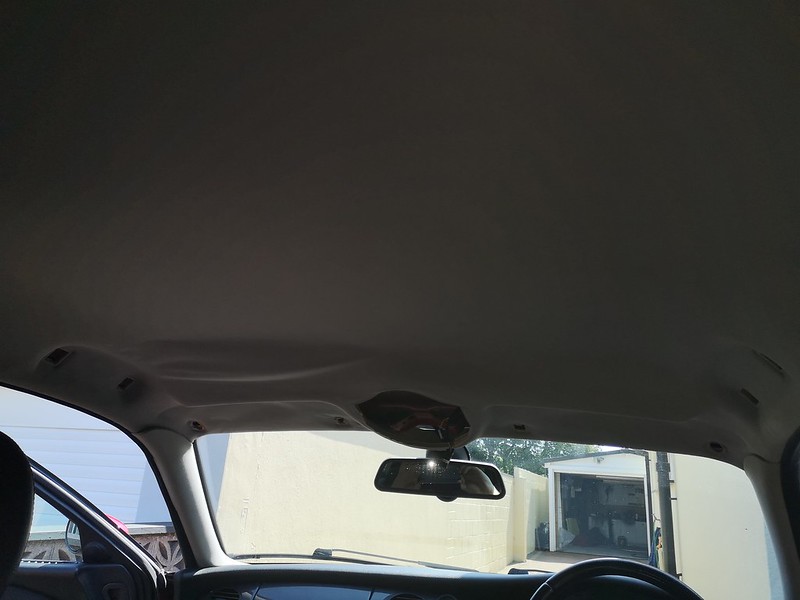 IMG_20190421_122856 by Jon Christie, on Flickr[/IMG] IMG_20190421_122856 by Jon Christie, on Flickr[/IMG] IMG_20190421_122921 by Jon Christie, on Flickr IMG_20190421_122921 by Jon Christie, on FlickrI always do this job on the drive in the sun so the doors can be opened wide [IMG]  IMG_20190421_120010 by Jon Christie, on Flickr[/IMG] IMG_20190421_120010 by Jon Christie, on Flickr[/IMG]ready to start [IMG]  IMG_20190421_115955 by Jon Christie, on Flickr[/IMG] IMG_20190421_115955 by Jon Christie, on Flickr[/IMG]first I take out the seats and the furniture attached to the headlining. I will go through the fastenings etc on the refit  [IMG]  IMG_20190421_122949 by Jon Christie, on Flickr[/IMG] IMG_20190421_122949 by Jon Christie, on Flickr[/IMG]and then the trims on the posts. I leave the top B post trim hanging. When removing these I always get my hands behind and pull where the trim clips are so as not to force anything. the plastics on these cars is getting brittle [IMG] 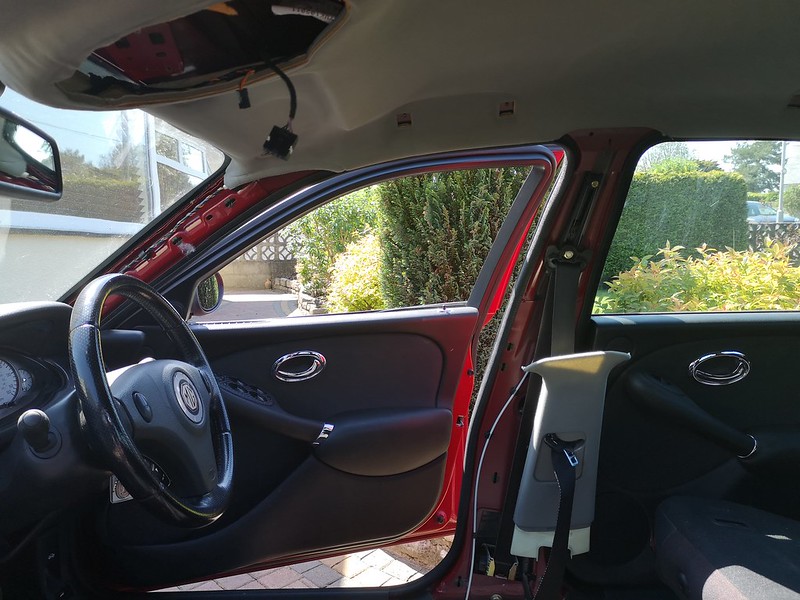 IMG_20190421_140046 by Jon Christie, on Flickr[/IMG] IMG_20190421_140046 by Jon Christie, on Flickr[/IMG][IMG]  IMG_20190421_140223 by Jon Christie, on Flickr[/IMG] IMG_20190421_140223 by Jon Christie, on Flickr[/IMG]All stacked on the drive removed [IMG]  IMG_20190421_152613 by Jon Christie, on Flickr[/IMG] IMG_20190421_152613 by Jon Christie, on Flickr[/IMG][IMG]  IMG_20190421_152621 by Jon Christie, on Flickr[/IMG] IMG_20190421_152621 by Jon Christie, on Flickr[/IMG]I unclipped the headlining on the rear clips moved the rubber seals from the door seals then dropped the headlining. Now I have always done it through the passenger front door but sonic said he took the unit am fitting out the drivers rear so did the same. it worked really well for removal. you can see how much sagging was evident [IMG]  IMG_20190421_141517 by Jon Christie, on Flickr[/IMG] IMG_20190421_141517 by Jon Christie, on Flickr[/IMG]and new against old [IMG]  IMG_20190421_141910 by Jon Christie, on Flickr[/IMG] IMG_20190421_141910 by Jon Christie, on Flickr[/IMG]and the roof still looking good inside [IMG]  IMG_20190421_141555 by Jon Christie, on Flickr[/IMG] IMG_20190421_141555 by Jon Christie, on Flickr[/IMG]The next issue was the loom in the headlining. The one Sonic sold to me had the updated loom for the auto mirror and rain sensor. Mine is the older style with the black plug. [IMG]  IMG_20190421_143801 by Jon Christie, on Flickr[/IMG] IMG_20190421_143801 by Jon Christie, on Flickr[/IMG]I had two options. Splice the looms or change the looms. I went for a complete change my original loom removed form old headlining and laid next to the one on the new lining [IMG]  IMG_20190421_143909 by Jon Christie, on Flickr[/IMG] IMG_20190421_143909 by Jon Christie, on Flickr[/IMG]I VERY carefully removed the loom from the new headlining [IMG]  IMG_20190421_144828 by Jon Christie, on Flickr[/IMG] IMG_20190421_144828 by Jon Christie, on Flickr[/IMG]Then glued on my original loom. I used 3M tape to stick it in place rather than the glue. [IMG]  IMG_20190421_150129 by Jon Christie, on Flickr[/IMG] IMG_20190421_150129 by Jon Christie, on Flickr[/IMG]I bought the new units in through the passenger door across corners. With care AND VERY CLEAN HANDS !! you dont have to removed the centre console and the biscuit can be manoeuvred around the console, gear knob and steering wheel. I then hold it in place and rest it on the 4 x door top rubber inner lips which is enough to hold it in place [IMG]  IMG_20190421_151949 by Jon Christie, on Flickr[/IMG] IMG_20190421_151949 by Jon Christie, on Flickr[/IMG][IMG]  IMG_20190421_152009 by Jon Christie, on Flickr[/IMG] IMG_20190421_152009 by Jon Christie, on Flickr[/IMG]next up to build everything up. first I fit the B post trims. the top clip slides up and then 2 plastic lugs fit into spring clips. Be careful to line the plastic lugs with the spring clip before pushing home or you can bend or break the plastic lugs (same for both sides) [IMG] 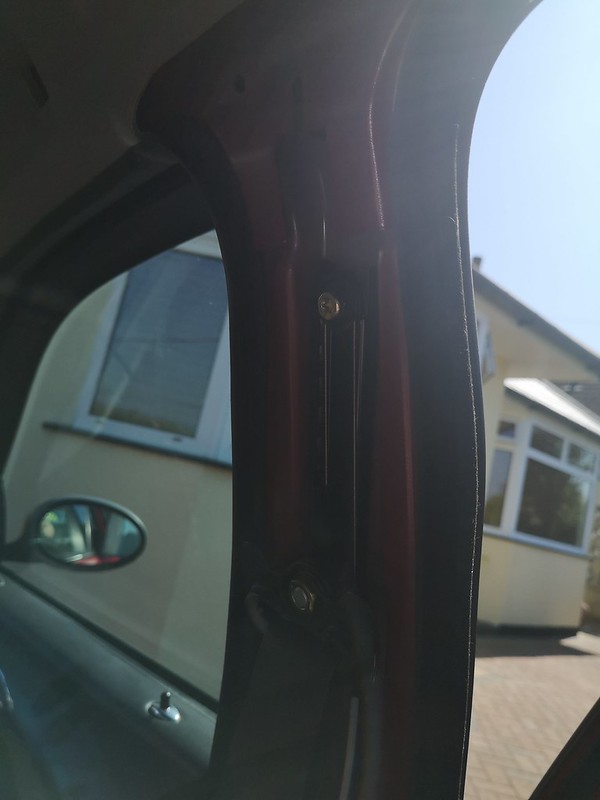 IMG_20190421_152112 by Jon Christie, on Flickr[/IMG] IMG_20190421_152112 by Jon Christie, on Flickr[/IMG][IMG]  IMG_20190421_152118 by Jon Christie, on Flickr[/IMG] IMG_20190421_152118 by Jon Christie, on Flickr[/IMG][IMG]  IMG_20190421_152123 by Jon Christie, on Flickr[/IMG] IMG_20190421_152123 by Jon Christie, on Flickr[/IMG][IMG]  IMG_20190421_152542 by Jon Christie, on Flickr[/IMG] IMG_20190421_152542 by Jon Christie, on Flickr[/IMG]Next up I fit the A post trims. Again 3 x lugs and 3 spring clips. Again the alignment is key to make sure they dont break. [IMG]  IMG_20190421_153333 by Jon Christie, on Flickr[/IMG] IMG_20190421_153333 by Jon Christie, on Flickr[/IMG][IMG]  IMG_20190421_153338 by Jon Christie, on Flickr[/IMG] IMG_20190421_153338 by Jon Christie, on Flickr[/IMG]and fitted [IMG]  IMG_20190421_153434 by Jon Christie, on Flickr[/IMG] IMG_20190421_153434 by Jon Christie, on Flickr[/IMG]Now to the wiring. Firstly the loom connector for the headlining is inside the drivers a post. As you can see mine is the older black style hence the loom change [IMG]  IMG_20190421_153500 by Jon Christie, on Flickr[/IMG] IMG_20190421_153500 by Jon Christie, on Flickr[/IMG][IMG]  IMG_20190421_153633 by Jon Christie, on Flickr[/IMG] IMG_20190421_153633 by Jon Christie, on Flickr[/IMG]The earth on the rear [IMG]  IMG_20190421_153802 by Jon Christie, on Flickr[/IMG] IMG_20190421_153802 by Jon Christie, on Flickr[/IMG]The connectors for the rain sensor and auto mirror. I alwasy struugle to get the wiring in the correct position (probably my fat fingers ). There is a channel for the sensor wiring to sit in and the plug for the mirror sits over the top. One fitted the plastic cover clips over.[IMG]  IMG_20190421_154020 by Jon Christie, on Flickr[/IMG] IMG_20190421_154020 by Jon Christie, on Flickr[/IMG][IMG]  IMG_20190421_185104 by Jon Christie, on Flickr[/IMG] IMG_20190421_185104 by Jon Christie, on Flickr[/IMG]The front interior lights. These clip on the rear and two screws screw into the frame [IMG]  IMG_20190421_162442 by Jon Christie, on Flickr[/IMG] IMG_20190421_162442 by Jon Christie, on Flickr[/IMG][IMG]  IMG_20190421_162642 by Jon Christie, on Flickr[/IMG] IMG_20190421_162642 by Jon Christie, on Flickr[/IMG]Then the sun visors. These are relatively easy with 2 x screws for the bar and the clip is clipped through closure which expands the clip making it sit solid. [IMG]  IMG_20190421_160716 by Jon Christie, on Flickr[/IMG] IMG_20190421_160716 by Jon Christie, on Flickr[/IMG][IMG]  IMG_20190421_160731 by Jon Christie, on Flickr[/IMG] IMG_20190421_160731 by Jon Christie, on Flickr[/IMG][IMG] 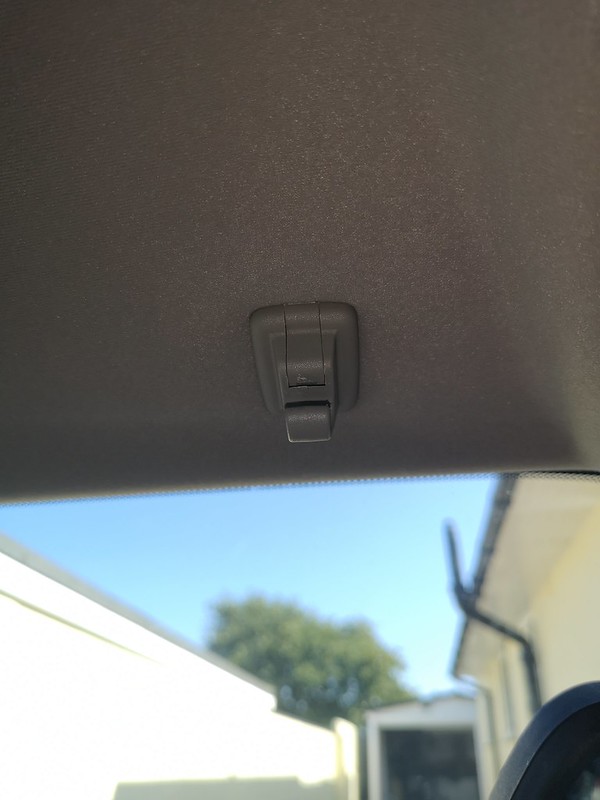 IMG_20190421_160809 by Jon Christie, on Flickr[/IMG] IMG_20190421_160809 by Jon Christie, on Flickr[/IMG][IMG]  IMG_20190421_160908 by Jon Christie, on Flickr[/IMG] IMG_20190421_160908 by Jon Christie, on Flickr[/IMG]All the front furniture fitted [IMG]  IMG_20190421_162702 by Jon Christie, on Flickr[/IMG] IMG_20190421_162702 by Jon Christie, on Flickr[/IMG]Working back the handles are fitted. You can hold them open by opening the covers on their little hinges and clipping against the handle. This holds the handle open against its spring. 2 x screws each handle into the frame ont he roof. [IMG] 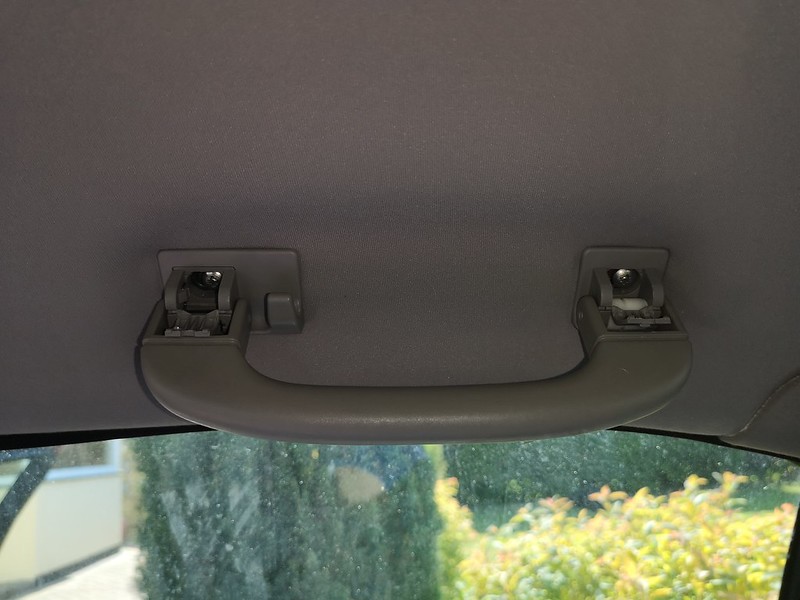 IMG_20190421_160259 by Jon Christie, on Flickr[/IMG] IMG_20190421_160259 by Jon Christie, on Flickr[/IMG]Caps closed [IMG]  IMG_20190421_160311 by Jon Christie, on Flickr[/IMG] IMG_20190421_160311 by Jon Christie, on Flickr[/IMG]and fitted [IMG]  IMG_20190421_160318 by Jon Christie, on Flickr[/IMG] IMG_20190421_160318 by Jon Christie, on Flickr[/IMG][IMG]  IMG_20190421_162714 by Jon Christie, on Flickr[/IMG] IMG_20190421_162714 by Jon Christie, on Flickr[/IMG]Next up the B post lower trims. These have 6 plastic lugs into spring clips. again alignment is key. I also eased the door seals away so the trims can be pushed in place, There is a tab at the top which clips into the upper trim as well. [IMG]  IMG_20190421_162746 by Jon Christie, on Flickr[/IMG] IMG_20190421_162746 by Jon Christie, on Flickr[/IMG][IMG]  IMG_20190421_162806 by Jon Christie, on Flickr[/IMG] IMG_20190421_162806 by Jon Christie, on Flickr[/IMG]and all fitted both sides. [IMG]  IMG_20190421_162923 by Jon Christie, on Flickr[/IMG] IMG_20190421_162923 by Jon Christie, on Flickr[/IMG][IMG]  IMG_20190421_163210 by Jon Christie, on Flickr[/IMG] IMG_20190421_163210 by Jon Christie, on Flickr[/IMG]Next the rear interior light and high level break light. be careful when removing these as the plastic is getting very brittle The interior light has 2 lugs which fit over the lining and then clip in the front. [IMG]  IMG_20190421_164358 by Jon Christie, on Flickr[/IMG] IMG_20190421_164358 by Jon Christie, on Flickr[/IMG]High level brake light [IMG]  IMG_20190421_182216 by Jon Christie, on Flickr[/IMG] IMG_20190421_182216 by Jon Christie, on Flickr[/IMG]The plastic cover over the wiring clips into place then 2 x screws expand the clip. At this point I push the 2 x clips that are attached to the rear of the lining into the roof. You can feel them clip in. [IMG] 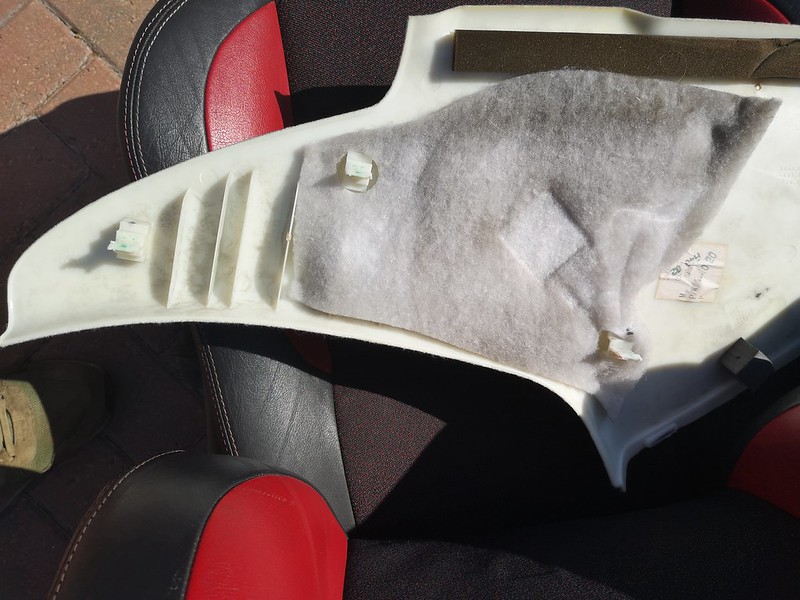 IMG_20190421_154059 by Jon Christie, on Flickr[/IMG] IMG_20190421_154059 by Jon Christie, on Flickr[/IMG]Lastly the rear trims go back. These slide in over the parcel shelf and have 3 lugs and spring clips. [IMG]  IMG_20190421_182505 by Jon Christie, on Flickr[/IMG] IMG_20190421_182505 by Jon Christie, on Flickr[/IMG][IMG]  IMG_20190421_154119 by Jon Christie, on Flickr[/IMG] IMG_20190421_154119 by Jon Christie, on Flickr[/IMG][IMG]  IMG_20190421_154246 by Jon Christie, on Flickr[/IMG] IMG_20190421_154246 by Jon Christie, on Flickr[/IMG]Thats the headlining all in and boy it looks better. Thanks Paul [IMG]  IMG_20190421_185646 by Jon Christie, on Flickr[/IMG] IMG_20190421_185646 by Jon Christie, on Flickr[/IMG][IMG]  IMG_20190421_185721 by Jon Christie, on Flickr[/IMG] IMG_20190421_185721 by Jon Christie, on Flickr[/IMG]so finally a good hoover out before putting the seats back. [IMG]  IMG_20190421_181258 by Jon Christie, on Flickr[/IMG] IMG_20190421_181258 by Jon Christie, on Flickr[/IMG]and the job all done [IMG]  IMG_20190421_185733 by Jon Christie, on Flickr[/IMG] IMG_20190421_185733 by Jon Christie, on Flickr[/IMG][IMG]  IMG_20190421_185743 by Jon Christie, on Flickr[/IMG] IMG_20190421_185743 by Jon Christie, on Flickr[/IMG][IMG]  IMG_20190421_185724 by Jon Christie, on Flickr[/IMG] IMG_20190421_185724 by Jon Christie, on Flickr[/IMG]5 hours all in with a couple of drink stops because it was baking on the drive but well worth the effort .Again shout out to Paul who had a top quality headlining he was willing to pass on.
__________________
Jon C Living the dream MK IV VVTI Tiptronic TT Toyota Supra MG ZT 190+
BornTuesday, 10th July 2001 @ 09:01:10 259th ZT to run off the production line, out of 18,894 252nd ZT 190 + to be made out of 4,023 101st ZT in Solar Red (code: CEU) to be made out of 1,888 Last edited by jonc3725; 21st April 2019 at 21:44.. |
|
|
|
|
21st April 2019, 21:37
|
#257 |
|
This is my second home
1979 Capri 1.6L, 1982 Capri 1.6L, 2016 Dacia Stepway Join Date: Jun 2009
Location: Dorset
Posts: 8,596
Thanks: 3,496
Thanked 3,397 Times in 2,218 Posts
|
She looks great Jon
I bet that was a pig of a job, rather you than me, well done.  |
|
|
|
|
23rd April 2019, 11:21
|
#258 | |
|
Posted a thing or two
MG ZT 190 + and MKIV Supra Join Date: Jan 2009
Location: Plymouth
Posts: 1,551
Thanks: 224
Thanked 493 Times in 359 Posts
|
Quote:
Engineering wise it's fairly basic but boy the work in way is tedious and any plastic clips on these cars are now turning brittle with age which is always the concern
__________________
Jon C Living the dream MK IV VVTI Tiptronic TT Toyota Supra MG ZT 190+
BornTuesday, 10th July 2001 @ 09:01:10 259th ZT to run off the production line, out of 18,894 252nd ZT 190 + to be made out of 4,023 101st ZT in Solar Red (code: CEU) to be made out of 1,888 |
|
|
|
|
|
31st August 2019, 20:43
|
#259 |
|
Posted a thing or two
MG ZT 190 + and MKIV Supra Join Date: Jan 2009
Location: Plymouth
Posts: 1,551
Thanks: 224
Thanked 493 Times in 359 Posts
|
So first things first,
Apart from the headlining a pretty unremarkable year of driving for the car. No issues to talk of (apart from a puncture ) so a service a couple of months late and a new MOT with no advisories IMG_20190816_155709 by Jon Christie, on Flickr IMG_20190816_155709 by Jon Christie, on FlickrIts been a couple of years but eventually got around to starting the suspension restoration. A few bits to buy however I have collected most of the bits I think I need Boxes of new spares  IMG_20190817_163247 by Jon Christie, on Flickr IMG_20190817_163247 by Jon Christie, on FlickrA pile of parts to refurbish  IMG_20190817_163232 by Jon Christie, on Flickr IMG_20190817_163232 by Jon Christie, on FlickrThe car waiting patiently for the good stuff to be fitted  IMG_20190817_163304 by Jon Christie, on Flickr IMG_20190817_163304 by Jon Christie, on Flickr
__________________
Jon C Living the dream MK IV VVTI Tiptronic TT Toyota Supra MG ZT 190+
BornTuesday, 10th July 2001 @ 09:01:10 259th ZT to run off the production line, out of 18,894 252nd ZT 190 + to be made out of 4,023 101st ZT in Solar Red (code: CEU) to be made out of 1,888 Last edited by jonc3725; 31st August 2019 at 22:19.. |
|
|
|
|
31st August 2019, 21:47
|
#260 |
|
Posted a thing or two
MG ZT 190 + and MKIV Supra Join Date: Jan 2009
Location: Plymouth
Posts: 1,551
Thanks: 224
Thanked 493 Times in 359 Posts
|
Leaving all the new parts in the box I attacked all the metal to get rid of rust and crud.
I always use Knot wire brush attachments with my angle grinder for large areas and smaller brushes on my trusty power drill for tight corners and smaller areas. https://www.screwfix.com/p/norton-ex...E&gclsrc=aw.ds I always wear a face mask, face visor and gloves when doing this and once done always neutralise the cleaned steel and rust with a tannic acid treatment before painting with a good quality paint (not NAUGHTY WORD-NAUGHTY WORD-NAUGHTY WORD-NAUGHTY WORD-NAUGHTY WORD-NAUGHTY WORD- Hammerite !!) https://www.rust.co.uk/product/fe123-rust-converter-4 Rear suspension tins  IMG_20190818_142405 by Jon Christie, on Flickr IMG_20190818_142405 by Jon Christie, on Flickr IMG_20190818_142414 by Jon Christie, on Flickr IMG_20190818_142414 by Jon Christie, on Flickr IMG_20190826_191620 by Jon Christie, on Flickr IMG_20190826_191620 by Jon Christie, on Flickr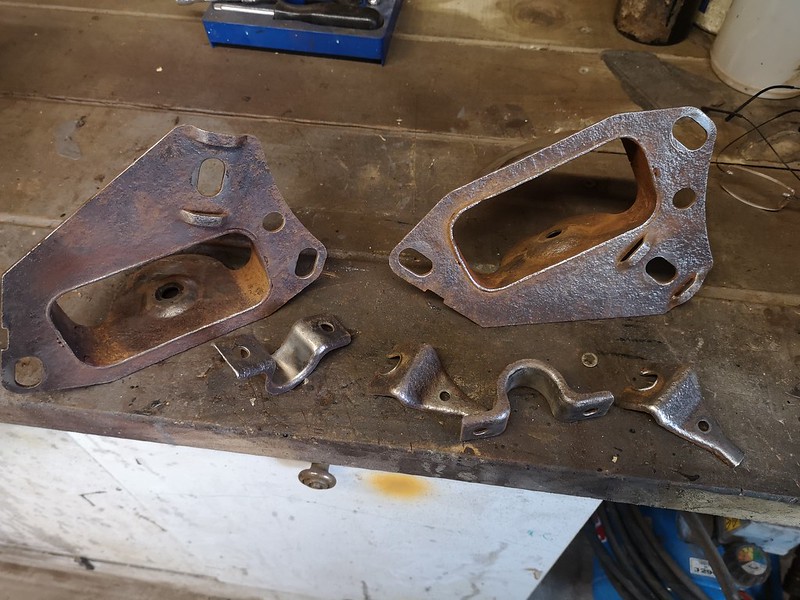 IMG_20190826_191635 by Jon Christie, on Flickr IMG_20190826_191635 by Jon Christie, on FlickrFront strut mounts, Bearings ditched as I have new to fit 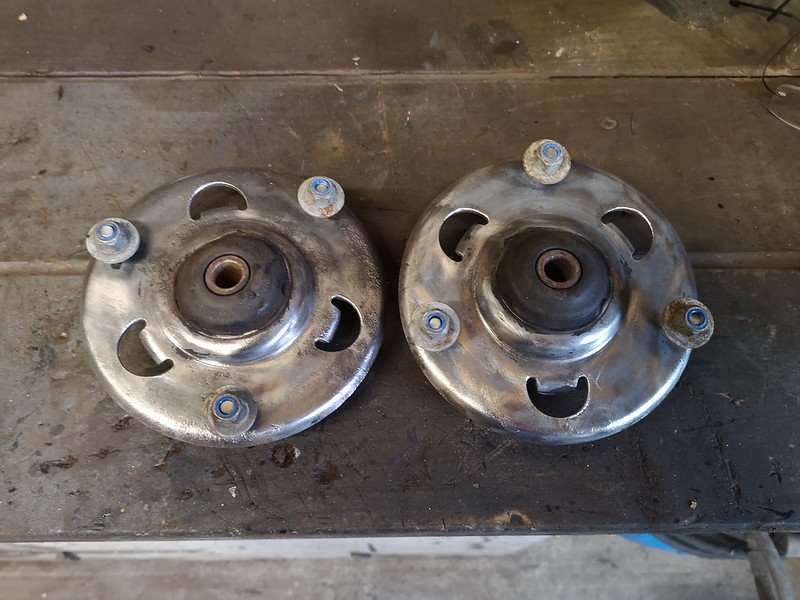 IMG_20190826_191534 by Jon Christie, on Flickr IMG_20190826_191534 by Jon Christie, on Flickr IMG_20190826_191541 by Jon Christie, on Flickr IMG_20190826_191541 by Jon Christie, on FlickrLower rear arms 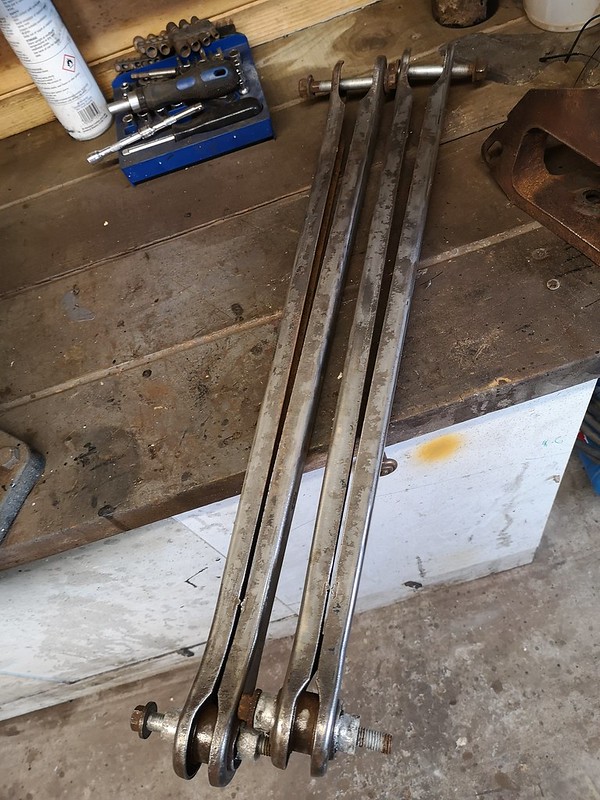 IMG_20190826_191704 by Jon Christie IMG_20190826_191704 by Jon ChristieFront hub. Orly one because the other one I had was knackered. Bearing was not so good and the pinch assembly thread was torn and the pinch point bent so I must have taken some effort to get it of my old car  IMG_20190826_191453 by Jon Christie, on Flickr IMG_20190826_191453 by Jon Christie, on Flickr IMG_20190826_191503 by Jon Christie, on Flickr IMG_20190826_191503 by Jon Christie, on FlickrAnd finally for this set the rear trailing arms. I am going to change the links and bushes as these will be worn. So cleaning up, removing the rust and neutralising the ferris to avoid rusting before getting the bushes and links pressed.  IMG_20190818_142430 by Jon Christie, on Flickr IMG_20190818_142430 by Jon Christie, on Flickr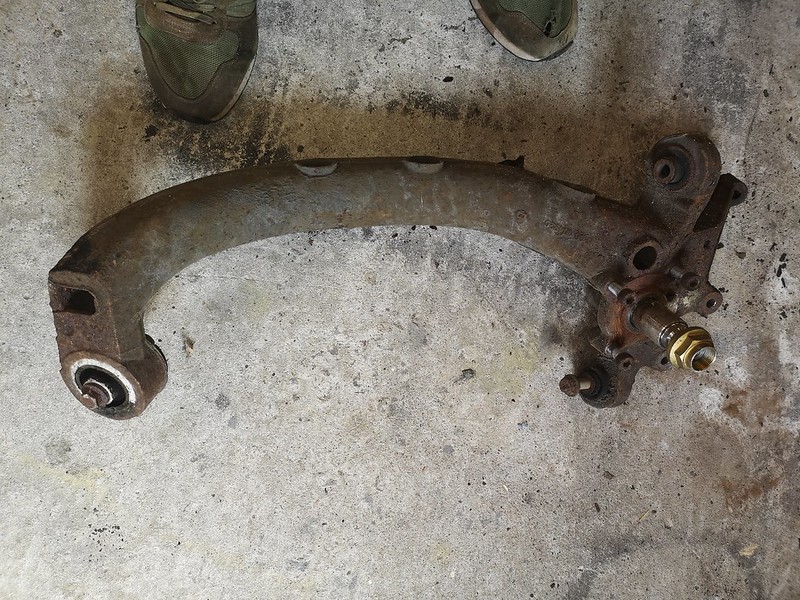 IMG_20190818_142437 by Jon Christie, on Flickr IMG_20190818_142437 by Jon Christie, on Flickr IMG_20190826_191754 by Jon Christie, on Flickr IMG_20190826_191754 by Jon Christie, on Flickr IMG_20190826_191801 by Jon Christie, on Flickr IMG_20190826_191801 by Jon Christie, on Flickr
__________________
Jon C Living the dream MK IV VVTI Tiptronic TT Toyota Supra MG ZT 190+
BornTuesday, 10th July 2001 @ 09:01:10 259th ZT to run off the production line, out of 18,894 252nd ZT 190 + to be made out of 4,023 101st ZT in Solar Red (code: CEU) to be made out of 1,888 Last edited by jonc3725; 31st August 2019 at 22:13.. |
|
|
|
 |
|
|


 Linear Mode

