
|
|
|
|
|
|
||
|
|
||
|
|
 23rd April 2012, 23:48
|
#1 |
|
This is my second home
Rover less ! Join Date: Jun 2011
Location: Tarbolton
Posts: 3,442
Thanks: 393
Thanked 888 Times in 542 Posts
|
Rather than tag this onto my gallery topic I thought it best to start a new topic.
I've finally started the suspension overhaul on the missus's diesel conny. At just under 118k miles it has become quite noticeable that the suspension requires attention. It has had one broken rear spring for almost 3 years with the opposite side now broken for over a year and surprisingly it passed all the MOT's during that time with no problem. To be honest although my test centre is very strict, with the 75 rear springs they seem to break right at the end of the coil and therefore cannot be seen from below. Here is the car just before I started and the ride height is normal on both sides. 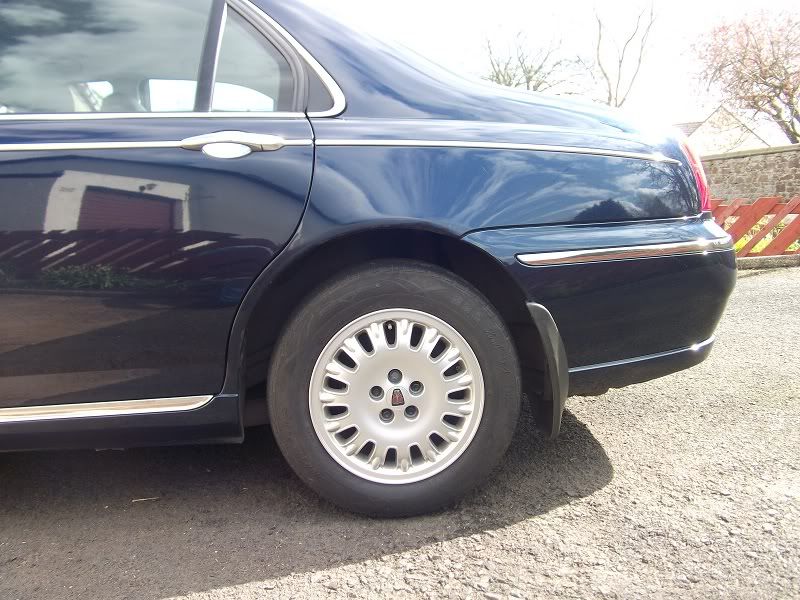 I have already purchased springs and shockers for front and rear but I am not one for simply just replacing these items without some other attention to the car so I have decided to remove the entire rear subframe assembly so that I can get it, and all other components sandblasted and painted. First off was the rear shockers. These were fairly easy to remove by first getting the car up on wooden blocks for safety and removing the rear wheels. I prefer using wooden blocks to axle stands as I find axle stands can move more easily, whereas wooden blocks will not budge. Even with my new air gun I still had to break the studs on the bottom of the shockers with a master bar then with the gun it was easy so here are the dud rear shockers.  Next to come off was the silencer. 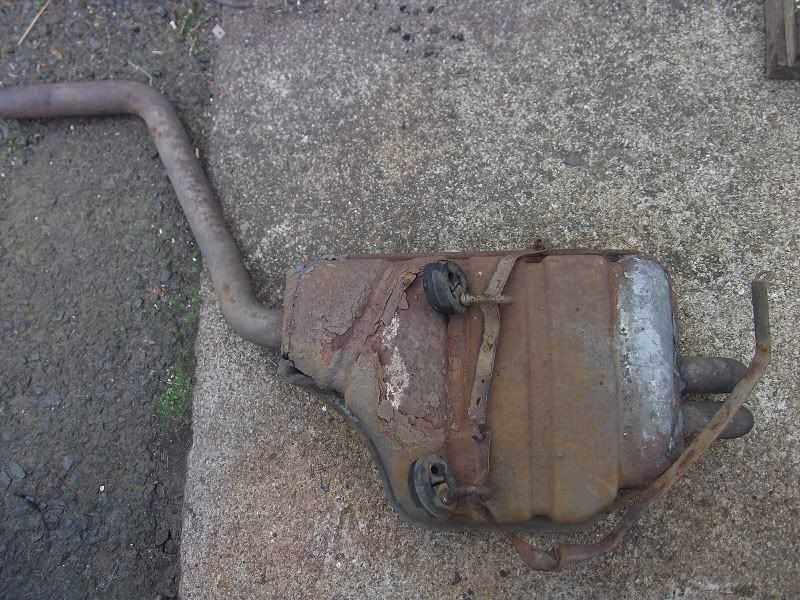 It's been needing replaced for the last two years having been welded up last year but now its off and will be replaced. With it removed I can easily get the sub frame off the car and I also intend to sand blast the fuel tank support strap which also required the exhaust off to be able to remove it from the car. Now this is what the underside looks like so you can see why I want to sandblast everything and get some decent paint on it. 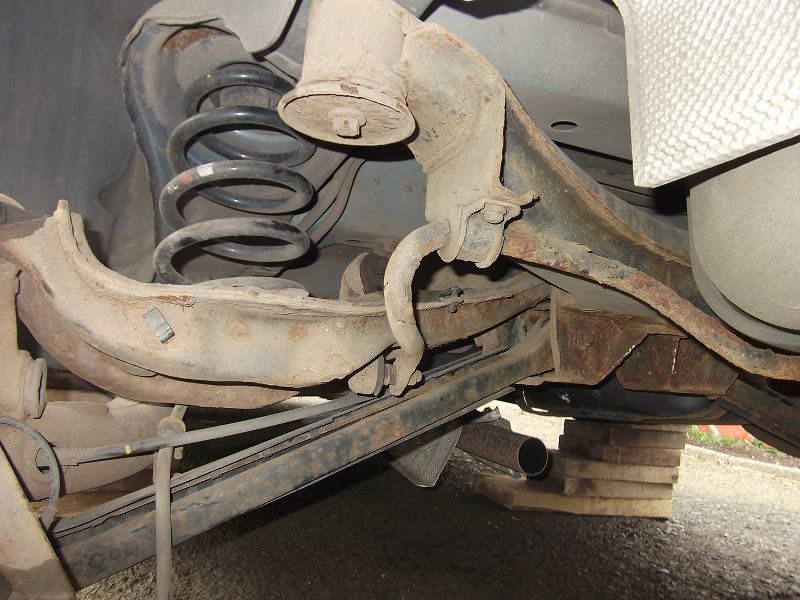 And while I'm at it, look at the bracket just above the fuel cooler for the FBH. I actually complained to the main dealer about this rusting when the car was new. It is now corroded right through so I will have to fabricate a new bracket.  Now back to the sub frame. Removal of this is not explained in the manual for some reason but removing it in my mind makes the suspension more accessible for repair, for example can you imagine attempting to replace the rear anti roll bar bushes or the drop links. Anyway after removing the brake calliper assembly,the top and bottom hub mounts, disconnecting the ABS leads and brake pad wear sensor you are now ready to remove the four subframe mounting studs. I supported the subframe on the trolley jack for this and after all the studs were removed manoeuvre the calliper assembly through between the upper and lower suspension arms. The calliper can then be placed securely on the ground and the entire subframe pulled from under the car. Here it is after four hours work and that was taking into account this was my first time and some of the studs were very awkward as they were rusty so I had to use different sized socket to account for their smaller sizes. 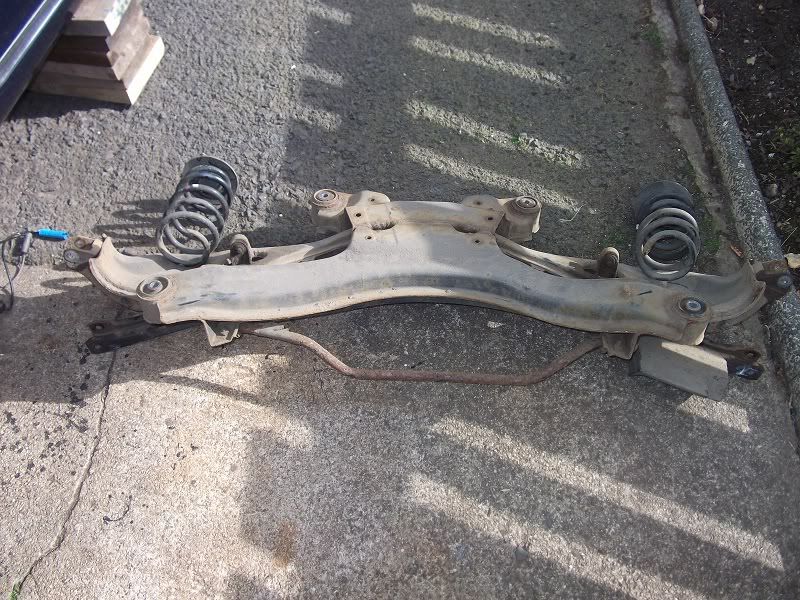 And another view 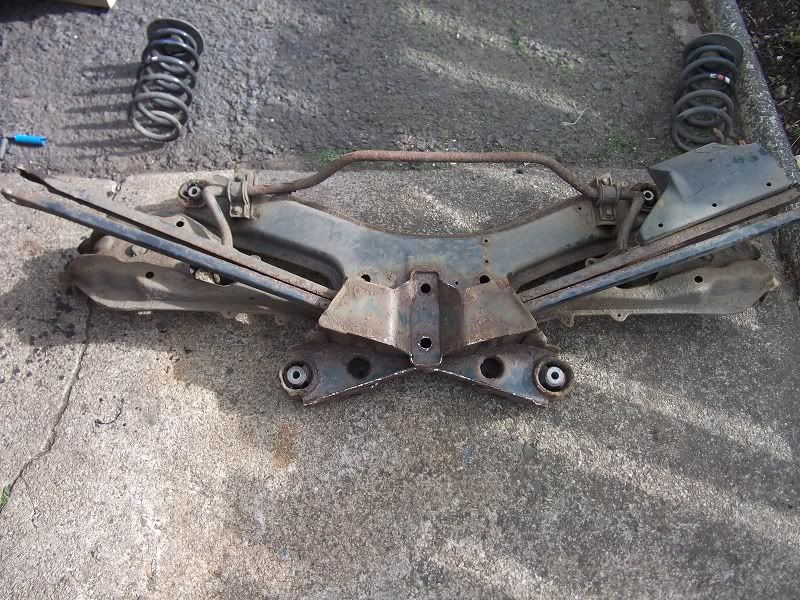 I then spent almost two hours removing the anti roll bar, drop links and upper and lower arms. Some of the studs were extremely rusty and all will be replaced. I have also removed the front brace bars on both cars and the three brace bars from the transmission tunnel to get the same treatment. Here is a shot of the front brace bars from the V6 I removed earlier in the week. You will note one of them is twisted as a result of either being jacked up or placed on a wheel free on a service ramp. This has already been straightened up. 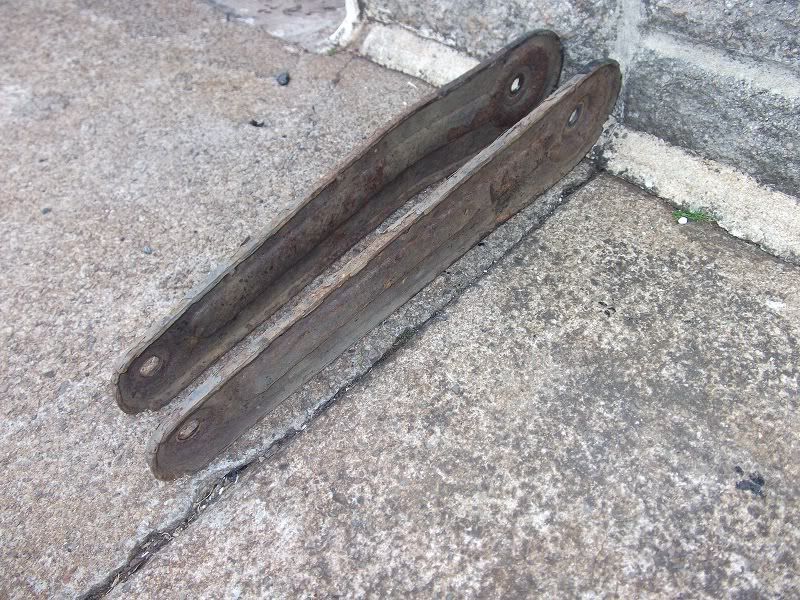 I will update this topic as I go along but I envisage this work, which will also include the front suspension will take at least 6 weeks. JYJ |

|

|
|
24th April 2012, 10:51
|
#2 |
|
Posted a thing or two
Rover 75 V6 2.0 Club Tourer LPG Join Date: Apr 2011
Location: South East
Posts: 1,405
Thanks: 3
Thanked 39 Times in 34 Posts
|
How bad where your rear shocks?
Replaced mine and they were not as bad as fronts. but still they had leaked badly and took way too long to return to the start position. Hence giving the car a saggy behind... |
|
|
|
|
24th April 2012, 13:29
|
#3 |
|
Loves to post

MG ZT+ 190 Join Date: Apr 2009
Location: Chipping Norton
Posts: 393
Thanks: 6
Thanked 26 Times in 22 Posts
|
It will be worth getting those bits powder coated. Must stronger than most paints, and isn't that dear - if your going to get bit bits blasted anyway. I did this on my SD1
|
|
|
|
|
24th April 2012, 18:27
|
#4 | |
|
This is my second home
Rover less ! Join Date: Jun 2011
Location: Tarbolton
Posts: 3,442
Thanks: 393
Thanked 888 Times in 542 Posts
|
Quote:
How bad where your rear shocks? Replaced mine and they were not as bad as fronts. but still they had leaked badly and took way too long to return to the start position. Hence giving the car a saggy behind... My rear shocks simply pushed down all the way with no resistance although they were not leaking. My front N/S has started to leak slightly. Today I removed the last lower link as I gave up on it last night. The securing stud simply would not budge as it was siezed solid in the aluminium sleeve of the bush. I had to grind the remainder of the thread and the head of the stud to force it out of the sub frame. I tell you these studs are hard, it took me all of 20 minutes with the angle grinder to get the job done. I will now have to add a new lower arm to my shopping list. I also removed the fuel tank securing bracket. I partially removed it 4 years back when I was renewing the rear brake pipes but was unable to get it off the car because of the exhaust so I cleaned it up as best I could then painted it. Rather unusual form of mounting on the fuel tank as it has 4 plastic rivets with the pop out centre button right into the base of the tank as well as the 4 mounting studs. These came off easy as I had put some copper grease on the threads last time. Last job today was a full power wash on the underside, it's amazing just how much dirt there is on top of the tank. It is sitting down on bricks about 1 inch lower than normal so this allowed me to get the power jet in. JYJ |
|
|
|
|
|
3rd May 2012, 18:04
|
#5 |
|
This is my second home
Rover less ! Join Date: Jun 2011
Location: Tarbolton
Posts: 3,442
Thanks: 393
Thanked 888 Times in 542 Posts
|
I've just checked on the sand blasting but afraid I'm still waiting, well that's boys for you. Hopefully by the time I'm back from a break in the sun the parts will all be gleaming.
I'll be back on the job soon with more updates and photos. JYJ |
|
|
|
|
3rd May 2012, 18:23
|
#6 |
|
This is my second home

rover 75 1.8 vvc club se wedgwood blue Join Date: Aug 2009
Location: Seaton Carew
Posts: 26,922
Thanks: 65
Thanked 7,142 Times in 4,642 Posts
|
Excellent work there Jim
 look forward to seeing the finished article look forward to seeing the finished article |

|
|
|
15th January 2013, 18:51
|
#7 | |
|
Posted a thing or two
Rover 75 CDT Join Date: Sep 2011
Location: Bradford
Posts: 1,478
Thanks: 1
Thanked 14 Times in 8 Posts
|
Quote:
The old hubs don't look bad but where the bottom balljoint goes must be worn.
__________________
Love is like a snowmobile, speeding across the frozen tundra. Which suddenly flips, pinning you underneath. At night the ice-weasels come... http://farm6.staticflickr.com/5331/6...77671f80_n.jpg |
|
|
|
|
|
25th February 2013, 19:03
|
#8 |
|
This is my second home
Rover less ! Join Date: Jun 2011
Location: Tarbolton
Posts: 3,442
Thanks: 393
Thanked 888 Times in 542 Posts
|
The annoying rattle seemed to be getting worse so with the fine weather at the moment, I decided to have a look.
Using a pry bar there is absolutely no movement at the ball joints so I then beefed up the pinch bolt and managed to get a fair bit on it but still the rattle goes on.  I now think It may be the anti roll bar bushes which in my wisdom I did not replace so they're on the list for next time I do a service underneath. Oh! and I eventually fitted my front brake back plates which were shipped from China. Now the bad news  I had positioned the car straight on in my driveway to allow me to jack it up on the cement area rather than the ashphalt. When I was all finished, in my haste to get ready to visit my father-in-law in hospital, I hit the button for my garage door (electric) then it came down and scored the front bumper, newly painted just last summer. This door will auto reverse if it hits a spec of dust practically but not when I attempted to hold it back by hand so I had to watch it score right down through the bumper. With the weather keeping up I am now preparing the V6 for MOT and have the front end stripped to fit the new brake back plates to it as well. JYJ |
|
|
|
|
25th February 2013, 19:36
|
#9 | |
|
Premium Trader

Rover 75 Join Date: Nov 2010
Location: Devon
Posts: 33,774
Thanks: 8,837
Thanked 14,831 Times in 8,030 Posts
|
Quote:
Oh dear, not good at all, although im sure you will have her back to her best soon.
__________________
Lest we forget..
|
|
|
|
|
|
25th February 2013, 20:03
|
#10 | |
|
This is my second home
Rover less ! Join Date: Jun 2011
Location: Tarbolton
Posts: 3,442
Thanks: 393
Thanked 888 Times in 542 Posts
|
Quote:
Forgot to mention, I was visiting an old friend today who had one of the first 75's. A couple of years back he gave me the leatherette service document holder he had held onto. Today he gave me some of the early publications he had in his office. They include a colour guide and price list and are all dated from 1999 Publication numbers are : 5645, (colour guide) 5646, (Design your own Rover 75) 5647 Seventy Five) and 5702 (price list They will be a nice touch to add to my display. He also tells me he still has his Alpine CD stacker but I've already got one in both my 75's JYJ |
|
|
|
|
 |
|
|


 Hybrid Mode
