

|
||
|
|
||
|
|
||
|
|
#21 | |
|
This is my second home
Hyundai i10 998cc Join Date: Mar 2012
Location: Kilmarnock
Posts: 6,602
Thanks: 2,088
Thanked 2,298 Times in 1,349 Posts
|
Quote:
Yes I agree, I will be changing the main belt, Idler & tensioner at least. Once dismantled I can assess if any other parts would be needed, as I said in one of my previous posts its just over two years and under 3,000 miles since the job was done (Timing Belts "R" us in Leicester) so I'm hoping for a straight forward job.
__________________
Cheers from Trevor  MM0KJJ |
|
|
|

|
|
|
#22 | |
|
Banned
MG ZT V6 190+ Join Date: Sep 2008
Location: Leeds
Posts: 33,223
Thanks: 41
Thanked 1,614 Times in 1,416 Posts
|
Quote:
Some great images on this thread, a picture says a thousand words. |
|
|
|

|
|
|
#23 | |
|
Posted a thing or two
Rover 75 Connie SE Tourer Triumph Street Triple R Join Date: Aug 2009
Location: Bletchley, Milton Keynes
Posts: 1,163
Thanks: 75
Thanked 91 Times in 65 Posts
|
Quote:
Nevertheless the car was fixed, re-belted, re-valed, re-w/pumped, and all necessary bits and bobs,,,, why???? Cos he loves his Mota!!!!! 
__________________
Real walnut interior. Original refurbished Forked Spokes 16” with Michelin Primacy 4 rubber, Pioneer AVH-Z9200DAB double din Wi Fi phone integration. Retrofitted twin front horns. 160 re-map. Revotec fan. Silicone intercooler hoses and ‘O ring’ replacement. Top hose thermostat. New walnut and smokestone steering wheel with cruise upgrade. Brembo Brakes. Ceramic coated rear Exhaust. L/engine mount, Hydramount, Bosch MAF. Focal Access Drivers and Focal Amp. |
|
|
|

|
|
|
#24 |
|
Posted a thing or two
Rover 75 2.0 V6 Auto Join Date: May 2011
Location: Sandnes - Norway
Posts: 1,560
Thanks: 64
Thanked 283 Times in 174 Posts
|
Hi all,
I have had a few hours more out in the garage, and its time for an update: I continued from where I left the last session with removing the alternator, PAS pump and oil dipstick. Then loosen the oil cooler to gain access to the AC compressor bolts. I removed the two AC compressor bolts in the front, but left the rear one alone as I found it hard to reach. Then I removed the engine front plate and the front timing belt was then fully revealed: 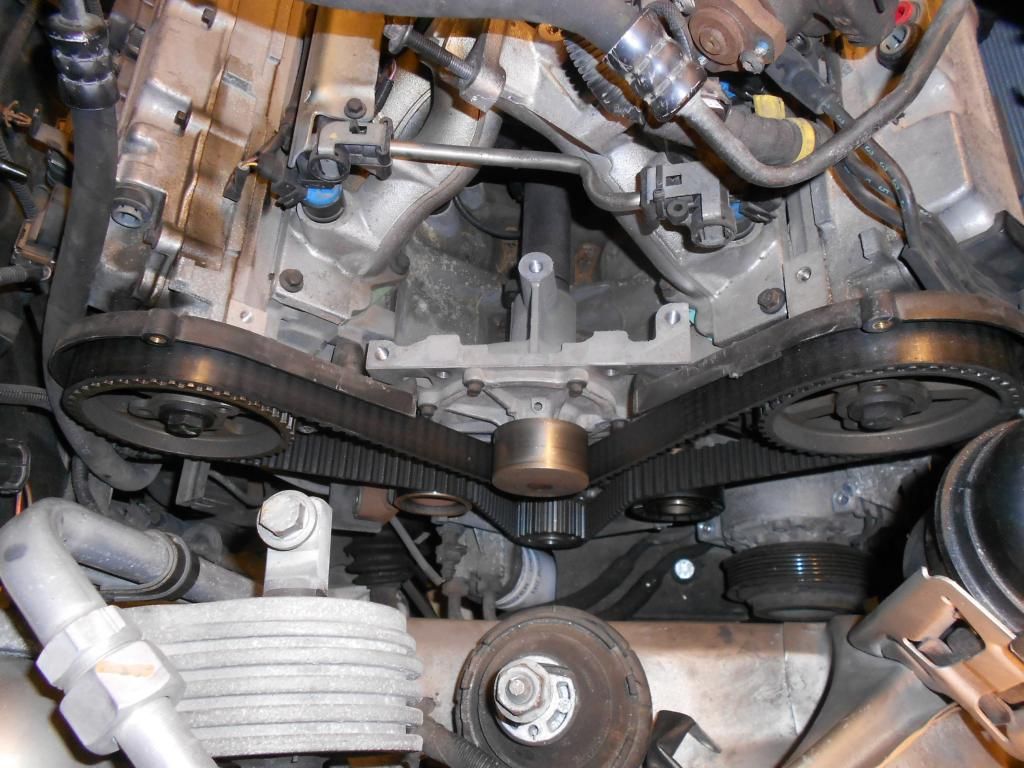 Then I made timing marks across the rear belt covers and their pulleys according to the haynes manual. I also checked that the engine was parked in the "safe position" while doing this: 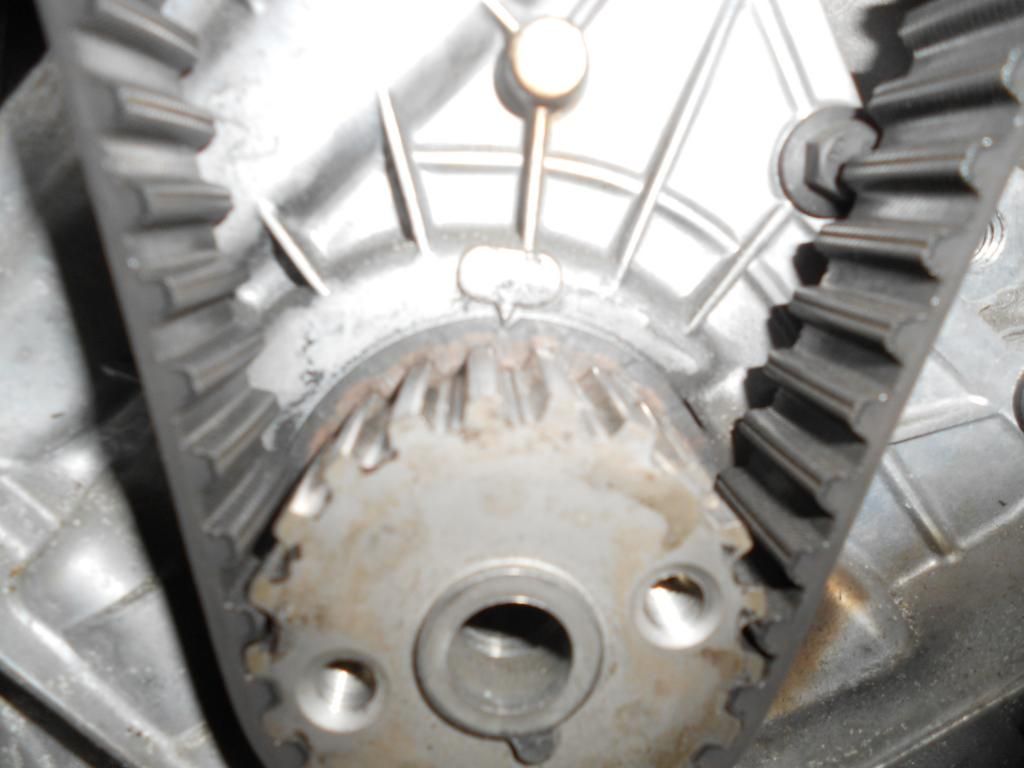 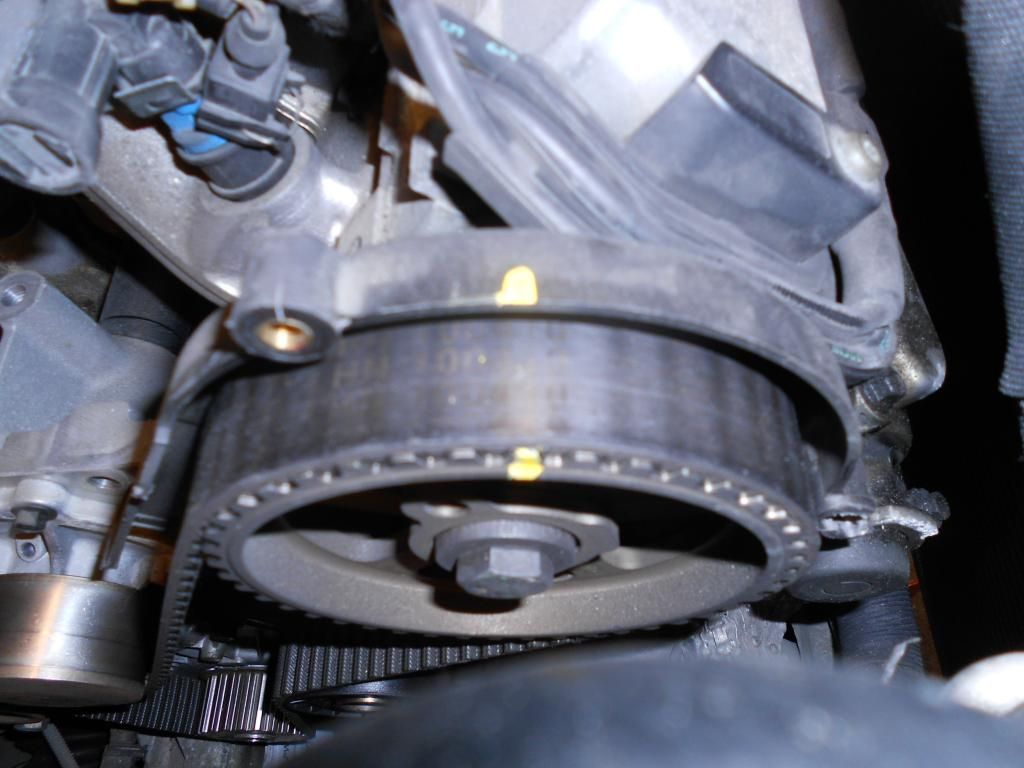 Cambelt + tensioner, tensioner pulley, idler pulley and water pump was then removed: 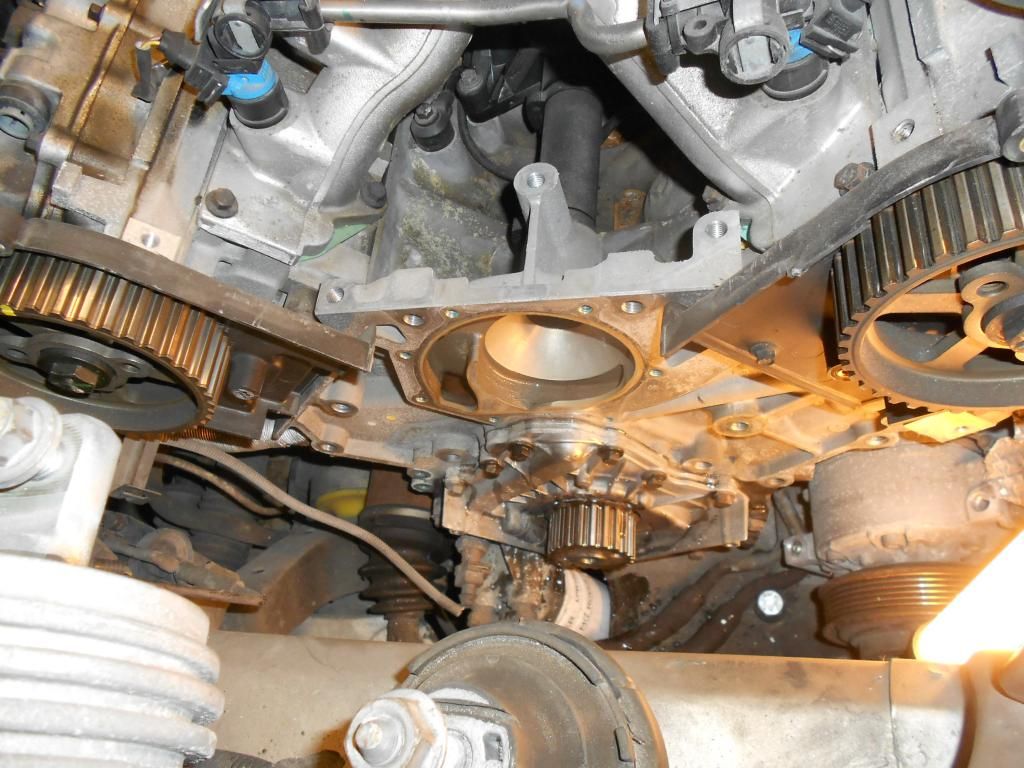 The cam pulleys did rotate slightly inwards when the cambelt was removed and needs to be rotated back into position when the new cambelt is fitted. To my big surprise, I found a damaged area in the cambelt   : :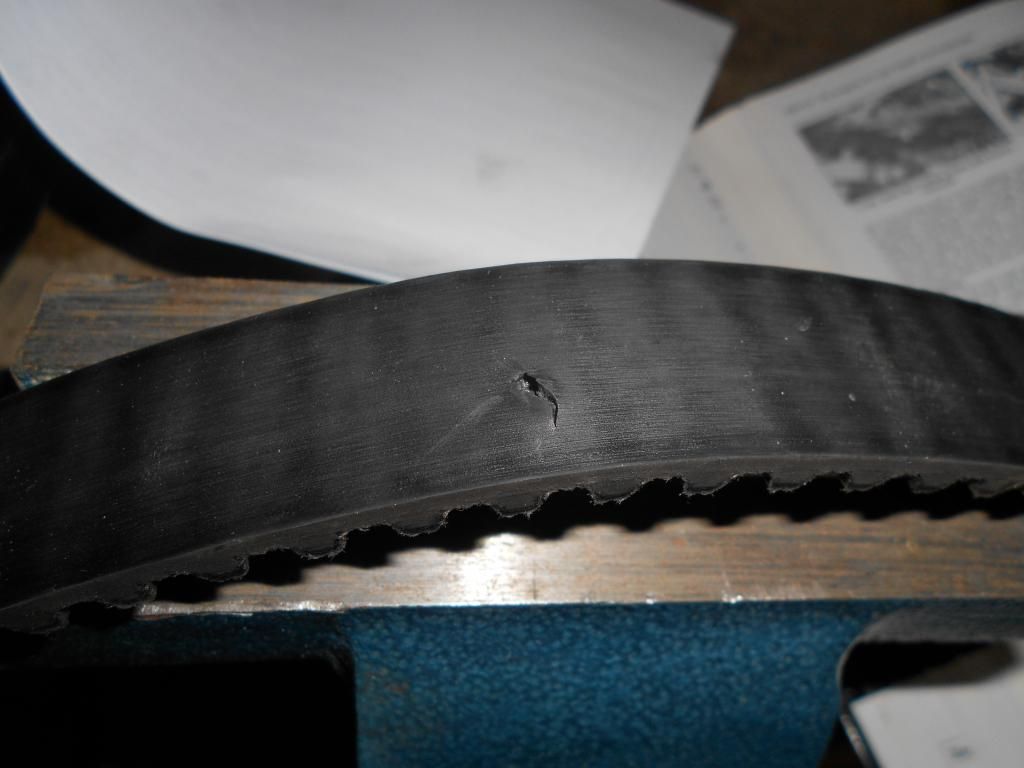 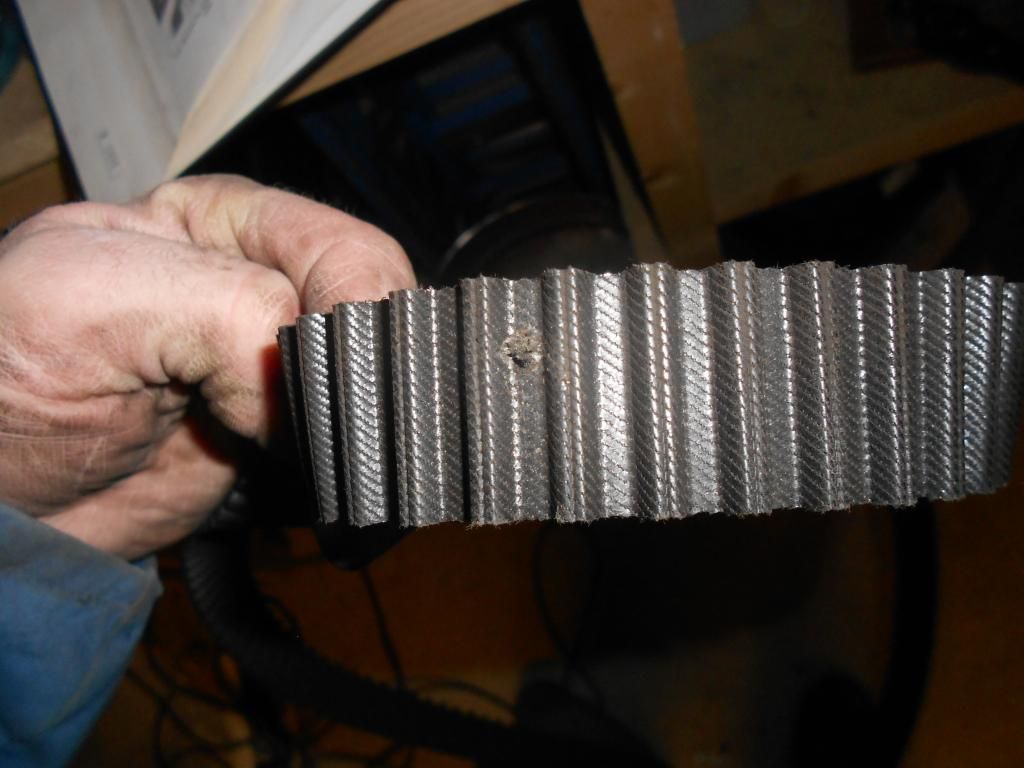 On closer inspection, I found a stone chip inside the damaged area. I also found some stone chips resting below the crankshaft pulley which has at some point found their way inside the cambelt covers. Old and new waterpump: 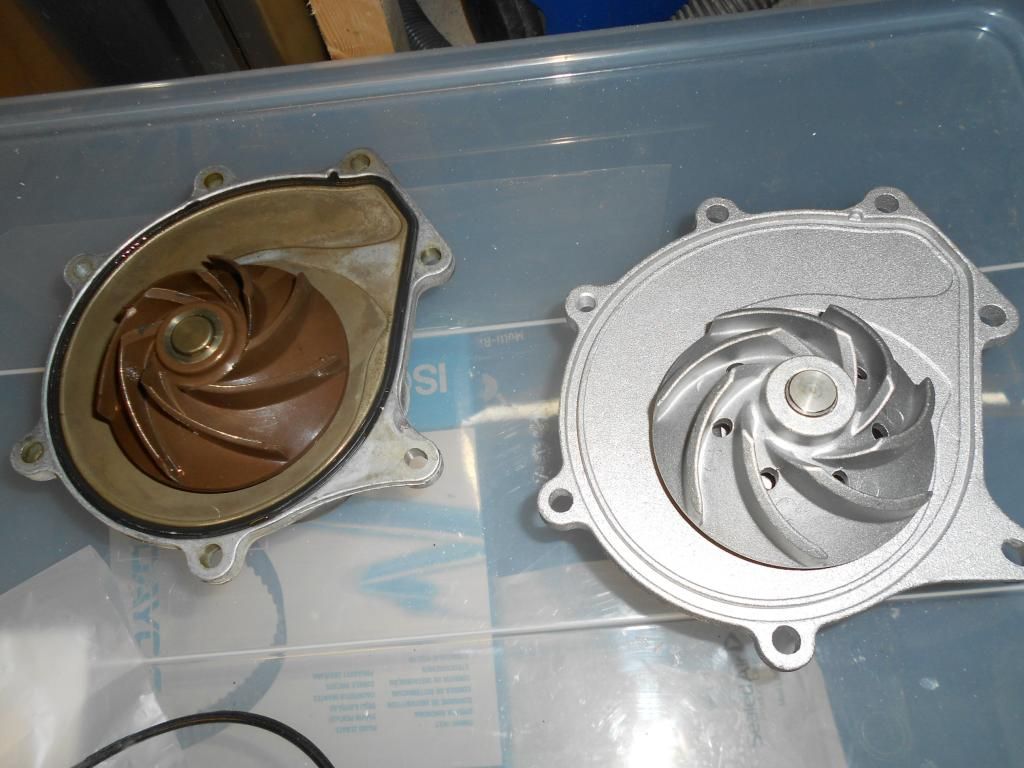 Old one has a plastic impeller, and the new one a metal one. The casting on the OEM pump is a level smoother than the replacement and that one has been in there since the car was new. Its casting was marked with a production date from -99. The seal surface on the block was cleaned with some grit 400 wet-n-dry paper and wiped dry before the new pump was fitted together with a new seal to the block. I added a drop of loctite 243 to its bolts before mounting and torqued them up to 10Nm as specified. The new idler pulley and tensioner pulled was mounted to the block. I also added a drop of loctite 243 to their threads prior to installation and torqued up their bolts to 45Nm as specified by the Haynes manual. The tensioner damper was compressed and locked in its initial position with a 1,5mm drill bit, as per the manual, now ready for installation. A new timing belt was put in place. I used a piece of rubber hose under the crankshaft pulley to keep it in place while routing the belt into position: 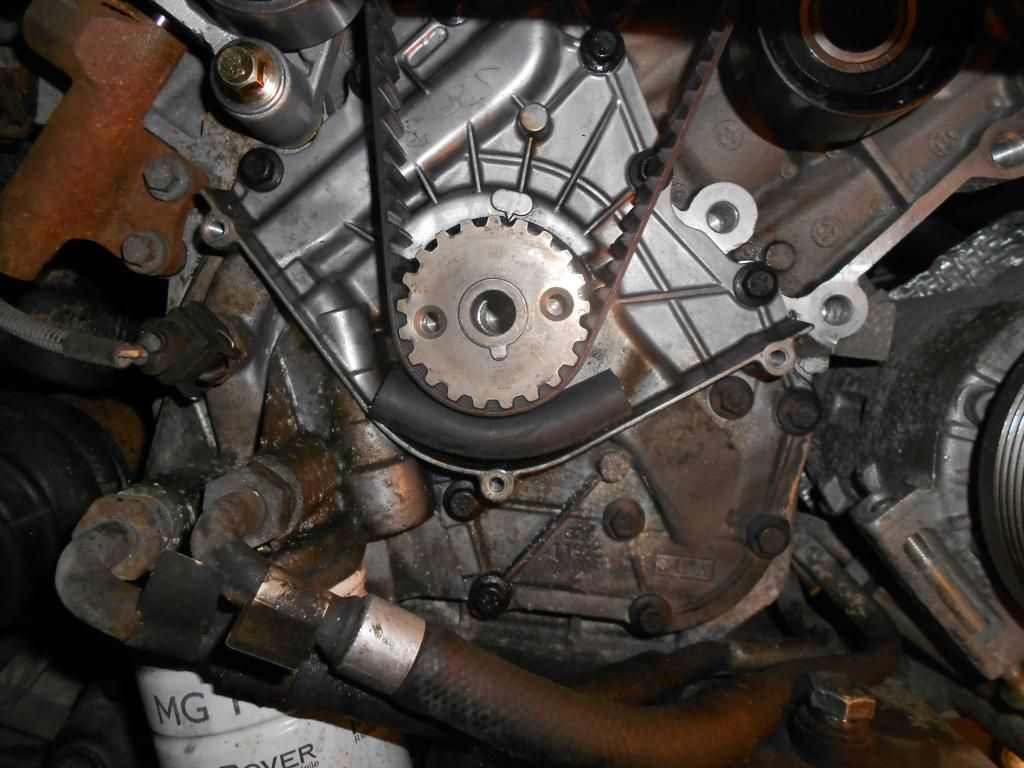 Starting at the cranckshaft puley the belt was routed around the idler pulley, then over the front inlet camshaft pulley which was held in the correct positon with a spanner, then around the water pump, then around the rear inlet camshaft pulley which was held in position with my sprocket tool and at last around the tensioner pulley. Tension was applied to the belt with the appropriate tooling in the hexagon slot in the tensioner pulley while installing the tensioner damper onto the block. Loctite 243 was added to the tensioner damper bolts prior to installation and torqued according to specifications: 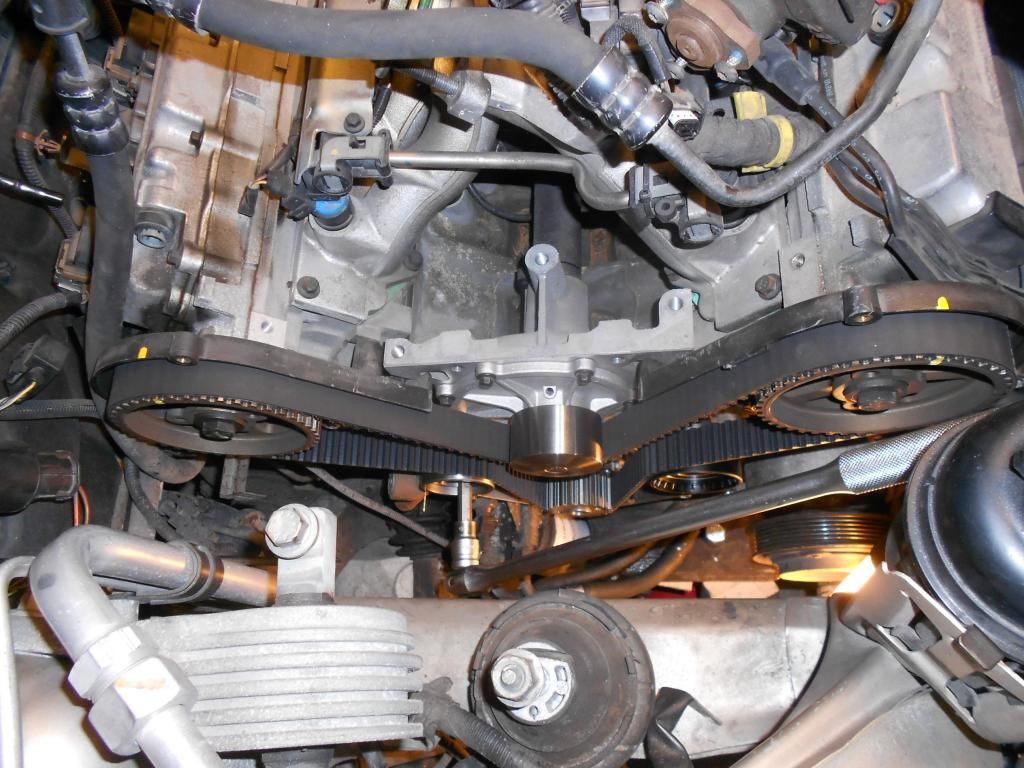 !!! AND NOW A WORD OF WARNING !!! The tensioner pulley needs now to be adjusted and locked in position!! This procedure is not described in either the haynes manual, the RAVE manual or the famous video on youtube!! I found this procedure in the enclosed document which came together with the new pulley. I was not aware of this procedure until I saw this document and would probably just fit the tensioner pulley "as-is". Many thanks to DMGRS Mat for this document  I have attached this document to this thread and will not go into more details about it here. I have attached this document to this thread and will not go into more details about it here.Another great thread explains this here: http://forums.mg-rover.org/showthrea...32#post2934932 So basically, there may be some KV6 engines out there running with the adjustment bolt for the tensioner pulley only temporary fixed at 10 Nm and with the wrong adjustment!!! I think that migth have been the case here also as I accidentially put my allen key into the adjustment fixing bolt in the tensioner pulley intead of the hexagon slot when turning the tensioner clockwise to release it from the tensioner damper. I am pretty sure I rotated the bolt some at that stage, confirming that the bolt was not properly made up!! Grrrr.... Bloddy LR garage that did the last TB change.... I will check that pulley bolt closer next time I am out in the garage!! So then, before starting to put things back on and closing of the front end, the checklist should be as follows: - Tripple check the timing marks. - All bolts on water pump, pulleys and tensioner damper torqued to their specifed torque and loctite added to the specific threads. - Tensioner pulley correctly adjusted and fixed with correct torque according to procedure. The lock pin in the tensioner damper shall be easily moved when the tension is correct. - Lock pin removed from tensioner damper. Then most things are reverse of removal. Its a good idea to fit a new AUX belt in the same operation and check its pulleys: 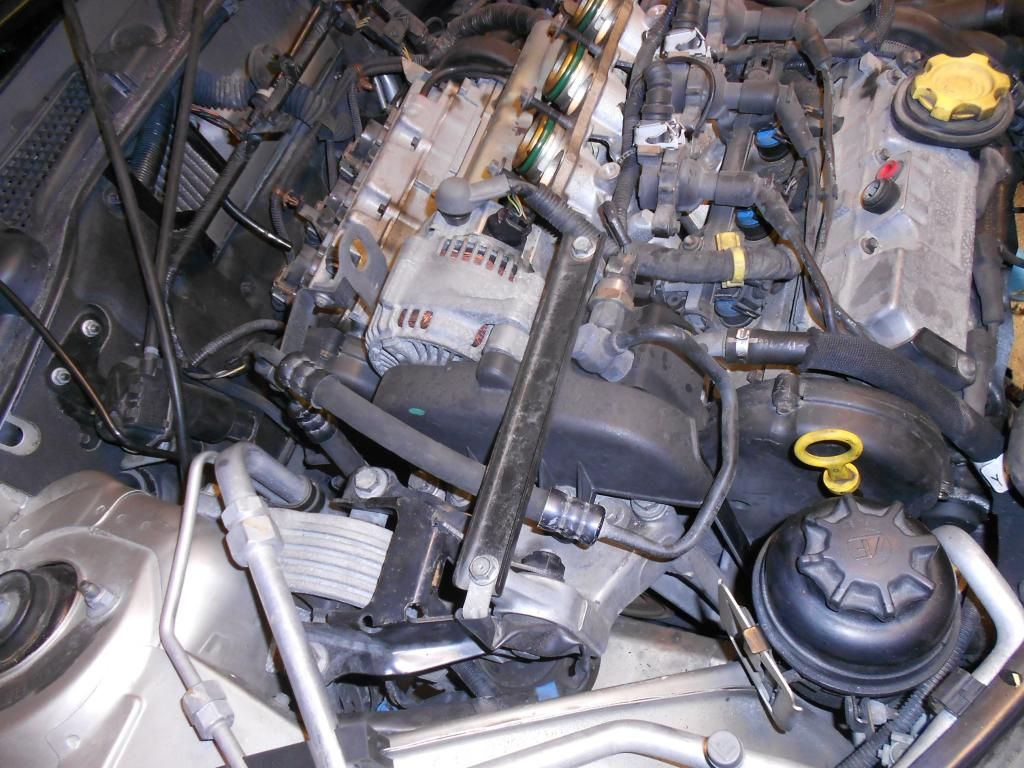 Remember to remove the crankshaft lock pin and tighten the crankshaft pulley to 160Nm using appropriate tooling: 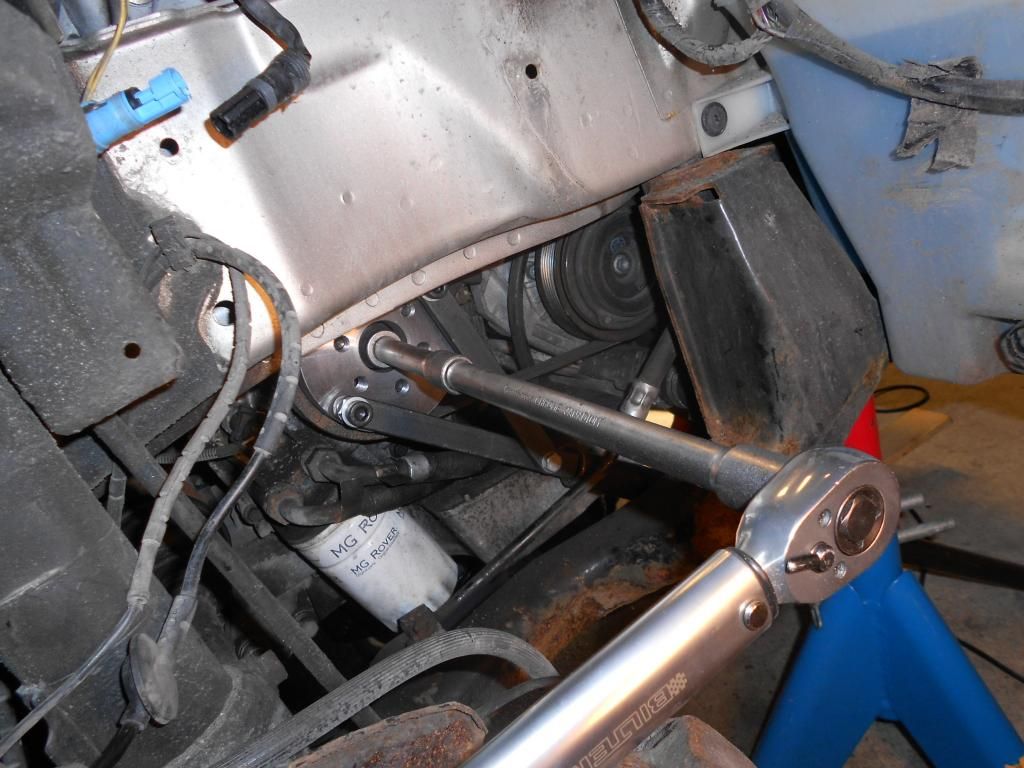 So far, so good. I am very satisfied with the work done so far  Last edited by beinet1; 16th January 2018 at 18:49.. |
|
|

|
|
|
#25 |
|
Doesn't do things by halves
Rover 75 2.5 Connoisseur Auto (1999) Dealer launch model. Join Date: Mar 2007
Location: Former Middlesex
Posts: 20,380
Thanks: 1,587
Thanked 3,749 Times in 3,181 Posts
|
Einar,
You mentioned that the original water pump had a plastic impeller. Did it look worn, or was there play in the shaft? How many kilometres has the engine covered with this pump? Simon
__________________
"Whatever is rightly done, however humble, is noble." Sir Henry Royce. |
|
|

|
|
|
#26 |
|
Discount MG Rover Spares
Rover 75 CDTi, 2x MG ZS180 Join Date: Jun 2011
Location: Hythe, Southampton
Posts: 11,320
Thanks: 456
Thanked 3,377 Times in 2,027 Posts
|
You should have seen my face when I saw the picture of the damaged cambelt - it even came with an obligatory 'ooooo'.
 I bet you're glad you did the job when you did! Excellent thread and pictures by the way, keep up the good work.
__________________
 Your trusted MG Rover specialist! Tel: 02380 001133 / Email: [email protected] We now have a 'chat' function on our site for even quicker replies. Give it a try! Remember - discount code FORUM5 for 5% off  |
|
|

|
|
|
#27 |
|
Regular poster
MG ZT-T Join Date: Nov 2014
Location: Luton
Posts: 57
Thanks: 0
Thanked 3 Times in 3 Posts
|
A very good and informative guide particularly with the photos.
Its put me in the frame of mind to do my 190 cambelt now, come the better weather. I was going to get a trader to do it after reading the Haynes guide and other forums saying its a mechanic only job. Looks quite straight forward now to be honest as long as all the timing marks are kept secure. I've done a few cam belts on other cars but they were much easier to strip down, it was the amount of prep work which initially put me off and the mention of the Rover locking tools which I've since heard are a waste of money. Out of interest, what did you use as the crankshaft locking pin ? Rover MG mention a specific pin which appears stepped in its construction, or will a suitable sized allen key or bolt fit ? Also where did you get the cam belt kit from or did you buy it all separate? ( I know your title says your in Norway but did you order from a UK specialist ?) Oz. Last edited by ozfish1969; 13th January 2015 at 18:04.. |
|
|

|
|
|
#28 | |
|
Doesn't do things by halves
Rover 75 2.5 Connoisseur Auto (1999) Dealer launch model. Join Date: Mar 2007
Location: Former Middlesex
Posts: 20,380
Thanks: 1,587
Thanked 3,749 Times in 3,181 Posts
|
Answer here:
Quote:
Simon
__________________
"Whatever is rightly done, however humble, is noble." Sir Henry Royce. |
|
|
|

|
|
|
#29 |
|
Regular poster
MG ZT-T Join Date: Nov 2014
Location: Luton
Posts: 57
Thanks: 0
Thanked 3 Times in 3 Posts
|
Well spotted that man!!
I should of looked myself for the answers, trouble is I read the first instalment a few days ago and the latest update today. At my age the first instalment has 'slipped' from my memory already  . .Only thing I don't have a lathe to make such a bolt, at least I know the size now for the locking bolt so will find something similar. Thanks. Last edited by ozfish1969; 13th January 2015 at 18:33.. |
|
|

|
|
|
#30 | |
|
same car since 2005
2001 Rover 75 2.0 v6 Connoisseur Saloon Join Date: Nov 2006
Location: Ellesmere Port , Cheshire
Posts: 3,811
Thanks: 379
Thanked 549 Times in 466 Posts
|
Quote:
 As with most special tools it is difficult to justify the cost for a one-off job , but if you do have them they are invariably a joy to use ! As with most special tools it is difficult to justify the cost for a one-off job , but if you do have them they are invariably a joy to use ! 
__________________
 Who said it was simples ? Who said it was simples ?
|
|
|
|

|
 |
|
|