
|
|
|
|
|
|
||
|
|
||
 30th October 2014, 19:08
|
#1 |
|
Loves to post
Facelift Rover 75 Classic CDT auto and Connoisseur SE 1.8T Join Date: Jun 2014
Location: Ferryhill
Posts: 399
Thanks: 113
Thanked 110 Times in 83 Posts
|
Buying the car
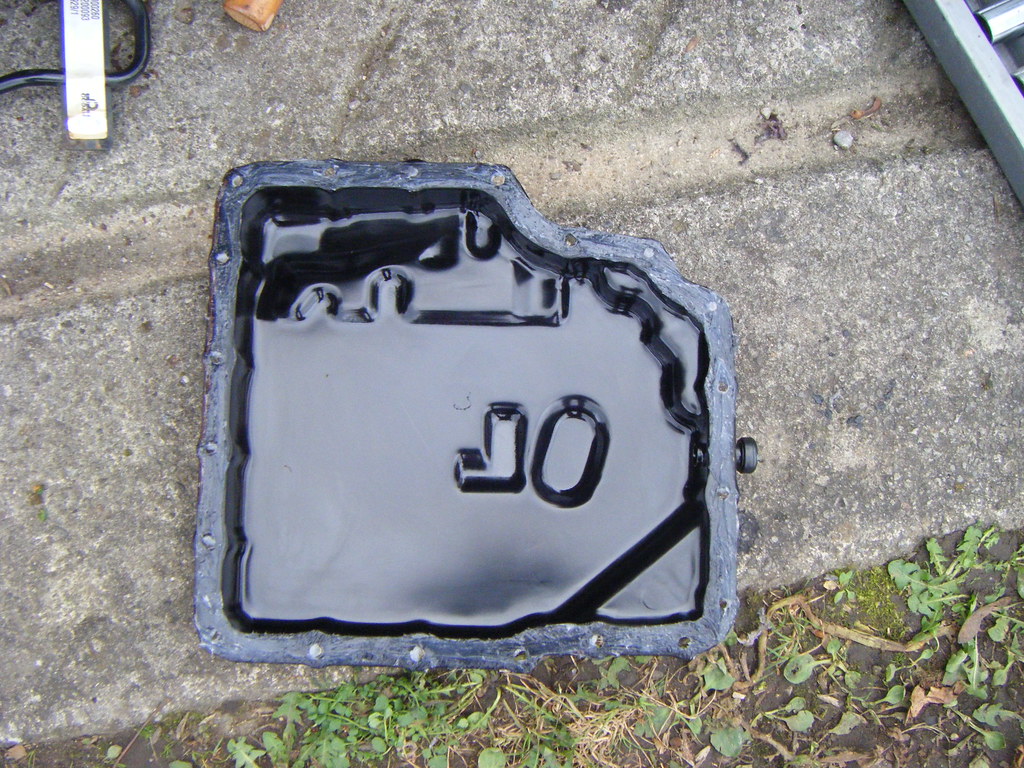
I saw a Rover 75 Classic CDT automatic on eBay and was unsuccessful at biding so I thought no more about it until the following day when the seller offered it to me because the original buyer was unresponsive. I went to inspect the car and paid for it. I bought the car from the town where my partners mother lives so I got the seller to drive it round and park it on her drive and went back a week later having sorted out insurance, etc. I bought it, knowing that it had a fault with the auto transmission. However, from a bit of reading, I was fairly confident that I would be able to fix it. The previous owner had replaced the lower engine mount. I found the procedure for a complete change of fluids, so we did that on my partners mothers driveway. (The excellent how to is at http://www.the75andztclub.co.uk/foru...d.php?t=124816). Briefly, for those that dont know, you drain the fluid from the drain plug, refit the plug and then add some new fluid. I ran the engine for 15 seconds with the oil cooler disconnected to flush the last of the fluid out, then reconnected it and refilled with new fluid then ensured the levels were correct. The old ATF was very dirty, rusty coloured, and had numerous disconcerting small black bits in suspension. It was clearly long overdue a change. Despite the fluid transfusion, when I drove the car for the first time, the gearbox was still jerky so I have been driving like an old granny to nurse it through the low gears. Apart from the gearbox fault, the car is fantastic. It is very refined on the motorway and makes for relaxed long distance cruising. I like the leather and walnut and it feels like a quality car. This is going to be my everyday car and my aim is to have a quiet comfortable car for my daily 45-minute commute to work and for longer runs on the motorway. |

|

|
|
30th October 2014, 19:12
|
#2 |
|
Loves to post
Facelift Rover 75 Classic CDT auto and Connoisseur SE 1.8T Join Date: Jun 2014
Location: Ferryhill
Posts: 399
Thanks: 113
Thanked 110 Times in 83 Posts
|
My priority was getting the car through its MOT as it only had a few days left. I took it to the council depot at Billingham. (TIP: the council MOT centres have no vested interest in finding a fault with your car so offer a fair test. In the past Im sure I have been ripped off by garages who find all sorts of unnecessary work to do. There is some good info and links to the centres on Martin Lewiss Money Saving Expert site). It needed a new track rod end and a new exhaust back box. I fitted the track rod end, which was straightforward enough after releasing the nut with a butane torch. I did not fancy cutting the old exhaust and fitting up the new one I got from the local motor factor, so my local garage fitted it for £40. (The exhaust is an ugly one that must be for a tourer as it is too long, so it will go to be replaced by stainless at some time). Before going for the re-test, I fitted four new tyres. (I went for Dunlop SP Sport BluResponse 195 65 r15 v load 91 which are rated B fuel efficiency, A wet braking and 68 db noise level) and had a full 4 wheel alignment. It passed the re-test OK and the nice people there did not charge me for it. The new tyres are very quiet.
|
|
|
|
|
30th October 2014, 19:17
|
#3 |
|
Loves to post
Facelift Rover 75 Classic CDT auto and Connoisseur SE 1.8T Join Date: Jun 2014
Location: Ferryhill
Posts: 399
Thanks: 113
Thanked 110 Times in 83 Posts
|
I have bought a Rover 75 1.8t Connoisseur in exactly the same colour. This is going to be more of a project as it has the all too predictable head gasket failure. Someone has bodged one of the coolant hoses as it is barely hanging on, so when I tried to top up the coolant level, it all flowed out on the ground. I bought this initially as a spares care to upgrade my Classic, but it seems a sound car so I will strip the engine to investigate if I can bring it back to life. In the meantime, I may well take advantage of the similar colour panels and fit the front bumper to my Classic as it has a few battle scars from poor parking. This will minimise its time off road as it is my only transport at the moment.
This 1.8t project will have to take a back seat until my automatic is fixed. |
|
|
|
|
30th October 2014, 19:20
|
#4 |
|
Loves to post
Facelift Rover 75 Classic CDT auto and Connoisseur SE 1.8T Join Date: Jun 2014
Location: Ferryhill
Posts: 399
Thanks: 113
Thanked 110 Times in 83 Posts
|
On Sunday 12th of October I went to Trikey’s third meet in Hull. This was my fist club meet and I found everyone I met to be very friendly and supportive. There were some tremendously knowledgeable guys there, including ex-employees of MG rover. I paid Andy for a service and was taken through the process step by step so I can do it myself next time. We fitted a new PCV, new fuel filter, new oil filter and changed the oil.
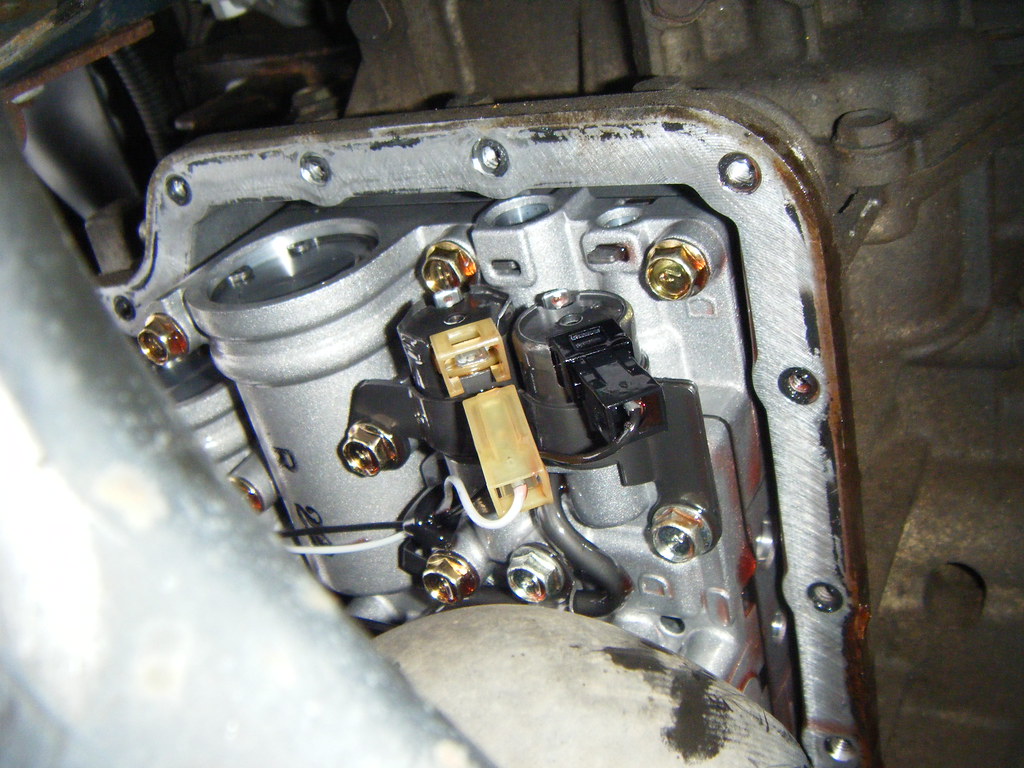
Someone asked me where the temperature gauge was sitting and I replied that it barely rose at all – never getting beyond the eight o clock position. He said that meant that the thermostat was kaput and replacing the original was a PITA, so I should fit a Renault one in the top pipe. Marina Brian is a wizard as he read my ECU, with the full diagnostic malarkey then proceeded to wipe it and re-write it as it was set wrong from the factory. Before the meet, I had diagnosed that the 2-4 brake duty solenoid in the auto box was faulty – from reading reports from others with exactly my symptoms and already had a new one in a jiffy bag ready to fit. I had borrowed my neighbours fault code reader but because my ECU was faulty it was not logging any fault data. Once the ECU was ‘awake’ after Brian’s surgery it reported the solenoid was faulty. Fitting a functioning solenoid was clearly a priority now. Last edited by good_mojo; 30th October 2014 at 19:41.. |
|
|
|
|
30th October 2014, 19:32
|
#5 |
|
I believe i can fly
MG ZT-T Join Date: Feb 2014
Location: Wolverhampton
Posts: 2,004
Thanks: 66
Thanked 280 Times in 251 Posts
|
Welcome and enjoy your new car
|
|
|
|
|
30th October 2014, 19:40
|
#6 |
|
Loves to post
Facelift Rover 75 Classic CDT auto and Connoisseur SE 1.8T Join Date: Jun 2014
Location: Ferryhill
Posts: 399
Thanks: 113
Thanked 110 Times in 83 Posts
|
I decided to minimise the amount of dismantling and take of the front in as few pieces as possible. I read the how to at http://www.the75andztclub.co.uk/foru...17&postcount=1
Then I set to: Raise car at front on axle stands (to minimise the amount of fluid lost from the transmission) Remove engine top cover Remove screw (Philips) from intake snorkel to manifold Remove 10mm bolts from slam panel to each wing Remover 10 mm screws from top under each wheel arch Place protective tape on wings and pop bumper out from side of wings Remove 10mm bolt from front of fuse box Remove 9 x 10 mm bolts across top of bumper (leave middle one till last) Disconnect wiring Get assistance to remove bumper (this is a two person job to avoid damage to car or bumper) Remove 8 x crash bar main bolts (leave slam panel attached) Unclip headlamp wires Slide black clip to separate and detach metal pipe Release bonnet release cable from divider block Remove steering pump cooler bolts Remove retaining pin to temperature sender wiring and separate There are t-25 splined fixings holding the radiator these were seized solid so push the soft rubber like fixings through the large holes instead |
|
|
|
|
30th October 2014, 20:11
|
#7 |
|
Loves to post
Facelift Rover 75 Classic CDT auto and Connoisseur SE 1.8T Join Date: Jun 2014
Location: Ferryhill
Posts: 399
Thanks: 113
Thanked 110 Times in 83 Posts
|
My primary objective was to fix the transmission issue. However, as usual, there were several other things that cropped up along the way...
This is what I did: EGR
Picture of EGR 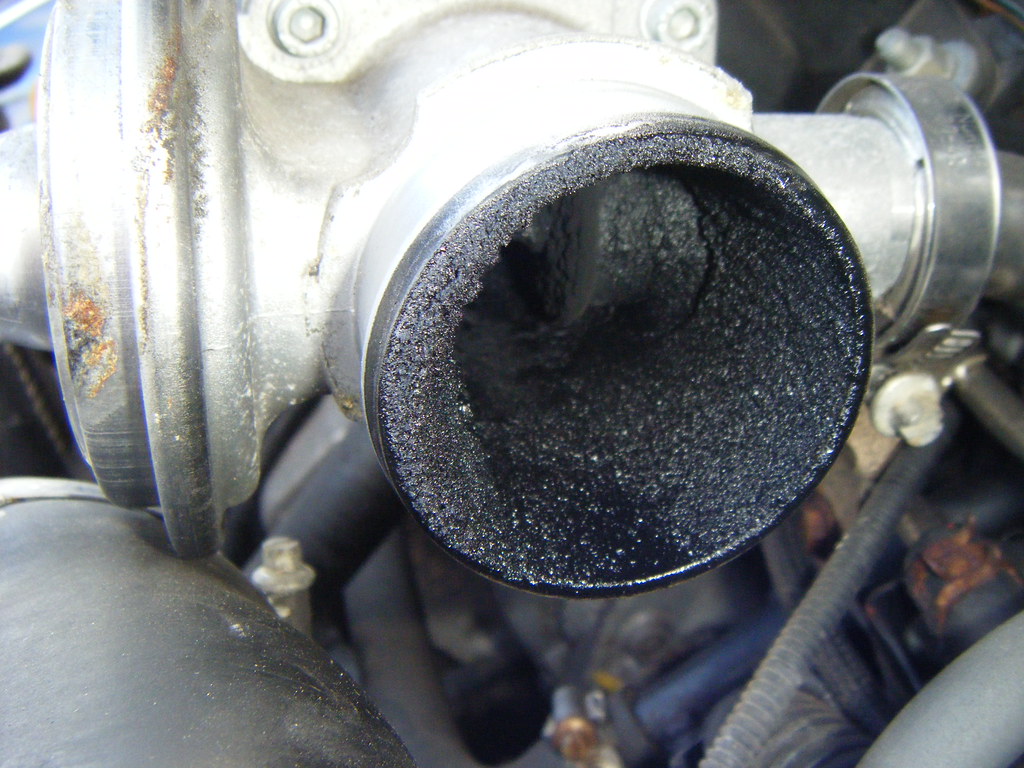 Inlet manifold
picture of inlet manifold removed 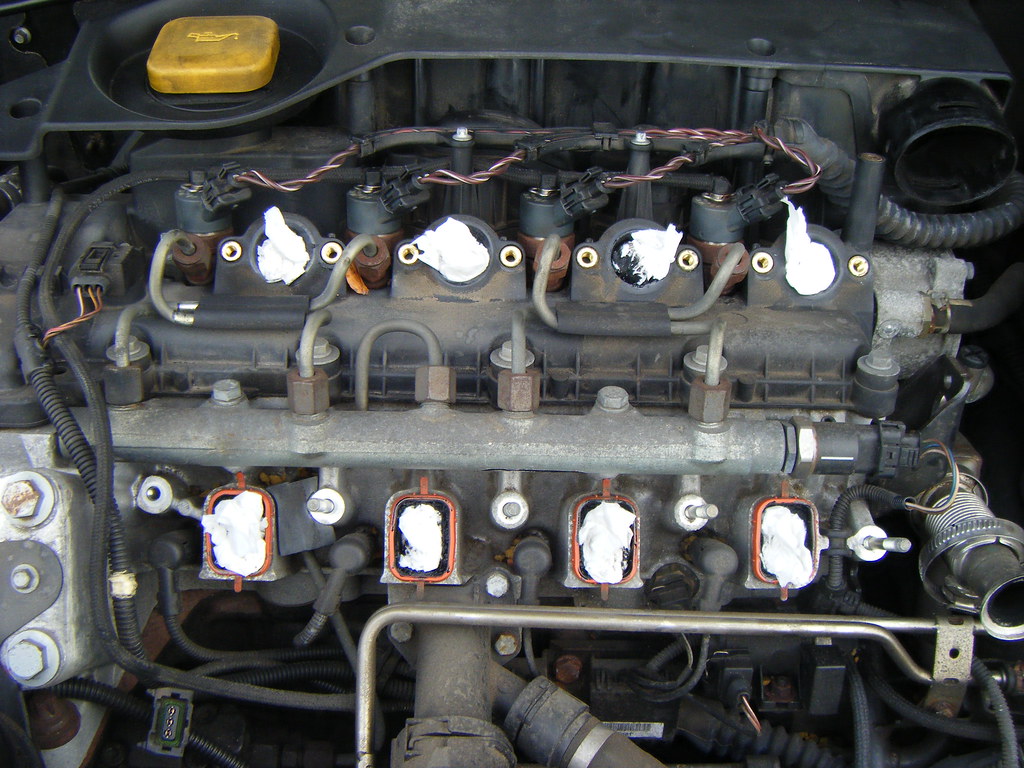 Auto box
Inlet manifold reprise My inlet manifold was badly choked 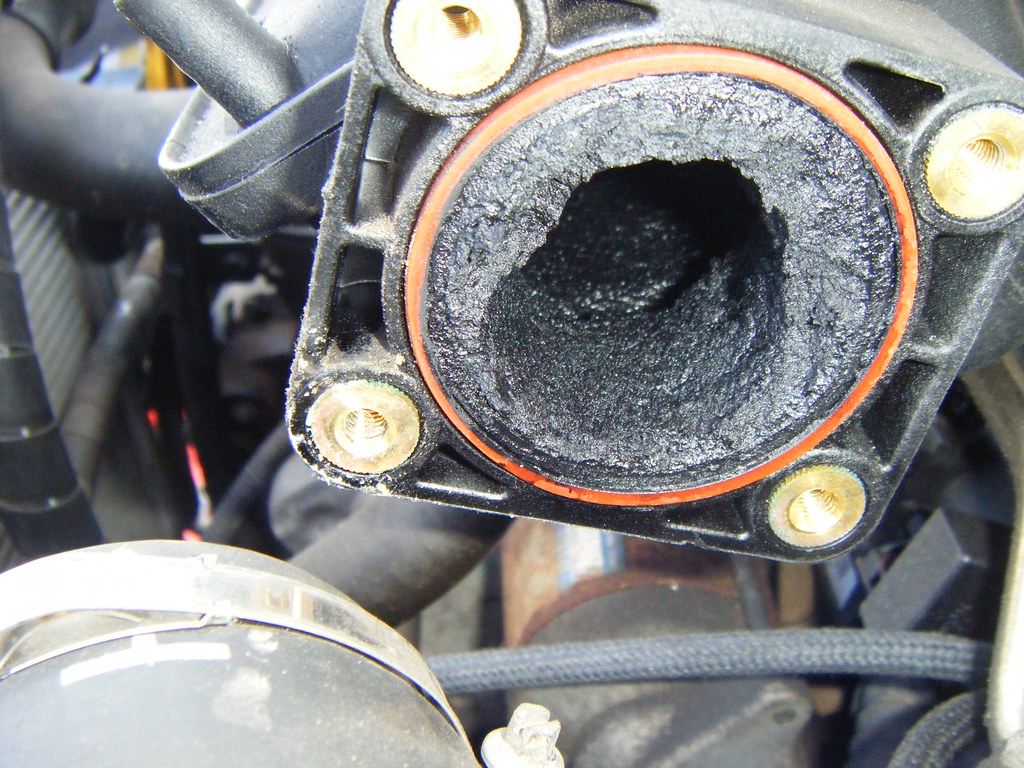 with a horrible black sludge. I collected all the o-rings and put them to one side then sprayed a can of foaming oven cleaner into it and left it overnight. The following morning I pressure washed it out, though there was still a huge amount of gunge left. I shook it dry and reapplied another ½ can of cleaner and worked this around with a bottle brush, before re-jetting with the pressure washer. Then used the remainder of the can and repeated… Eventually I managed to clear the sludge. If you are going to do this, ensure you are suited and booted! Oven cleaner itself is highly caustic and the black gunge is NASTY. I had gloves, protective goggles, boiler suit, rigger boots and an old coat on. I got very filthy as did the surrounding area. This is not something I ever want to do again, so hopefully the EGR bypass will prevent the sooty gunge build up from re-occurring. I wish I had weighed the manifold before and after cleaning. Carbon is one of the lightest elements, yet there was so much of it, that the manifold seems to be considerably less heavy now it has all gone. At the cylinder head, where the manifold meets up was similarly gunged, so I sprayed carb cleaner in to try to shift the worst of it. Hopefully, a motorway run will deal with anything stuck by the valves. I cleaned the MAP sensor with carb cleaner and re-fitted it along with all the o-rings. Once dry, I refitted the manifold and intercooler pipes, with the EGR bypass. 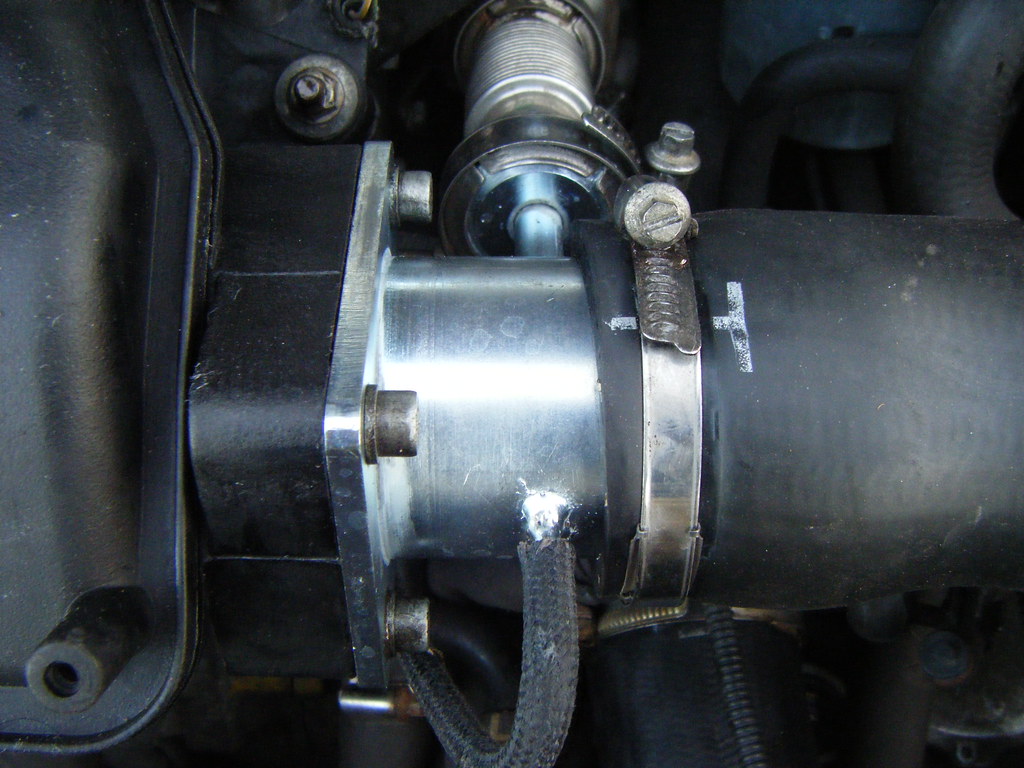 I ordered my stainless steel EGR bypass from DMGRS late in the afternoon and it arrived next morning. (What a fantastic service). I fitted a K&N air filter and ensured all the engine orifices were closed before moving to the next stage, reconditioning the cooling system. Fit Renault thermostat
Refit slam panel assembly and bumper With my able assistant, we reconnected the steering pump cooler, and all the electrics, then refitted the slam panel assembly. I held the crash bar up as high as possible while it was bolted on. We then bolted on the bumper, taking care to connect the wiring first. Checks After I fitted the engine top cover, I checked that all the lights work as they should and then fired up the engine. It was reluctant to start at first then produced an enormous cloud of smoke, before settling down to idle. This must be the initial clearing of the crud that I dislodged with the carb cleaner. I will take it for a run up the motorway tomorrow to ensure it gets a good chance to clear everything properly. Last edited by Dragrad; 26th November 2014 at 23:23.. Reason: Pics added ;-) |
|
|
|
|
30th October 2014, 20:20
|
#8 |
|
Moderator / RS North East

MG ZT T 180,MGF Freestyle, Jaguar XKR Convertible and XF Join Date: Jan 2008
Location: Newton Aycliffe
Posts: 6,397
Thanks: 1,329
Thanked 2,231 Times in 1,309 Posts
|
Scott
Glad to see you are getting it sorted, and will be an excellent car which will give you many years of service, much better than that golf thing you had, I told you many years ago whilst at work, that these cars are very unrated by the general public, until you drive one, and then your opinions do change, nice to have you on board, and hope that you will join us at the many meets we have in the North East See you soon Stu |
|
|
|
|
30th October 2014, 20:22
|
#9 |
|
This is my second home
None Join Date: Feb 2013
Location: None
Posts: 5,556
Thanks: 465
Thanked 1,161 Times in 924 Posts
|
Blimey, were there any tea breaks? I wish you well with your project(s)
 |
|
|
|
|
30th October 2014, 20:32
|
#10 |
|
Discount MG Rover Spares

Rover 75 CDTi, 2x MG ZS180 Join Date: Jun 2011
Location: Hythe, Southampton
Posts: 11,320
Thanks: 456
Thanked 3,377 Times in 2,027 Posts
|
I also had the solenoid issue - a new one sorted it out too. Not a bad job, and nice to have smooth changes back!
__________________
 Your trusted MG Rover specialist! Tel: 02380 001133 / Email: [email protected] We now have a 'chat' function on our site for even quicker replies. Give it a try! Remember - discount code FORUM5 for 5% off |
|
|
|
 |
|
|


 #
# Linear Mode

