
|
|
|
|
|
|
||
|
|
||
 28th September 2016, 20:32
|
#191 |
|
Posted a thing or two
MG ZT 190 + and MKIV Supra Join Date: Jan 2009
Location: Plymouth
Posts: 1,551
Thanks: 224
Thanked 493 Times in 359 Posts
|
I have managed to do a few things over the last couple of days:-
1. The tins have been sprayed 2. Rear brakes and hubs stripped down ready for rebuild Firstly the tins were primed with red oxide ready for the top coat (which is drying as we speak  ) ) Fuel tank frame 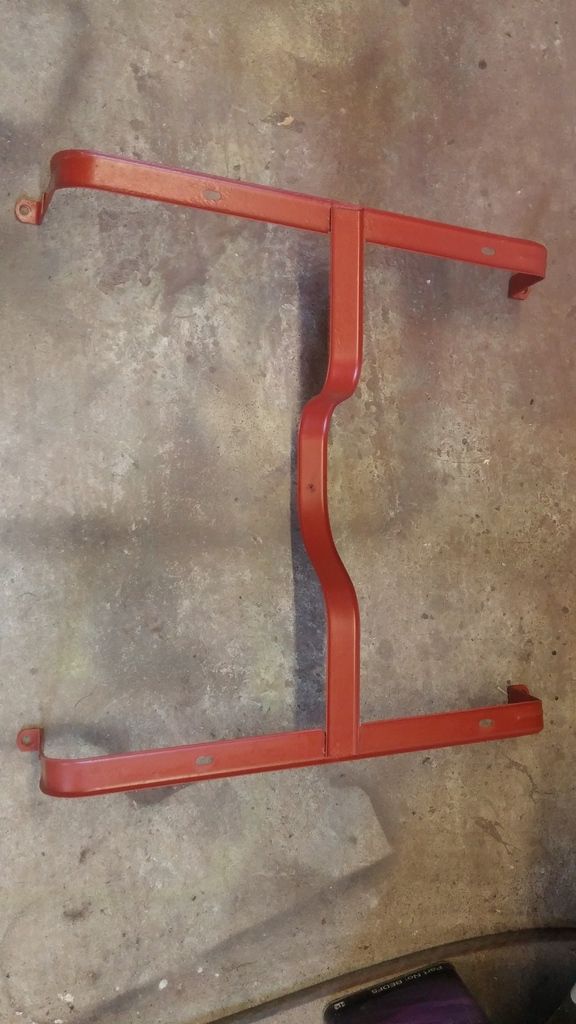 next both rear hubs and brakes stripped down 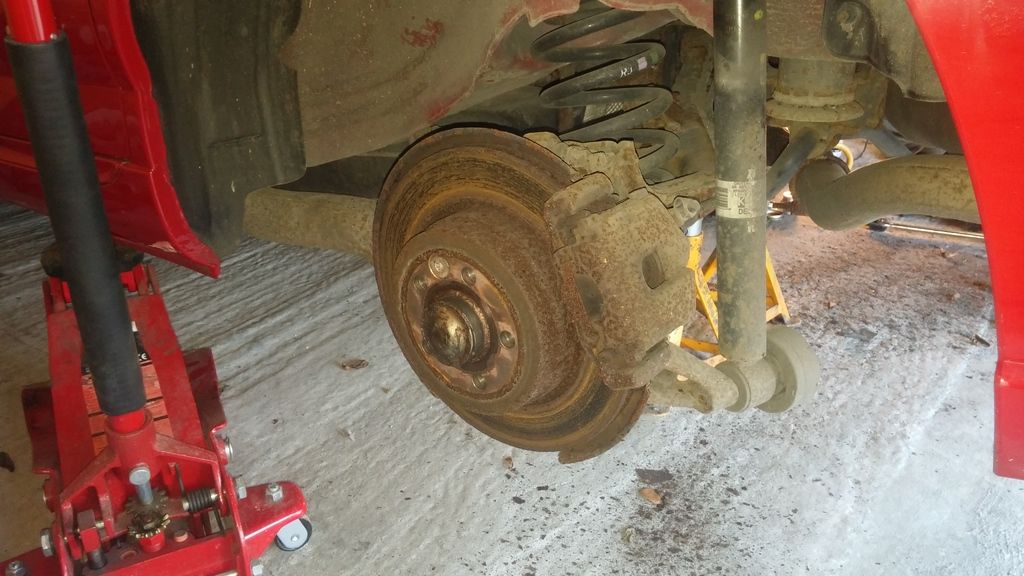 I started with removing the hub nut cap to get to the hub nut 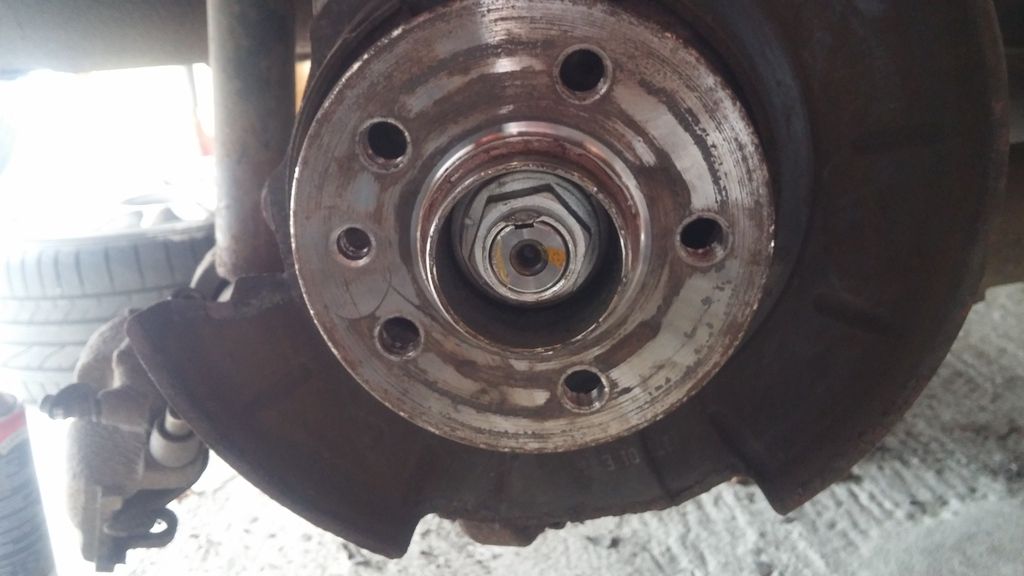 Then I opened up the tang which used as a final locking mechanism 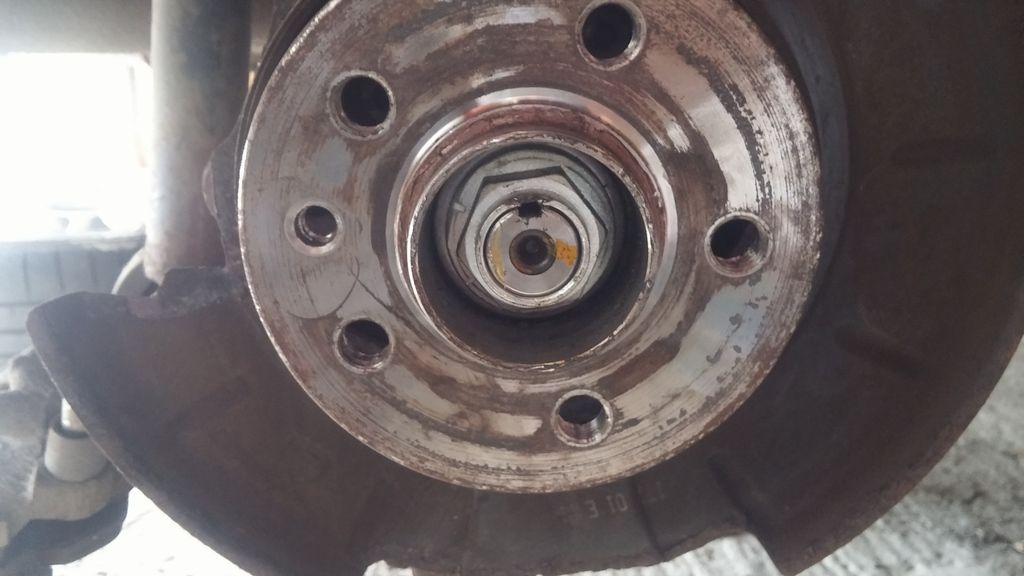 At this point I fit a space saver (the only decent use for one  ). ).The space saver allows you to get closer to the hub nut and I lowered the car onto the ground. 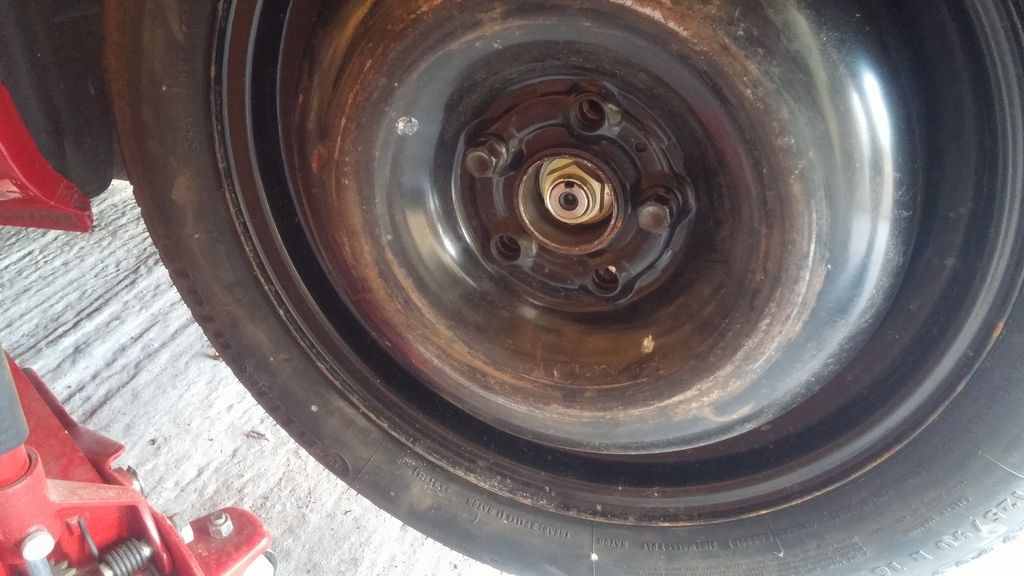 Then using an M32 socket and a decent breaker I can normally undo the hub nuts. I say normally because the car I broke last year was a bitch  You can see that using the space saver gets the tools close to the nut 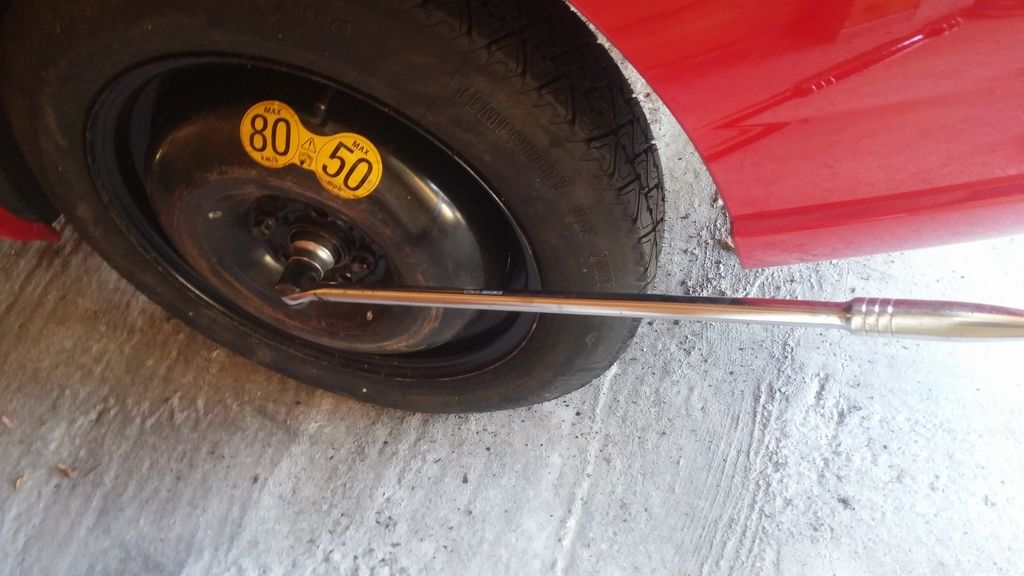 With the hub nut loosened next I stripped down the brakes Caliper removed by undoing the slider bolts, releasing the piston and pulling it off 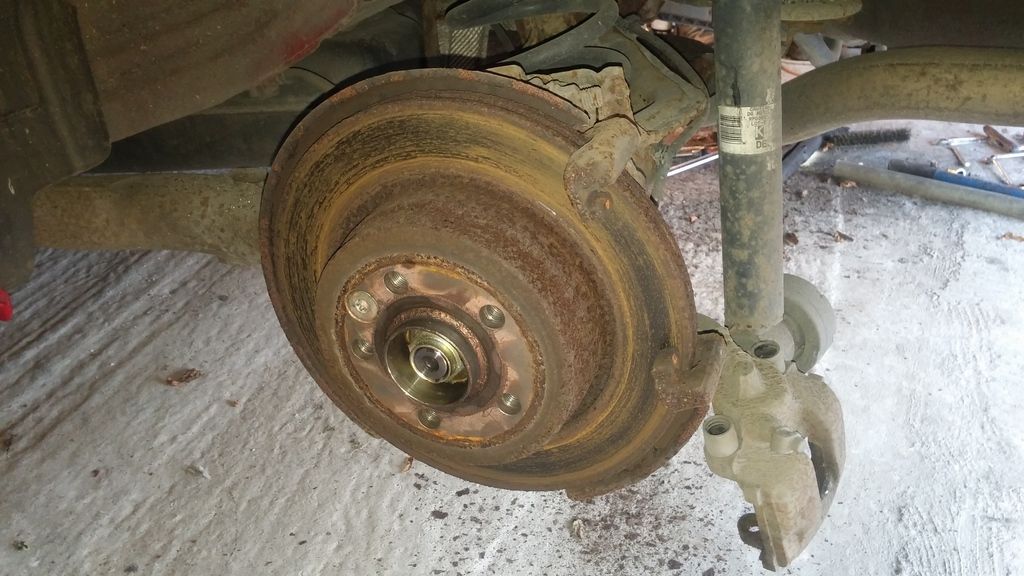 Next up the carrier is removed by undoing the two bolts behind 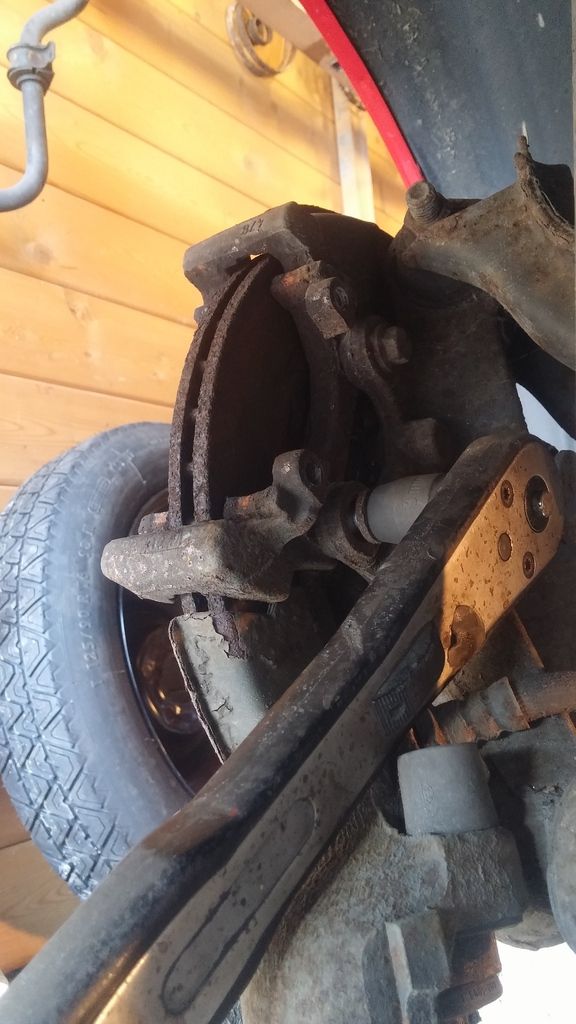 With the carrier removed then comes the disc. Again the star drive countersunk bolt is removed the same as the front discs 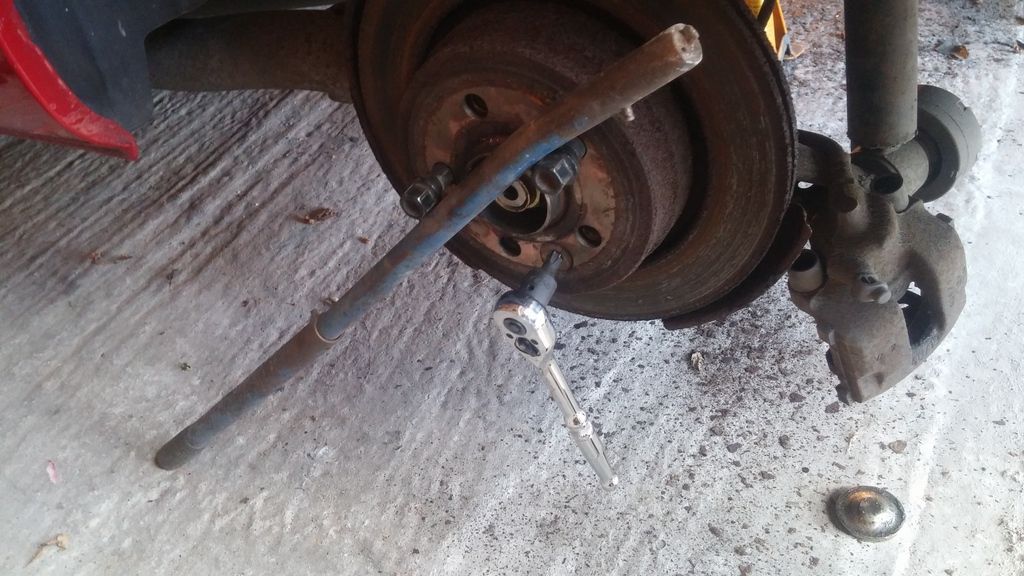 The adjuster inside the drum was fully undoen so the disc could be removed over the handbrake shoes 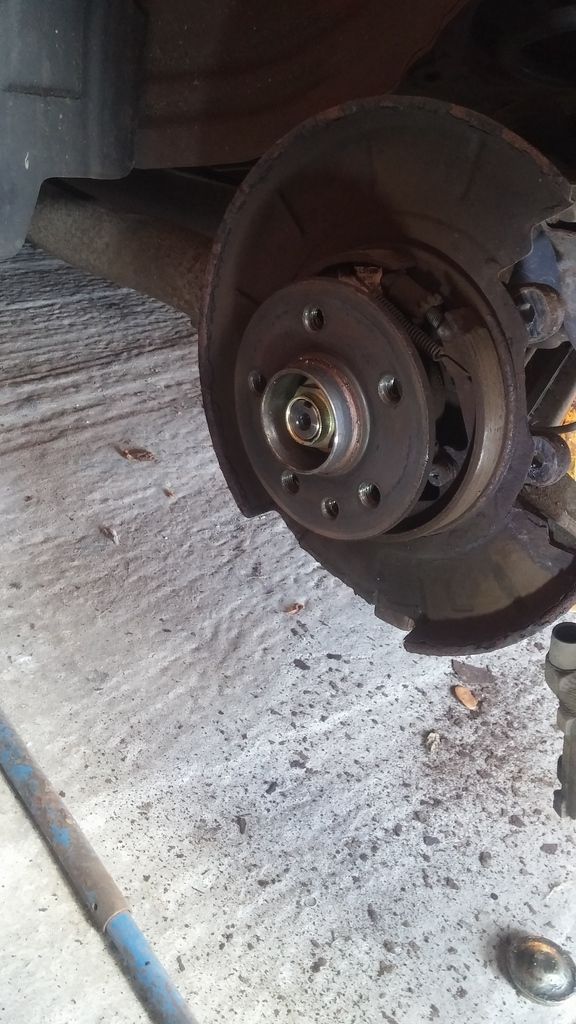 The hub nut was then fully removed and the hub carefully removed 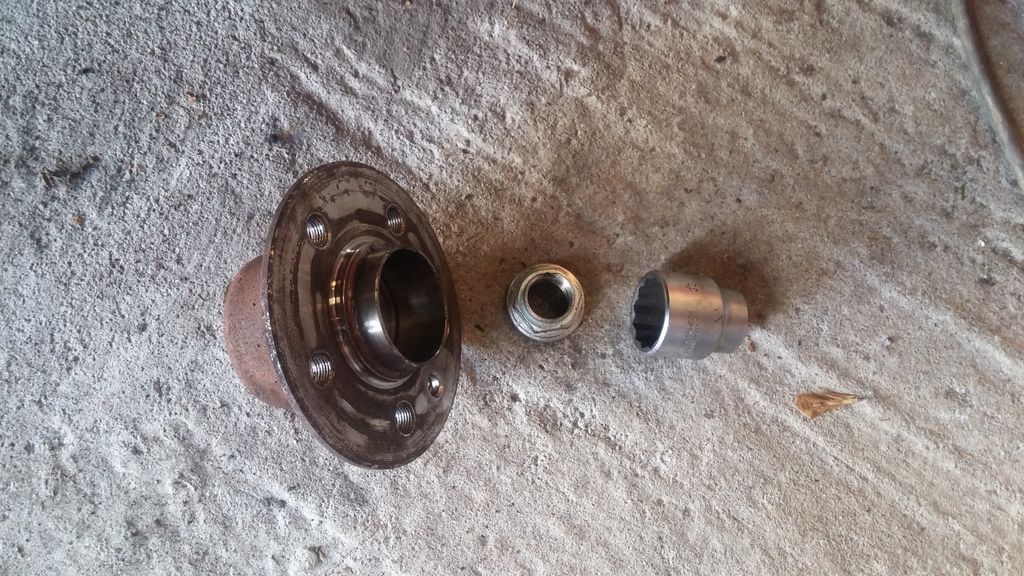 Next the shoes are released by removing the push pins which go through dust shield and the springs 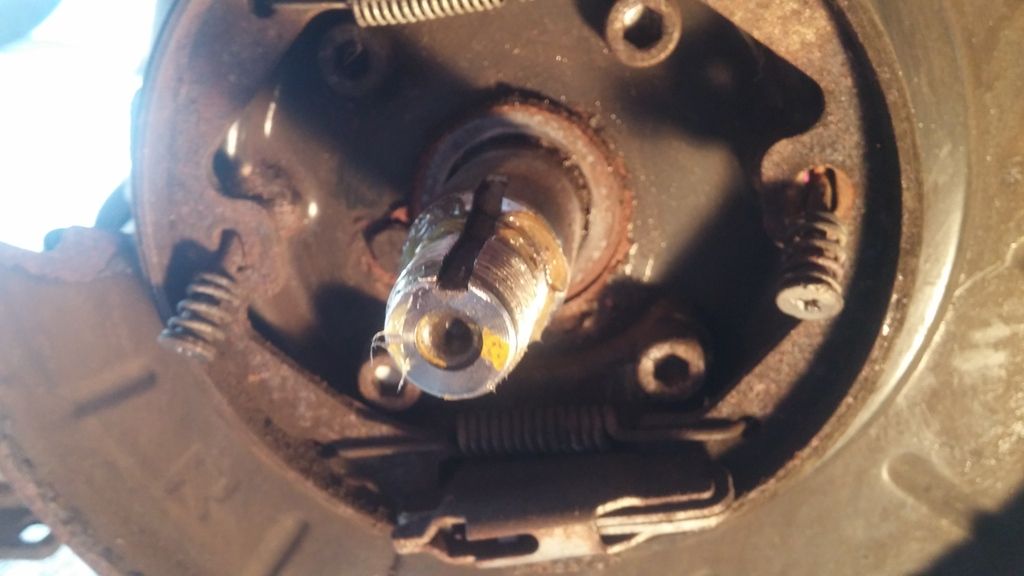 Shoes, springs, handbrake cable lever and adjuster removed 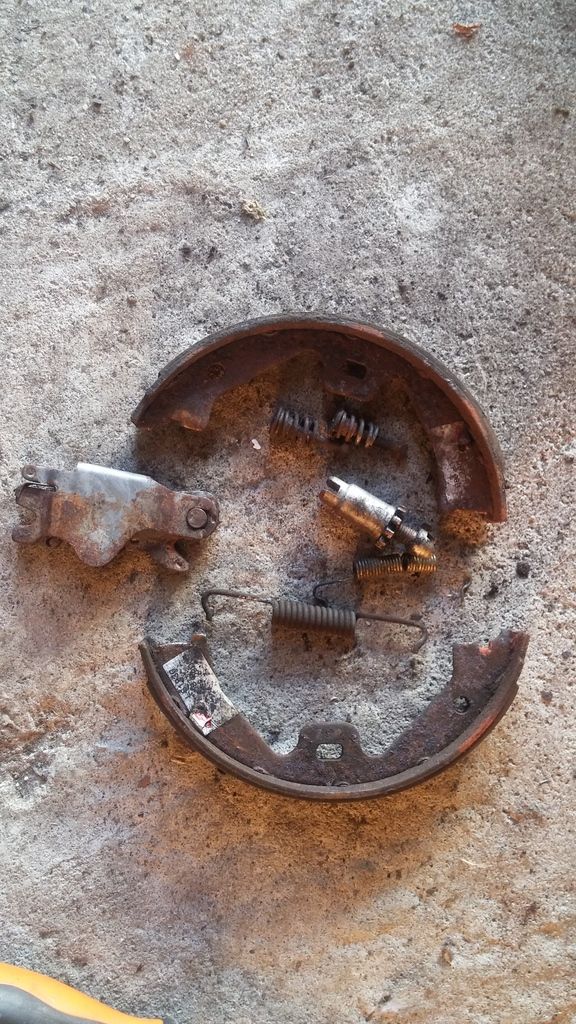 This opens up the dust shield behind and on mine the corrosion that can give issue for the ABS can be seen. Also you can see the allen key securing bolts for the bust shield and the ABS sensor. 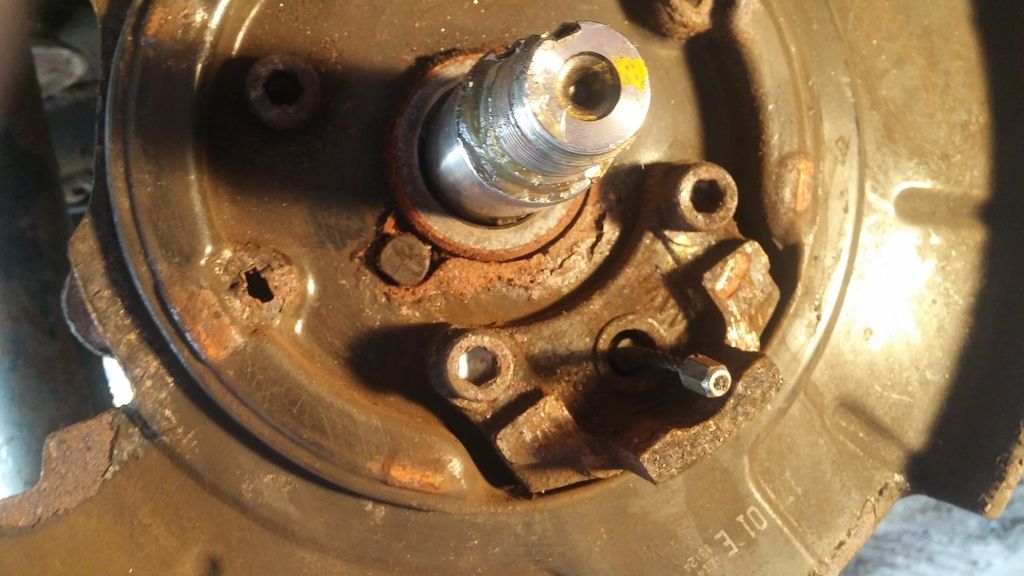 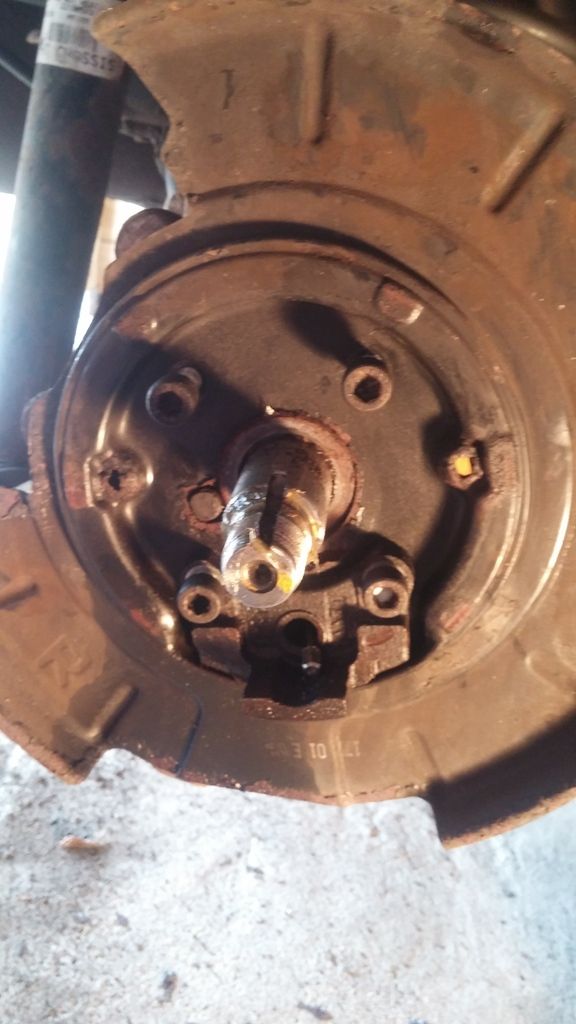 Next i soaked the handbrake cable entry into the dust shield with penetrating oil and allowed it to soak. Once the 4 M8 bolts are removed I gave the shields a good tug and luckily the brake cables released so i did not need heat or the dremmel 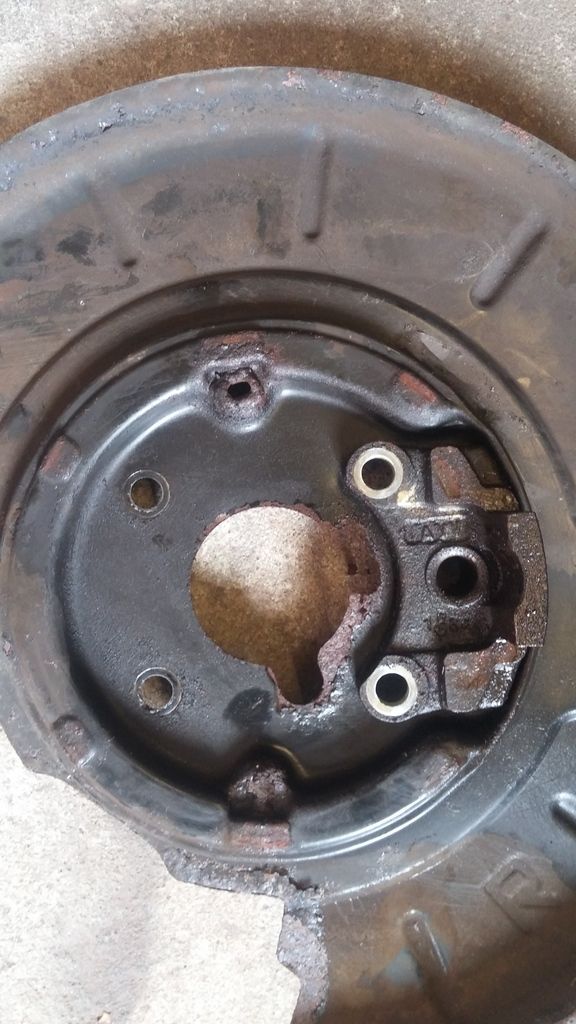 The entire area was cleaned off on the hub axle ready for the rebuild 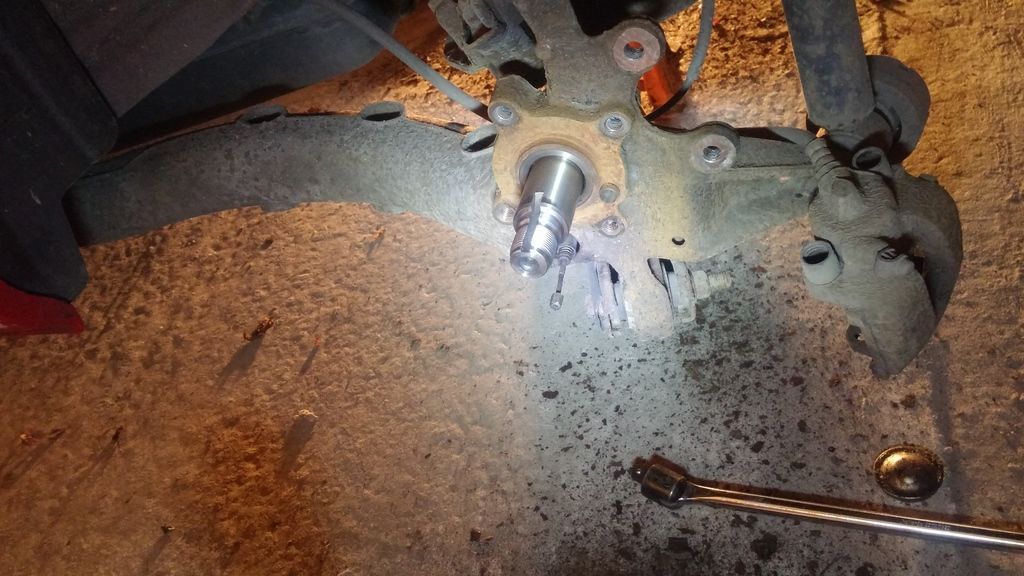 Next up the nice bit of the rebuild
__________________
Jon C Living the dream  MK IV VVTI Tiptronic TT Toyota Supra MG ZT 190+
BornTuesday, 10th July 2001 @ 09:01:10 259th ZT to run off the production line, out of 18,894 252nd ZT 190 + to be made out of 4,023 101st ZT in Solar Red (code: CEU) to be made out of 1,888 Last edited by jonc3725; 20th August 2017 at 22:12.. |

|

|
|
28th September 2016, 20:42
|
#192 |
|
This is my second home
ZT 260 SE Twilight and 10 other 75 ZT's :O Join Date: Jan 2007
Location: Conwy NORTH WALES
Posts: 11,094
Thanks: 512
Thanked 1,116 Times in 763 Posts
|
If only MGR had put grease or silicone between the backplate and the rear arm face
__________________
[SIGPIC][/SIGPIC] Newbies do now!! 1. Plenum drains..all 3 or 4 year dependent 2. Cooling fan..All speeds functioning 3. Bonnet cable divider block |
|
|
|
|
3rd October 2016, 19:55
|
#193 | |
|
Posted a thing or two
MG ZT 190 + and MKIV Supra Join Date: Jan 2009
Location: Plymouth
Posts: 1,551
Thanks: 224
Thanked 493 Times in 359 Posts
|
Quote:
__________________
Jon C Living the dream MK IV VVTI Tiptronic TT Toyota Supra MG ZT 190+
BornTuesday, 10th July 2001 @ 09:01:10 259th ZT to run off the production line, out of 18,894 252nd ZT 190 + to be made out of 4,023 101st ZT in Solar Red (code: CEU) to be made out of 1,888 |
|
|
|
|
|
3rd October 2016, 20:09
|
#194 | |
|
This is my second home
1979 Capri 1.6L, 1982 Capri 1.6L, 2016 Dacia Stepway Join Date: Jun 2009
Location: Dorset
Posts: 8,595
Thanks: 3,496
Thanked 3,397 Times in 2,218 Posts
|
Quote:
 |
|
|
|
|
|
3rd October 2016, 20:19
|
#195 |
|
Posted a thing or two
MG ZT 190 + and MKIV Supra Join Date: Jan 2009
Location: Plymouth
Posts: 1,551
Thanks: 224
Thanked 493 Times in 359 Posts
|
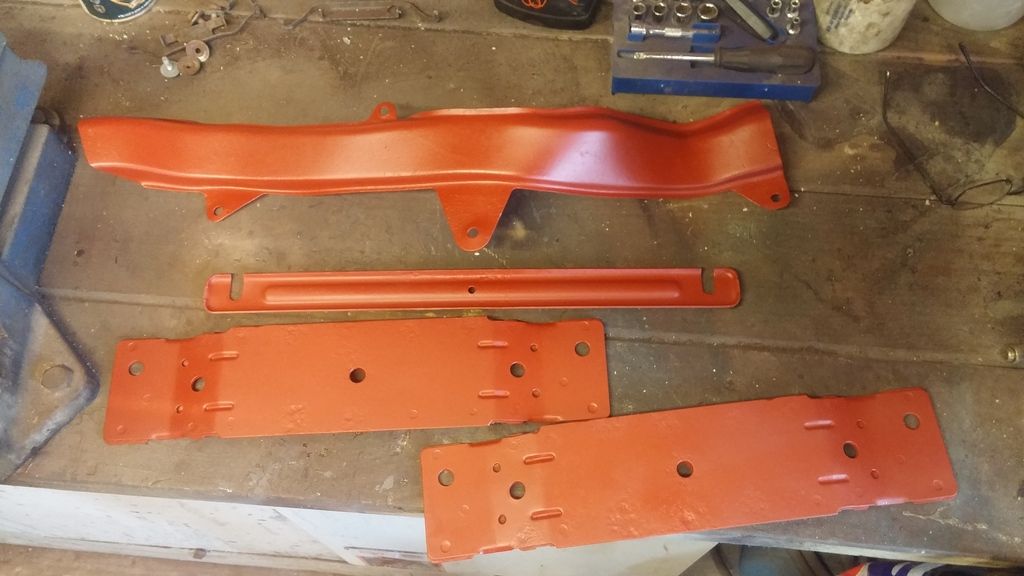
Slight update from the weekend.
The new rear backplates after additional painting and ready to fit. I have given the hubs a good going over and the bearings seem fine and the ABS magnetic rings are undamaged so I decided that these would go back on. Not sure if that is a good idea or not but they are fine. 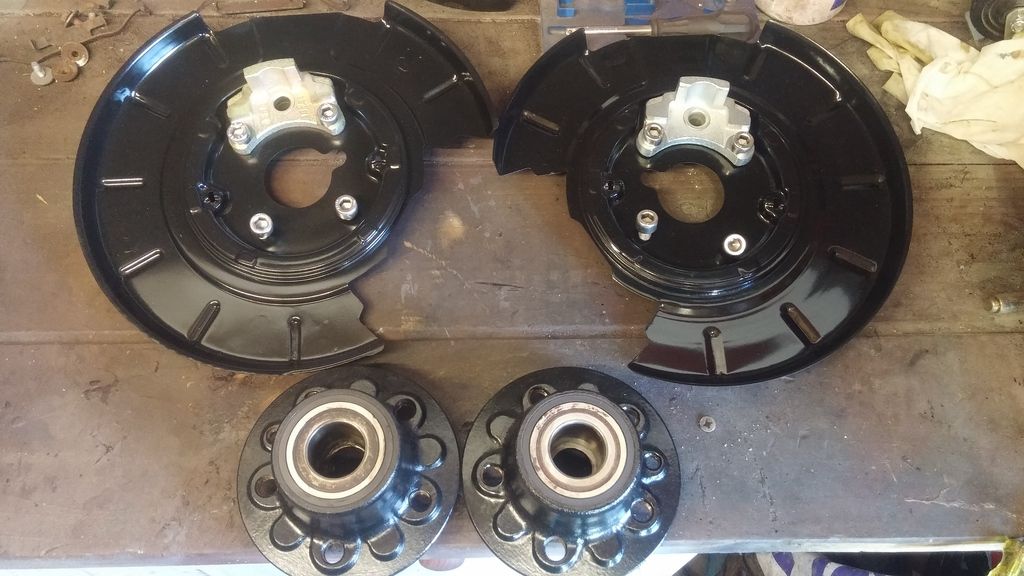 Also all the tins have completely dried ready for fitting under the car when I have completed the underseal. 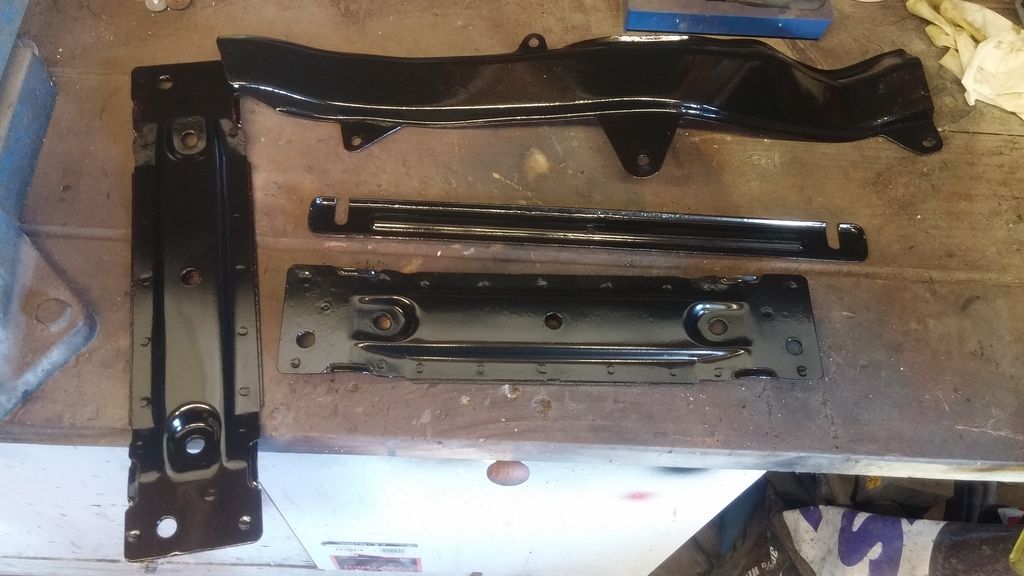 and the fuel tank strap ready to go 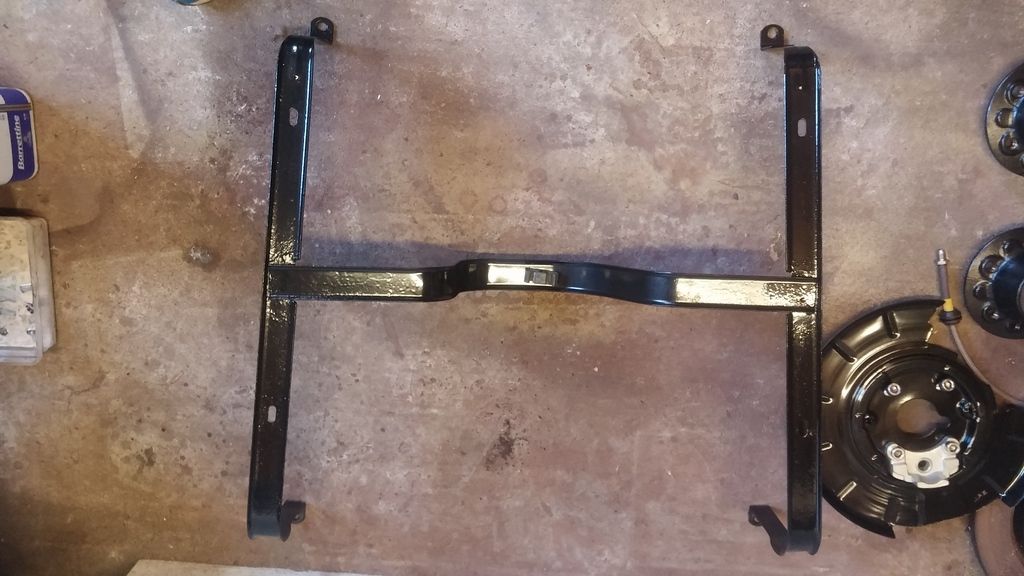 Pipe cover was waxed inside with cavity wax and refitted now the underseal had dried on the passenger side rear arch. 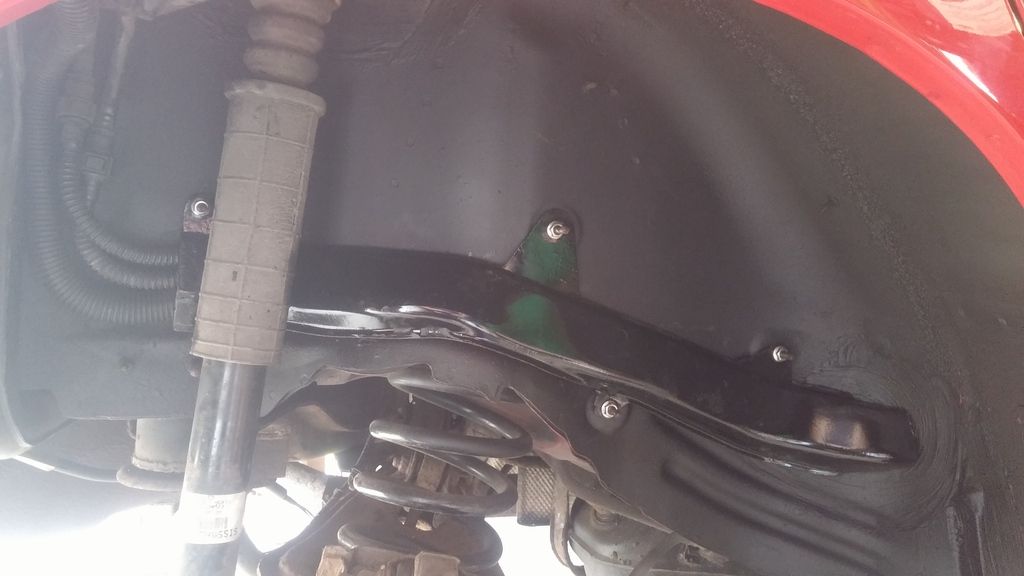 Next up I waxoyled the sill cavities from the rear arches  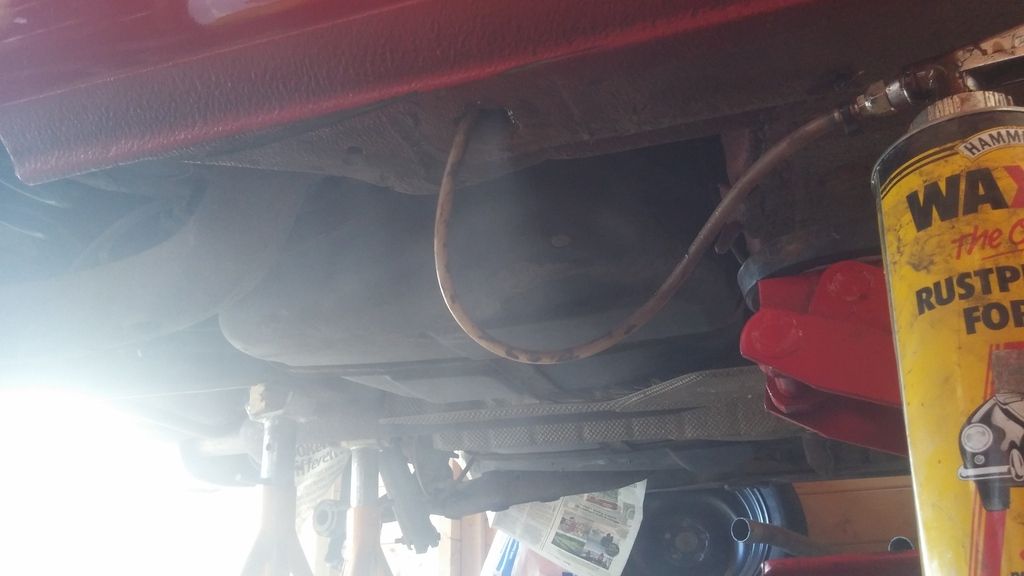 Next up I removed the passenger side rear wheel arch plastic to find the same dirt underneath  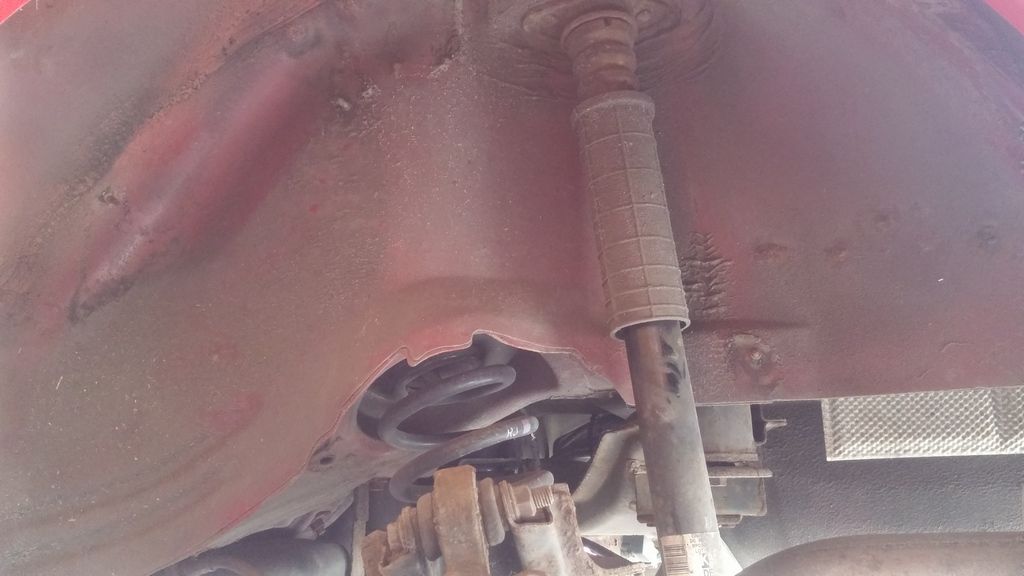 The whole area was washed and cleaned off 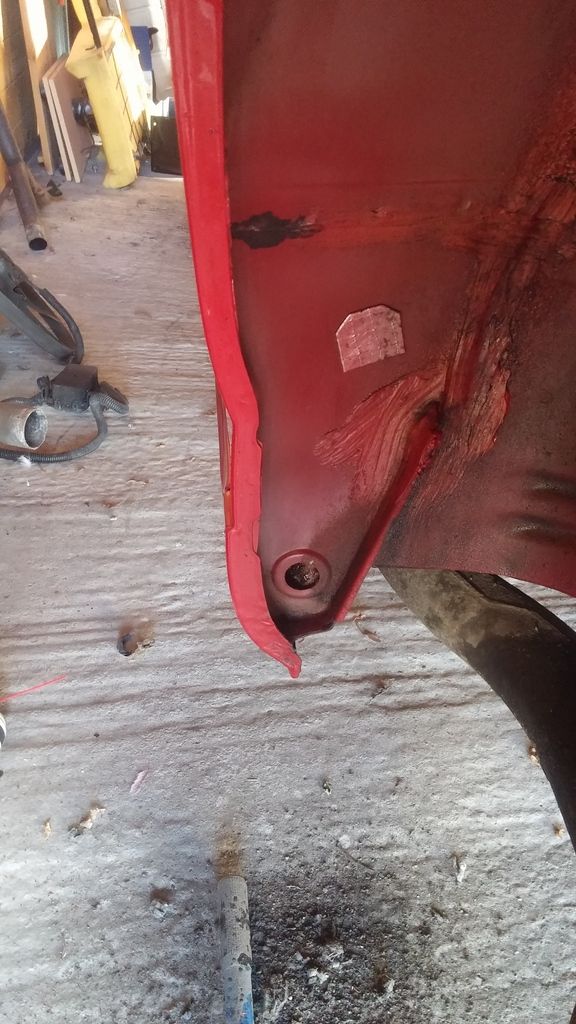 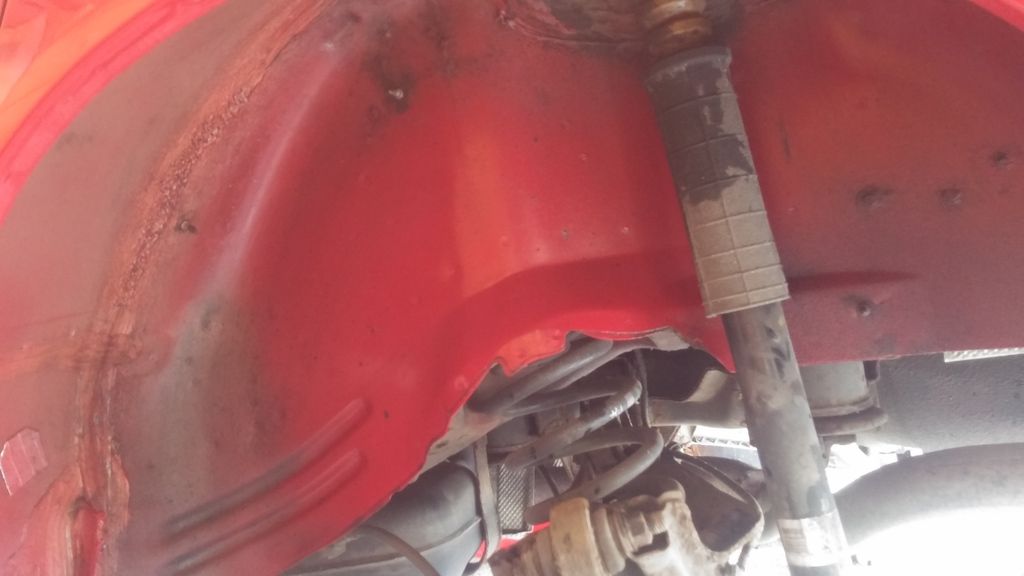 Allowed to dry and then treated 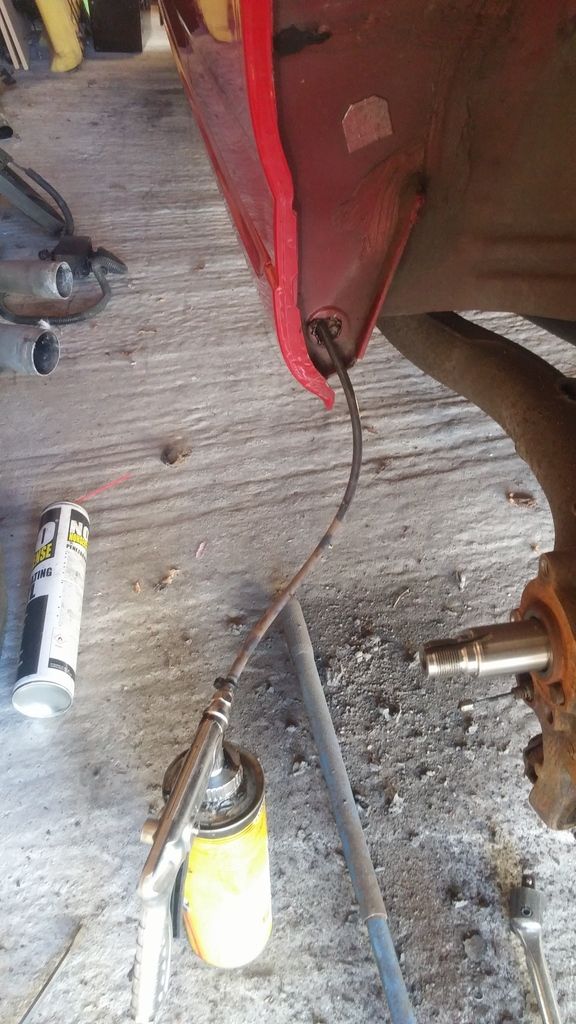 and undersealed the whole arch 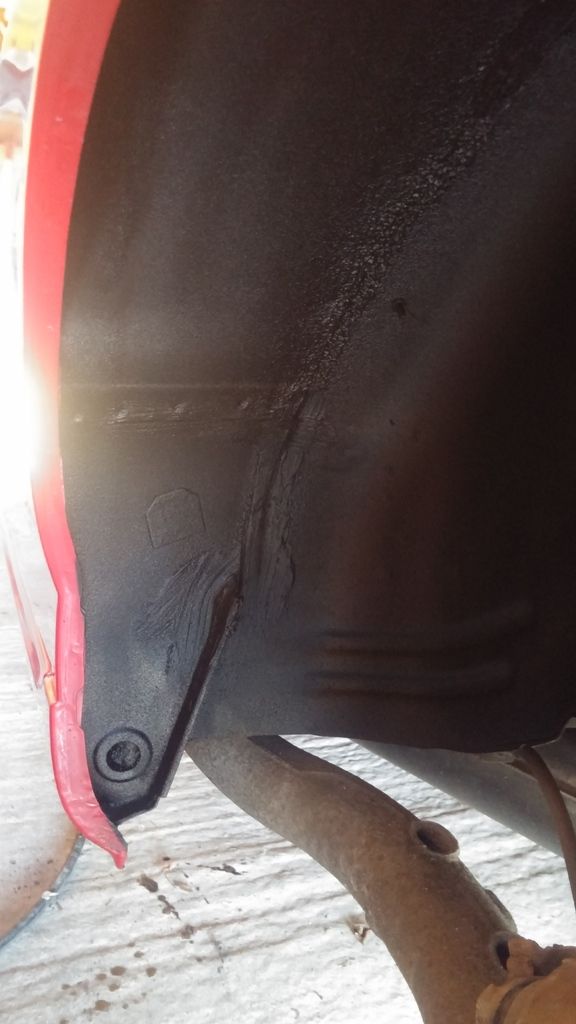 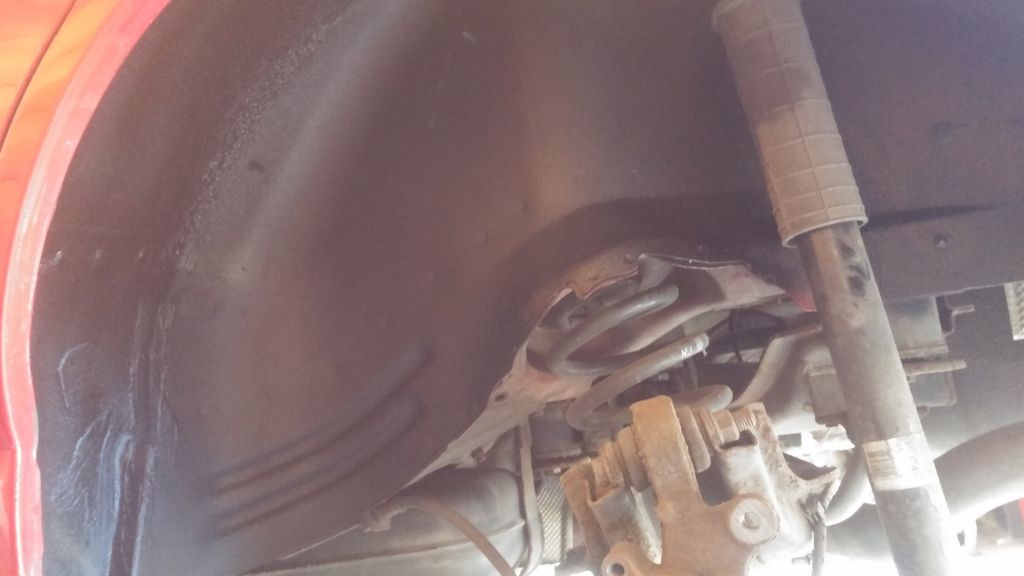 Next up whilst underneath I noticed the rear light level sensor was looking ropey so I removed it to investigate the whole set up. It was that corroded it was easier to remove the brackets from the suspension  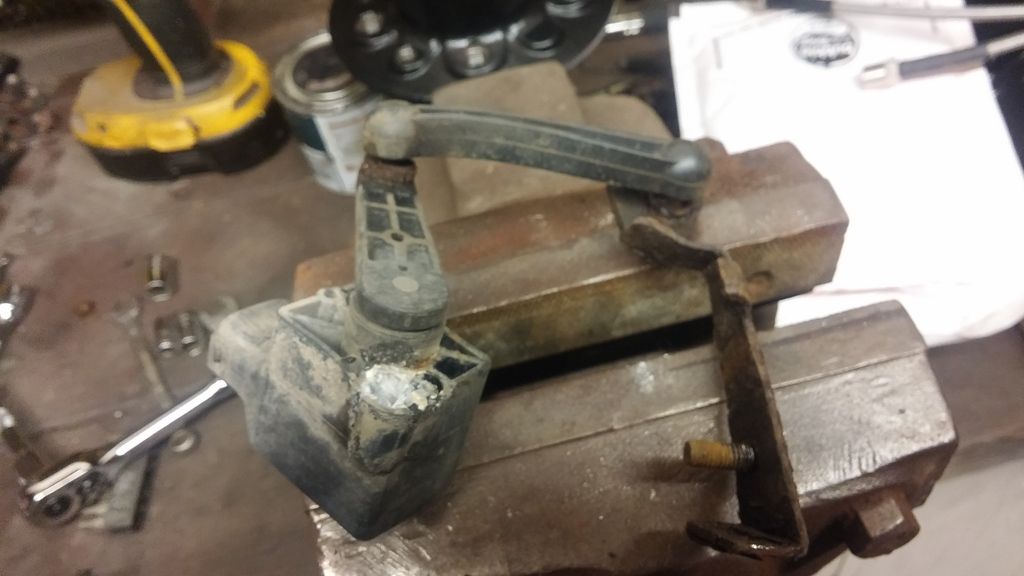 After stripping it down the corrosion has caused the level sensor body to crack and the arm where the ball joints sit had properly seized  About the only thing that was salvageable was the brackets and I might even remake them in stainless if they are too bad. A replacement sensor and 2 x arms have been ordered (as the front will probably be seized as well  ) )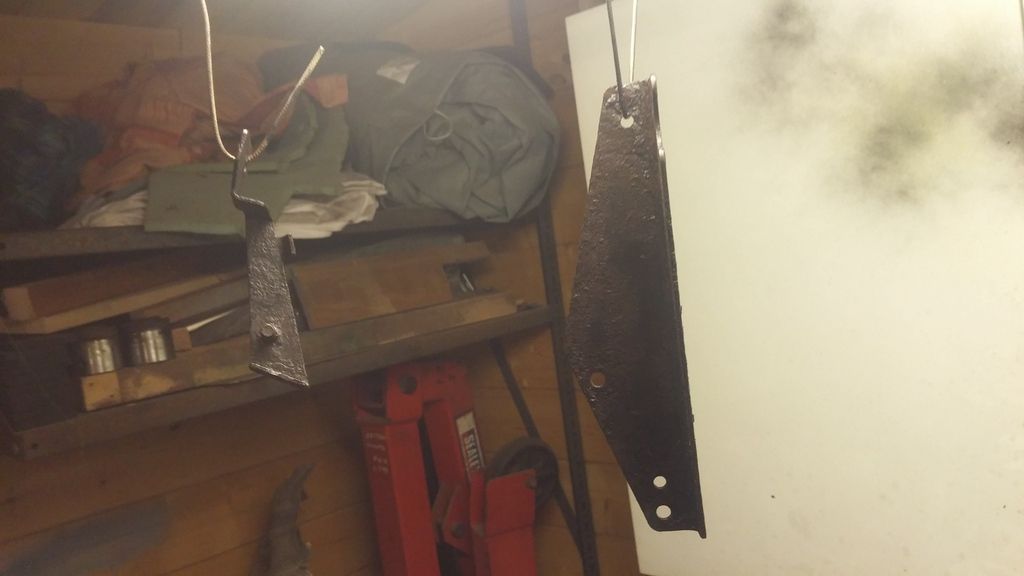 I know it seems mad to do so much work on the level sensor before stripping the suspension but these items are MOT failures and it was in a mess
__________________
Jon C Living the dream MK IV VVTI Tiptronic TT Toyota Supra MG ZT 190+
BornTuesday, 10th July 2001 @ 09:01:10 259th ZT to run off the production line, out of 18,894 252nd ZT 190 + to be made out of 4,023 101st ZT in Solar Red (code: CEU) to be made out of 1,888 Last edited by jonc3725; 20th August 2017 at 22:14.. |
|
|
|
|
3rd October 2016, 20:34
|
#196 |
|
This is my second home
1979 Capri 1.6L, 1982 Capri 1.6L, 2016 Dacia Stepway Join Date: Jun 2009
Location: Dorset
Posts: 8,595
Thanks: 3,496
Thanked 3,397 Times in 2,218 Posts
|
I got to stop reading this thread, its making me hugely jealous.
 Jon, If you were local, I would be round yours any chance I could get to play... Jon, If you were local, I would be round yours any chance I could get to play... |
|
|
|
|
3rd October 2016, 21:45
|
#197 | ||
|
Posted a thing or two
MG ZT 190 + and MKIV Supra Join Date: Jan 2009
Location: Plymouth
Posts: 1,551
Thanks: 224
Thanked 493 Times in 359 Posts
|
Quote:
Quote:
She is not perfect but as I plan to keep her for a very long time I want to do things properly so she lasts. My work is fairly full on so I vanish into the garage to empty my brain and get back to my tools  Always welcome to to have a play mate as this car is for driving. Shame your not local i could probably have helped more I know there are plenty of how to's out there but hopefully it shows that cars are just the sum of all their parts and most things can be tackled. My breaker bar is probably my favourite tool for old cars and I agree a decent set of hex sockets are worth their weight in gold particularly on more modern cars with the reduced flanged head bolts I am trying to get all the suspension parts together to start the suspension rebuild but I would like to get her on the road first
__________________
Jon C Living the dream MK IV VVTI Tiptronic TT Toyota Supra MG ZT 190+
BornTuesday, 10th July 2001 @ 09:01:10 259th ZT to run off the production line, out of 18,894 252nd ZT 190 + to be made out of 4,023 101st ZT in Solar Red (code: CEU) to be made out of 1,888 |
||
|
|
|
|
4th October 2016, 19:53
|
#198 |
|
Posted a thing or two
Rover 75 2.5 Dealer Launch Join Date: Jan 2011
Location: Liverpool
Posts: 1,462
Thanks: 150
Thanked 146 Times in 87 Posts
|
Hi Jon
Wow what a job you have done would not know where to start on mine very jealous of your skill Great Job Paul
__________________
[SIGPIC][/SIGPIC]
|
|
|
|
|
5th October 2016, 22:40
|
#199 | |
|
Posted a thing or two
MG ZT 190 + and MKIV Supra Join Date: Jan 2009
Location: Plymouth
Posts: 1,551
Thanks: 224
Thanked 493 Times in 359 Posts
|
Quote:
Sorry I couldn't help with the exhaust trim. These cars are just a mixture of bits all bolted together. There is not much i would not tackle mechanically so for me as long as the body is good I am happy to play with most bits Jon
__________________
Jon C Living the dream MK IV VVTI Tiptronic TT Toyota Supra MG ZT 190+
BornTuesday, 10th July 2001 @ 09:01:10 259th ZT to run off the production line, out of 18,894 252nd ZT 190 + to be made out of 4,023 101st ZT in Solar Red (code: CEU) to be made out of 1,888 |
|
|
|
|
|
27th October 2016, 21:53
|
#200 |
|
Posted a thing or two
MG ZT 190 + and MKIV Supra Join Date: Jan 2009
Location: Plymouth
Posts: 1,551
Thanks: 224
Thanked 493 Times in 359 Posts
|
A few bits to update.
I have not quite finished the back brakes due to a couple of issues: 1. The Rear replacement break lines were too short. New ones sent out by HEL 2. I fitted the nearside hub and the inner bearing fell to bits New one has just arrived with 5 year Guarantee.So back to little bit of progress A replacement rear level sensor and arm was bought and I treated the brackets to a complete de rust and spray. I still think i will make a couple of stainless ones when I rebuild the suspension 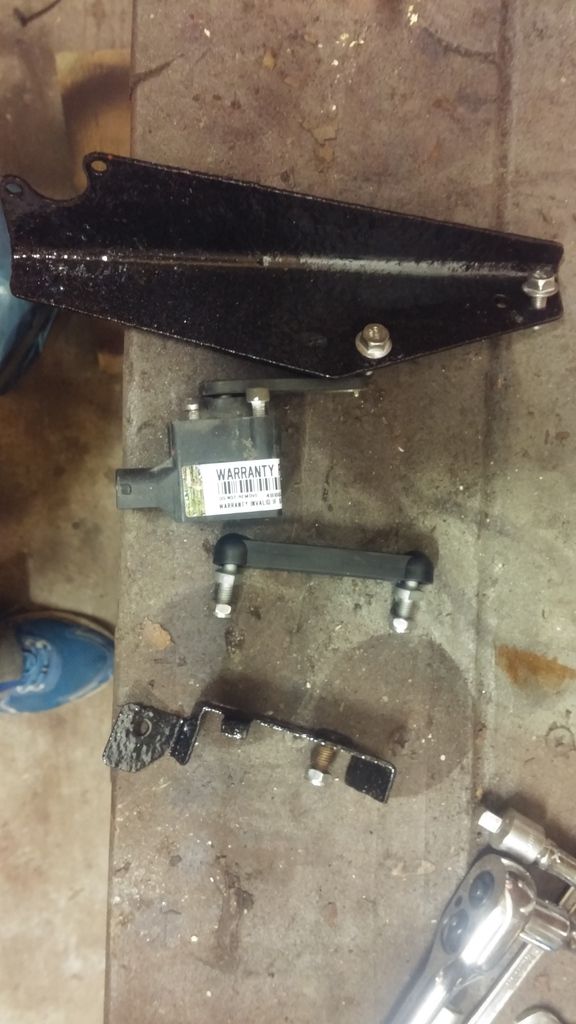 the system made up  and fitted to the rear of the car 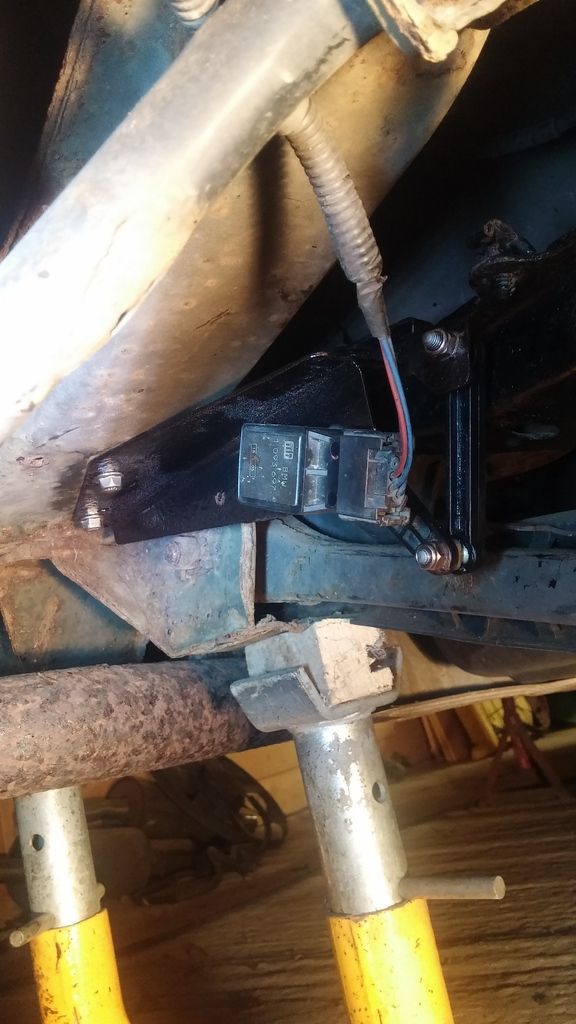 Next up the arch liners were cleaned ready for fitting (I doubt these will get a hand clean again 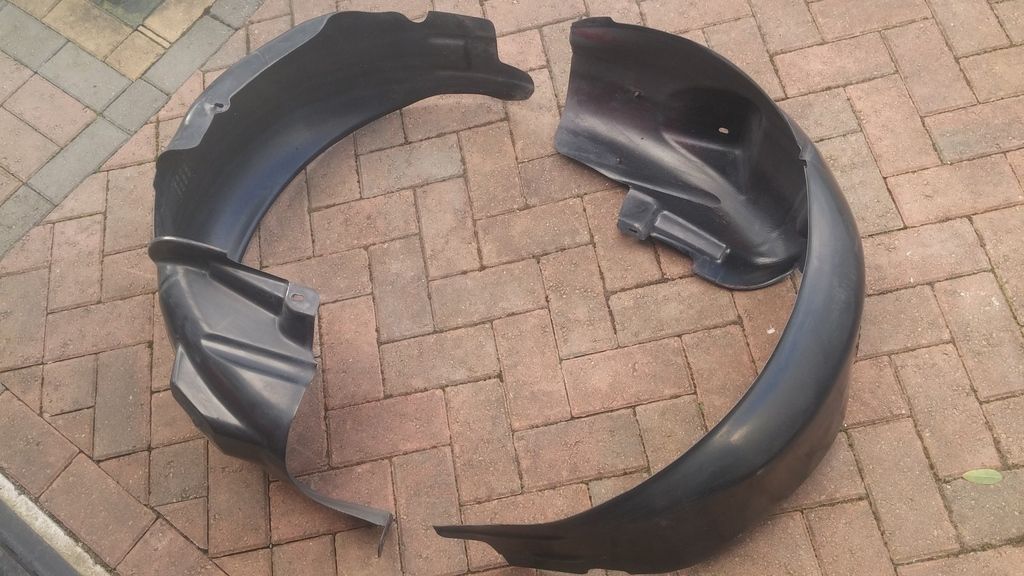 Next up the arches were fitted 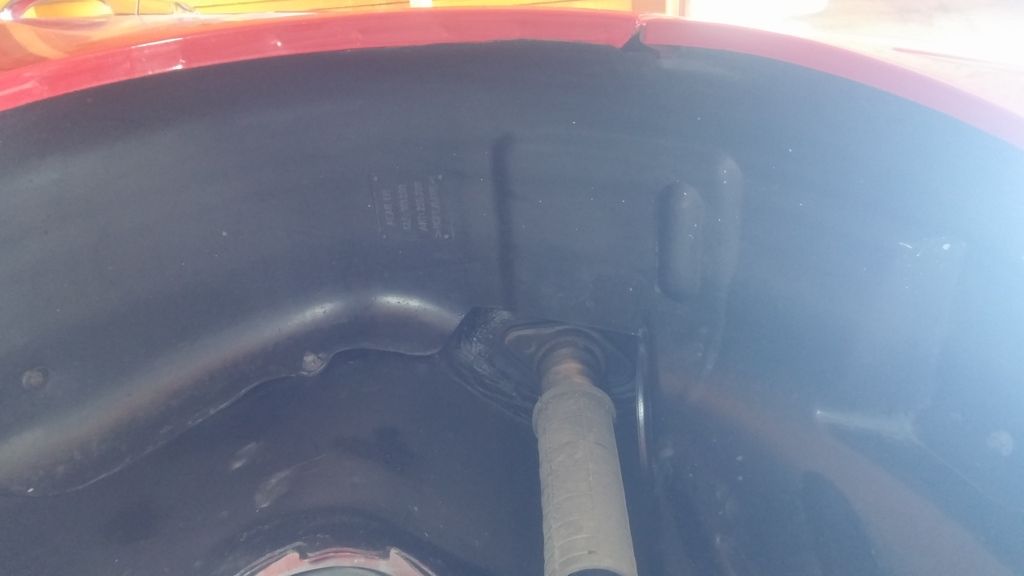 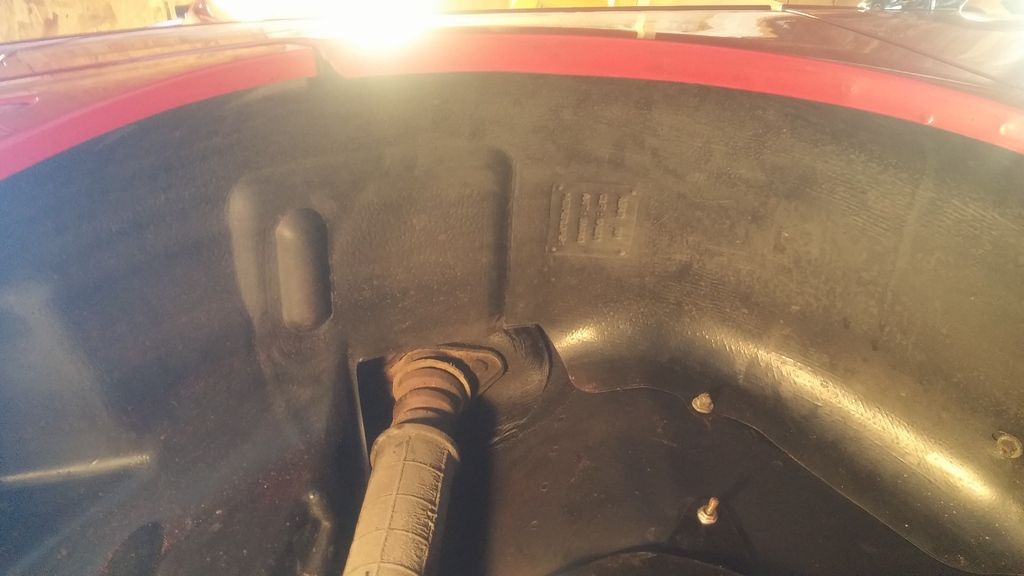 and onto the rear brakes The new backing plates are fitted. I found it easier to thread the handbrake cable through whilst fitting. I also used some coppergrease on the cable ferule where is passes through the back plate. 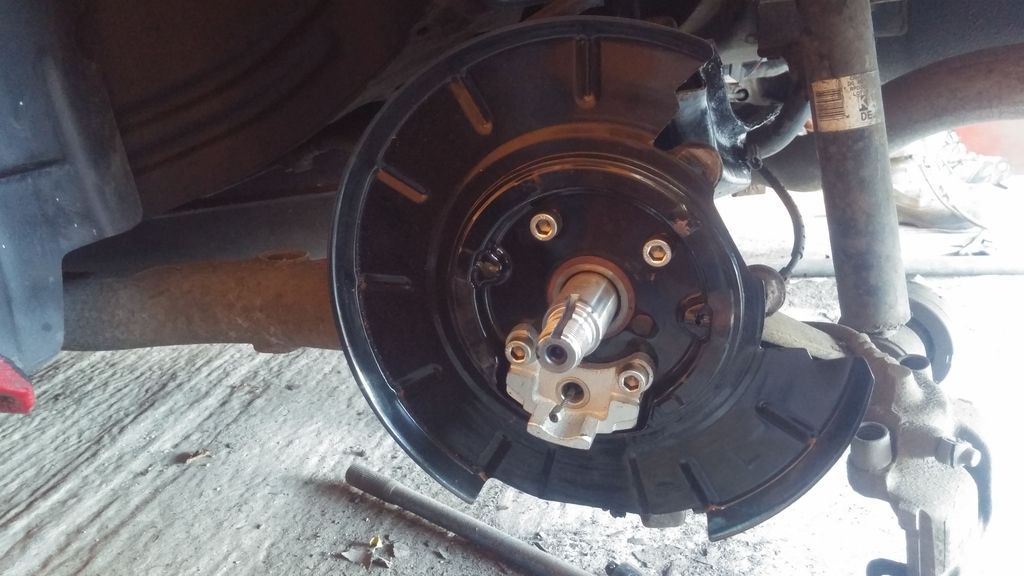 Next up I made up the handbrake shoes with hew springs. I also painted adjuster white so i could see it. I found the easiest way to fit was to build up the shoes on the bench but leave the lower spring off. I pulled out the handbrake hook to fit over the cable end 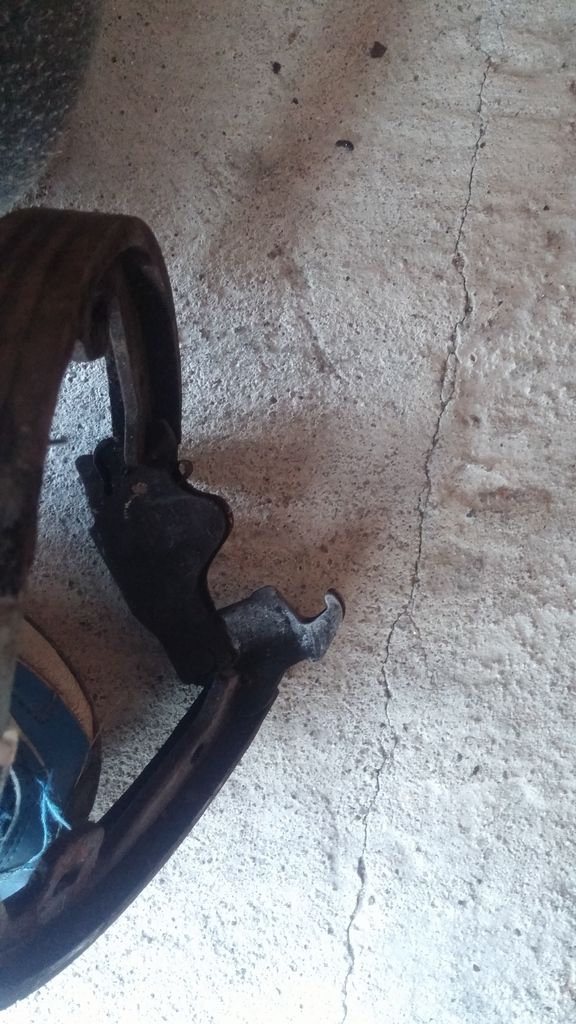 slipped it over the handbrake cable ferule 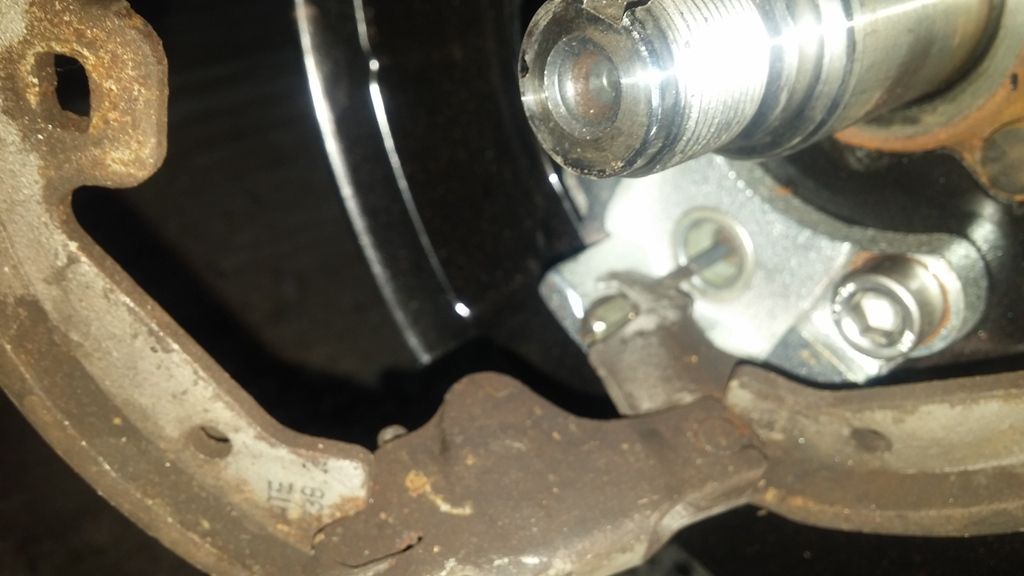 then pushed the shoes into position. My shoes were taken form the car I broke as they were only a year old. I also smeared a little coppergrease on the edge where the shoes sit on the backplate. Using new retainers as well I fitted the shoes to the back plate and fitted the final spring 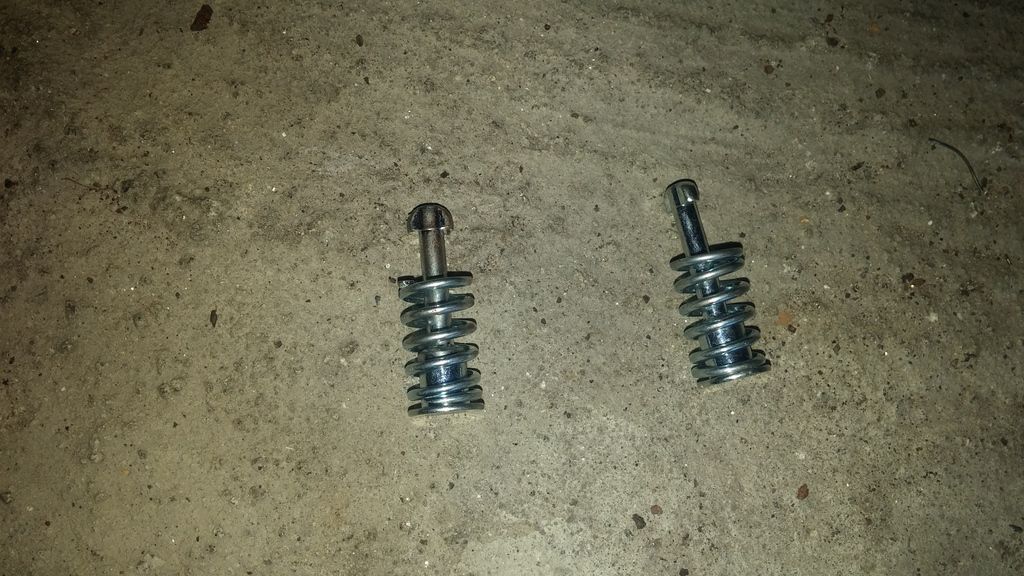  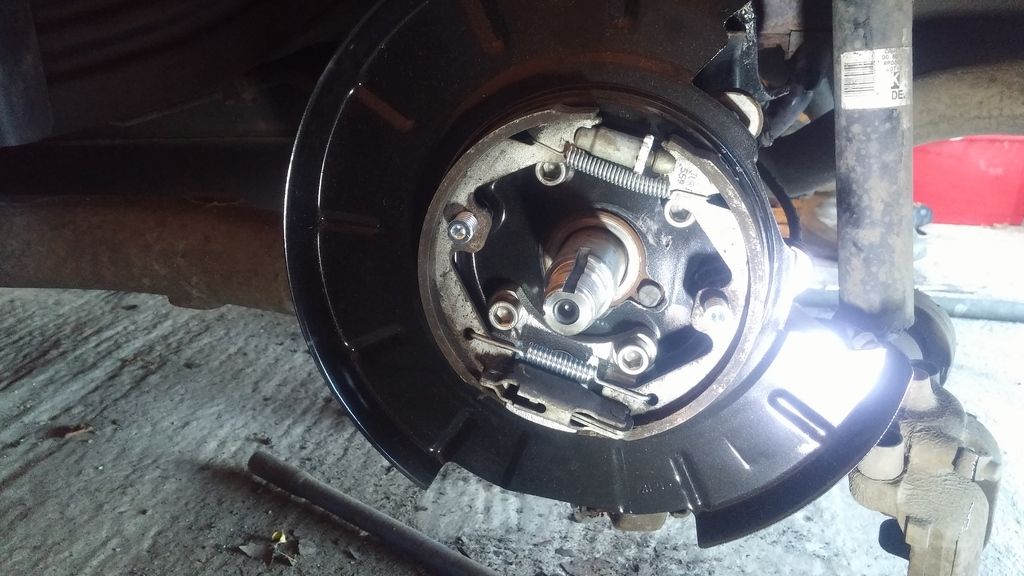 next up the hub and stub shaft were lightly greased and preped for fitting. there is a tab washer that fits inside the hub which locates on the keyway of the shaft. 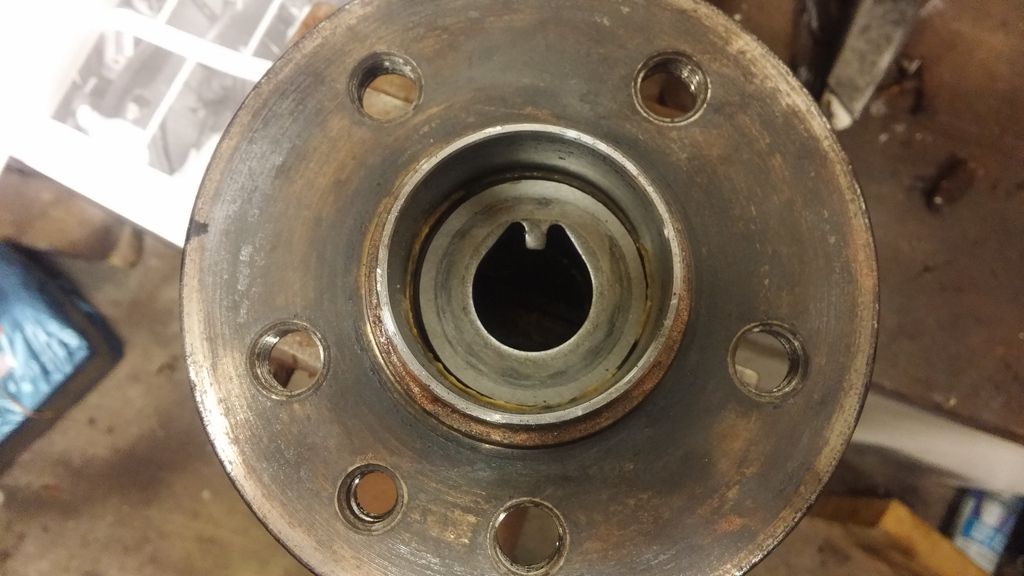 At thsi point its v important the magnetic ring does not get damaged on the back of the hub as this is part of the ABS sensor system 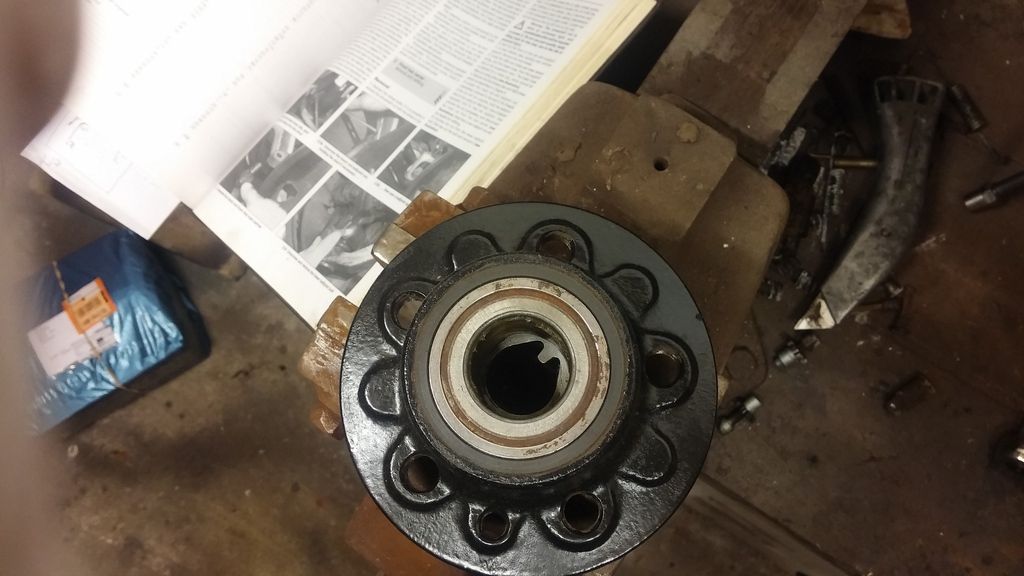  Hub slid onto the shaft and hub nut done up and then torqued 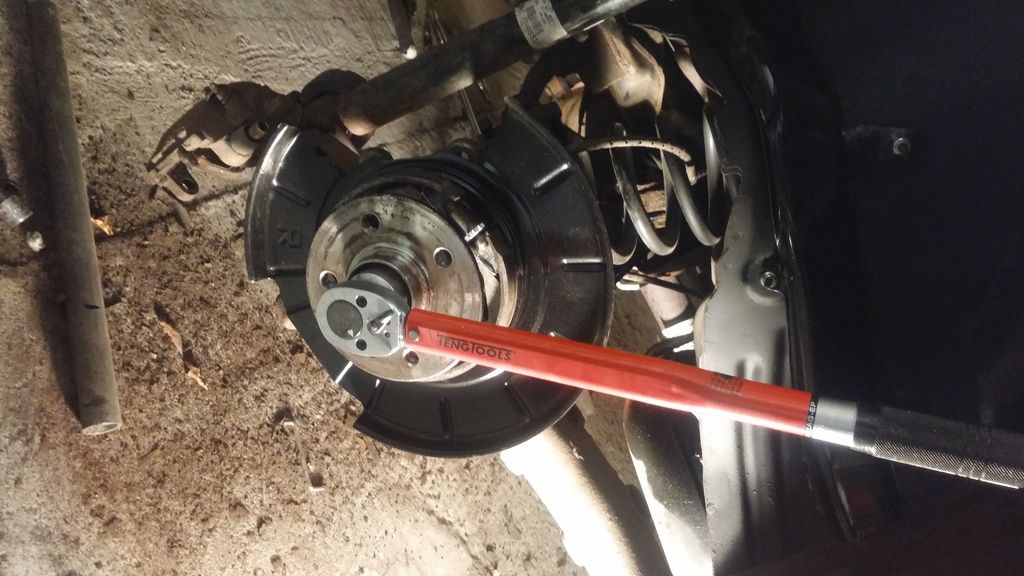 Tang was then punched in 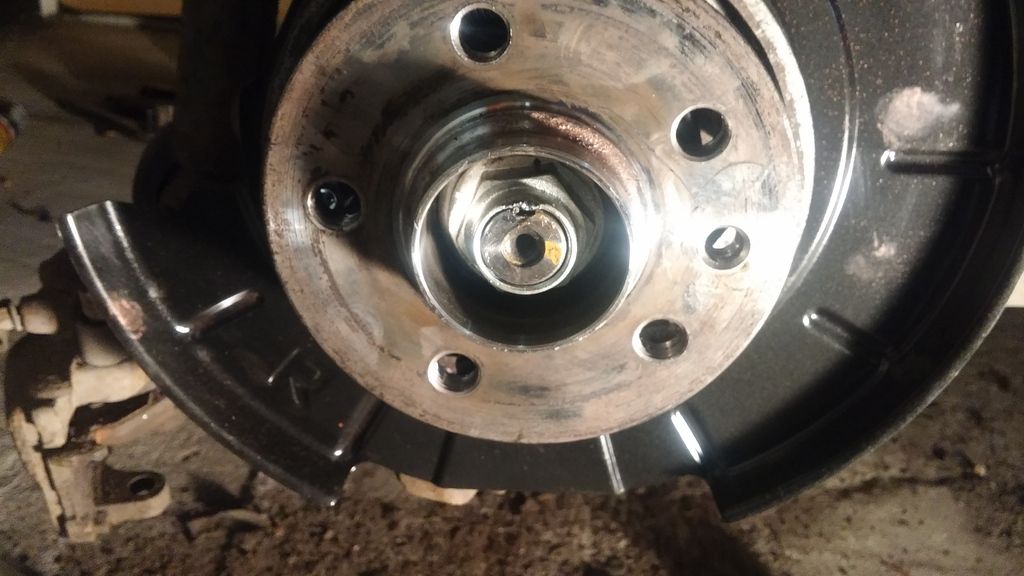 and the rear disc fitted. 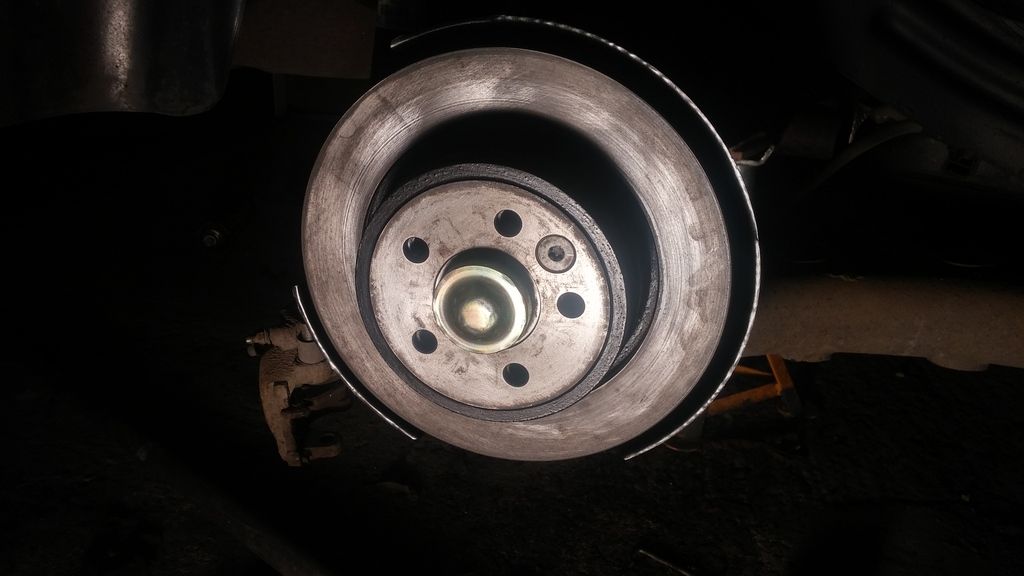 whilst waiting for the replacement brake lines and hub I removed the driver front wheel arch liner 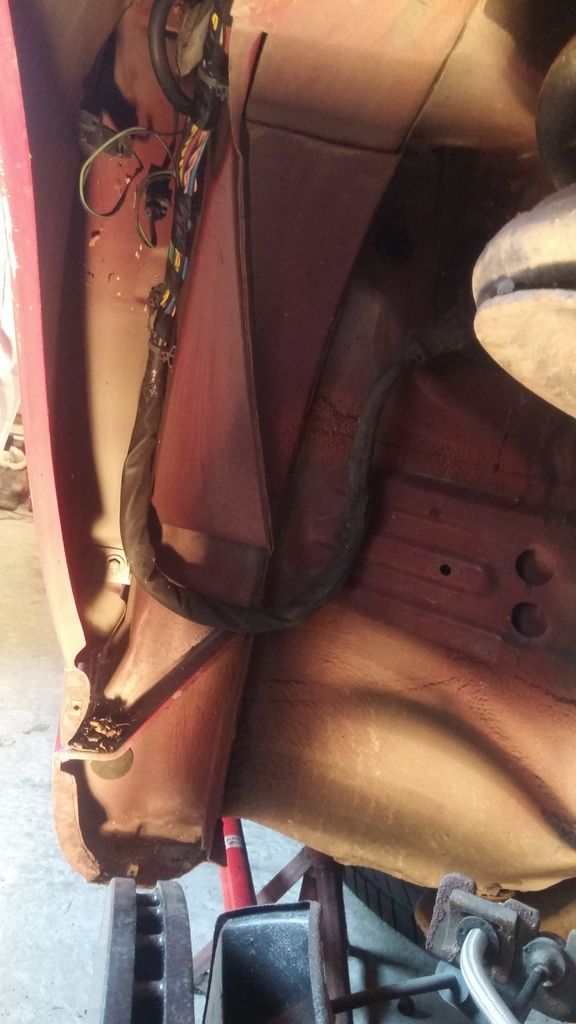 cleaned out all the crud 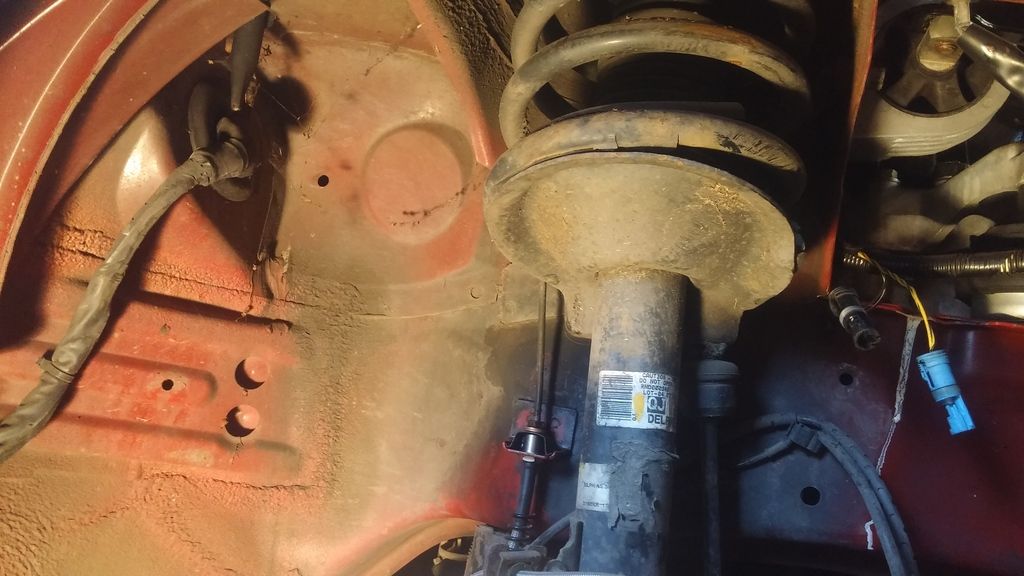 waxoyled the sill cavities from the front 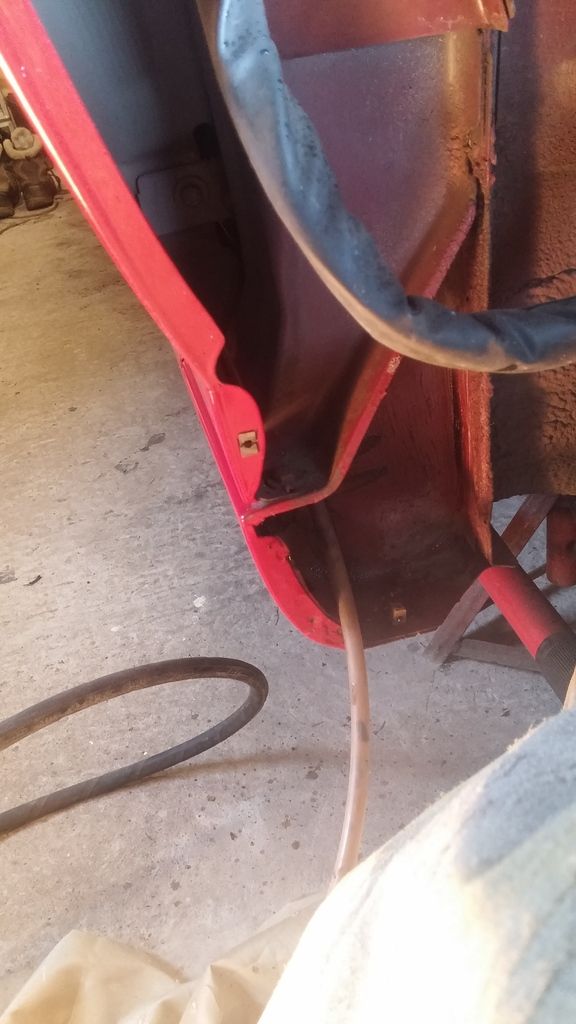 and undersealed the arch area 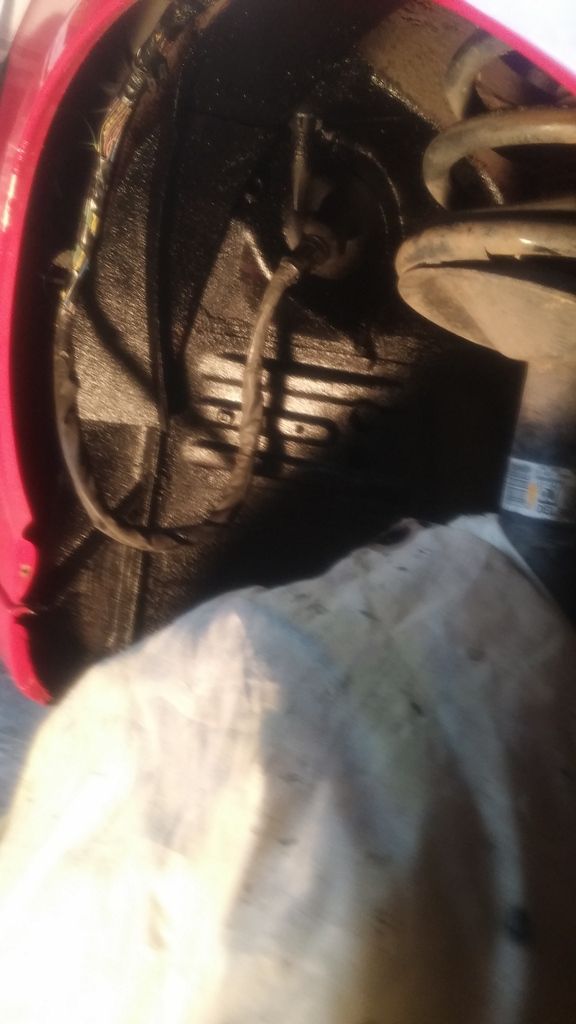 the hub and lines have arrived so back to the rear brakes to finish the m off
__________________
Jon C Living the dream MK IV VVTI Tiptronic TT Toyota Supra MG ZT 190+
BornTuesday, 10th July 2001 @ 09:01:10 259th ZT to run off the production line, out of 18,894 252nd ZT 190 + to be made out of 4,023 101st ZT in Solar Red (code: CEU) to be made out of 1,888 Last edited by jonc3725; 20th August 2017 at 22:16.. |
|
|
|
 |
|
|


 Linear Mode

