
|
|
|
|
|
|
||
|
|
||
 23rd January 2016, 08:46
|
#1 |
|
This is my second home
N/A Join Date: Feb 2010
Location: Suffolk
Posts: 6,867
Thanks: 0
Thanked 397 Times in 302 Posts
|
MOT today, failed on (amongst other things), the #3 bush below:
 Me and the tester were a bit lost for what to call it so apologies if I've got the wrong name. It's not that expensive (RHF100190), but does anyone know how difficult it is to replace? Looks to be bush in a metal housing, could bash it out with a suitable drift, or maybe I'd need a puller?  Interestingly, some chaps on a Russian site reckon BMW bushes are compatible, but so are the harder ones from the sportier models - https://translate.google.co.uk/trans...-text=&act=url The garage quoted 3 hours labour for it + a lower arm, but said if they could do it in less they'd charge less. I'm up for doing it myself if possible. |

|

|
|
23rd January 2016, 09:12
|
#2 |
|
I really should get out more.......
ZT CDTi 135, ZT260SE Join Date: Feb 2011
Location: Dundee
Posts: 2,877
Thanks: 10
Thanked 331 Times in 213 Posts
|
Replaced one on a ZT no problem, just used a bush "puller" kit and wound it out.....
These go all loose and flappy, but really not so hard to do... |
|
|
|
|
23rd January 2016, 09:30
|
#3 | |
|
This is my second home
N/A Join Date: Feb 2010
Location: Suffolk
Posts: 6,867
Thanks: 0
Thanked 397 Times in 302 Posts
|
Quote:
Does much have to come off to access it? |
|
|
|
|
|
23rd January 2016, 12:03
|
#4 |
|
I really should get out more.......
ZT CDTi 135, ZT260SE Join Date: Feb 2011
Location: Dundee
Posts: 2,877
Thanks: 10
Thanked 331 Times in 213 Posts
|
It was my stepdads..... and on his car...
He had this universal bush pulling/pushing kit. From what I can remember, if the shock and ARB are disconnected, the hub should drop far enough that you can then access the bush with the upper arm still in place. However, I did a complete rear subframe and lower and upper arm swap on his rear suspension, but I do remember doing the bushes semi in situ. What you need to be prepared for, are the bolts having welded themselves to the inside of the bush, we had to drill these out/angle grind them off... they were solid. I think at that point after the drilling we noticed the shocking slack in the bush, so perhaps that part of the step was a waste of time :p, but without it, probably wouldnt have noticed quite how bad the bushes were. I do remember his universal kit needed a little fettling on the lathe, to get the centre piece to fit over the bush dust seal. Perhaps there is a BMW tool out there that will be perfect, seeing as its supposedly a BMW part.... Worth checking out the BMW manuals just to be on the safe side! What I will say is that despite being tight as hell, they do actually wind out ok, despite being in there for over a decade, so at least thats some comfort ! |
|
|
|
|
24th January 2016, 23:22
|
#5 | |
|
This is my second home
N/A Join Date: Feb 2010
Location: Suffolk
Posts: 6,867
Thanks: 0
Thanked 397 Times in 302 Posts
|
Quote:
RAVE says you need to remove the spring - is this the case? I don't own any spring compressors but don't mind buying some, I just need to know in advance! I'll look into getting some replacement bolts (FC112187A / FX112057) as well, just in case. I'm still looking into this, but I'll post up my findings so far. The bushes are BMW items. Specifically, there are several variants - e.g. an "ordinary" one and a sportier one for the M3 which is presumably stiffer. Personally, I'd rather replace both of them with the better ones. The M3 ones are part number 33326775551, which has been superseded by 33306852895. You can pick them up on eBay for £13.10 - http://www.ebay.co.uk/itm/BMW-3-SERI...kAAOSwVFlT9boZ - for Meyle units. Cheaper than even the pattern parts from DMGRS. Being a BMW part, loads more info out there on replacement. In terms of tools: The bush is around 45.5mm You can get tools to remove it - this one was linked to by someone who used it for the job - http://www.ebay.co.uk/itm/Vauxhall-O...UAAOxygj5Sn3Cu - but it's £30 Alternatively, you can make one - it's just a rod with some cups on each end - theres some info here but it's US centric - http://www.bimmerforums.com/forum/sh...4#post11933434 / http://www.bimmerforums.com/forum/sh...8#post13009398 - the eBay listing above is clear that even with 12.9 grade threaded rod, it's a consumable - people online have mentioned to buy enough to make the tool a couple of times over incase it breaks! I don't own a lathe so I need to get a tool that works out of the box Last edited by Jakg; 24th January 2016 at 23:42.. |
|
|
|
|
|
25th January 2016, 01:20
|
#6 |
|
I really should get out more.......
ZT CDTi 135, ZT260SE Join Date: Feb 2011
Location: Dundee
Posts: 2,877
Thanks: 10
Thanked 331 Times in 213 Posts
|
Im working from memory here but:-
1) You dont need a spring compressor for the rear. 2) You can either drop the hub out of the upper arm by disconnecting the shock leaving the spring connected 3) or drop upper arm lower than the balljoint on the hub, but I cant remember if this is physically possible. 4) you cant rotate the hub away from the upperarm, because of the trailing arm bush keeping it aligned 5) Removing the spring is really easy 6) Do whatever gives you the best access, and if you start on the job and realise you really need to get the spring out of the way to get the movement you need in the upper arm, just do it, would save a lot of swearing and time. 7) The bush kit we used on my stepdads car was just exactly what you descrribe.. We had an outer collar that JUSt fitted over the bush and butted up against the thin outer edge of the hub, and of course a centre piece that mated with the inner of the bush, and wound the NAUGHTY WORD-NAUGHTY WORD-NAUGHTY WORD-NAUGHTY WORD-NAUGHTY WORD-NAUGHTY WORD- out. 8) Before worrying about springs and upper arms, just go out and make sure you can actually undo the upper arm to hub bolt first, both were seized solid on this car, and we had to cut off the bolt heads to separate the upper arm from the hub. Of course at the time we thought the bushes were ok, so didnt get a blowtorch out as we wanted to keep the bushes from melting! 9) Be prepared to be shocked at the corrosion on the rear...! If I was in your shoes and I was keeping the car, Id be checking the lower arms, subframe, upper arms, etc... Im sure youve seen the pics of the upper arm corrosion on here? Where they have literally sheared off with corrosion? This is what my stepdads were like, frankly dangerous. 10) When in there make sure the drain holes in the upper arm spring seat area are lined up with the rubber isolator and clear. If not, the spring sits in a pool of water its whole life, and this is probably why most of them end up knackered. Last edited by T16; 25th January 2016 at 01:23.. |
|
|
|
|
25th January 2016, 01:27
|
#7 |
|
I really should get out more.......
ZT CDTi 135, ZT260SE Join Date: Feb 2011
Location: Dundee
Posts: 2,877
Thanks: 10
Thanked 331 Times in 213 Posts
|
HAng on a minute?!!
Is the BMW E46 Upper arm the same dimensions as the rover one?!! If so, it looks like its alloy, would be great if it was a straight swap for the MG Rover pressed steel ones? 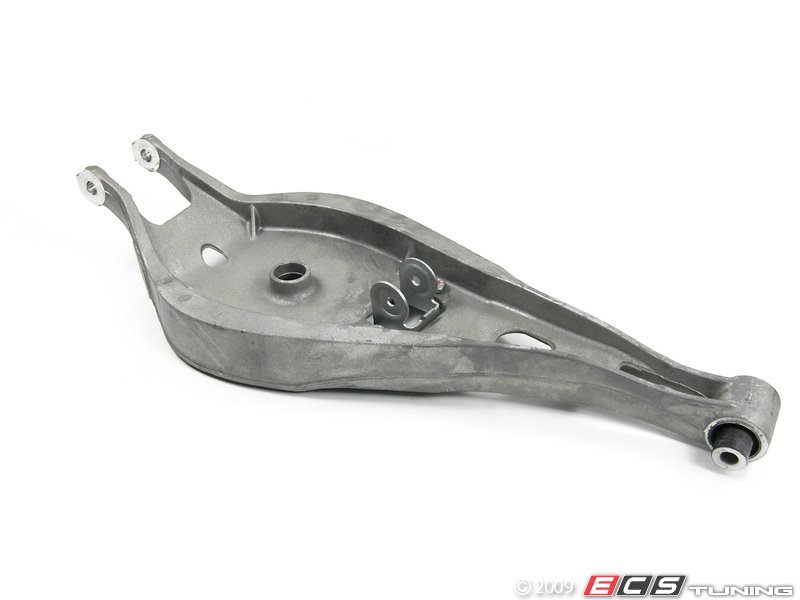  Last edited by T16; 25th January 2016 at 01:29.. |
|
|
|
|
30th January 2016, 21:48
|
#8 |
|
This is my second home
N/A Join Date: Feb 2010
Location: Suffolk
Posts: 6,867
Thanks: 0
Thanked 397 Times in 302 Posts
|
Poor progress today.
Struggled to get the car high enough to put axle stands under the jacking points, jacking from the rear recovery strap as per rave - I normally jack from the jacking point and put the stands under the arm (I know I shouldn't!) Then I struggled to get the rear drop link bolt off (rusted solid, eventually came off). Then I struggled to get the drop link free of the ARB - I tried removing the ARB only to find one of the bolts started to round so had to back to getting it off the drop link. Finally got the drop link off, only to get stuck at the damper bolt - all my strength on a 36" breaker bar wouldn't shift it, it just compressed the suspension. Will have another go tomorrow using my jack to turn the breaker bar. In the mean time, hailed the entire time so all my clothes are sodden, and I'm filthy. EDIT - All my sockets are six-sided and I used PlusGas on all the bolts before touching them. They've not been touched since the car was new and so are all rusted solid. |
|
|
|
|
31st January 2016, 10:25
|
#9 |
|
Precise
Rover 75 Tourer 2.5KV6 Connoisseur SE Join Date: Mar 2013
Location: Fleet
Posts: 2,954
Thanks: 630
Thanked 617 Times in 480 Posts
|
On this Forum "somewhere" it was stated that the BMW upper arms are a different size and cannot be fitted.
Remember when all is done, tighten the bolts with the car on its wheels so that all the rubber bushes are free from twist. |
|
|
|
|
31st January 2016, 11:55
|
#10 | |
|
This is my second home
N/A Join Date: Feb 2010
Location: Suffolk
Posts: 6,867
Thanks: 0
Thanked 397 Times in 302 Posts
|
Quote:
Removed the bolt holding the upper to trailing arm (only easy bit so far) and the bush virtually fell out. Unfortunately, only the inner bit came out. The outer collar is still welded to the inside of the arm. All I can see is lots of chiselling! It's 5° C and raining. I'm soaked. Should've paid a garage. |
|
|
|
|
 |
|
|


 Linear Mode

