
|
|
|
|
|
|
||
|
|
||
 27th December 2012, 11:32
|
#1 |
|
This is my second home
Rover less ! Join Date: Jun 2011
Location: Tarbolton
Posts: 3,442
Thanks: 393
Thanked 888 Times in 542 Posts
|
There's a lot of topics about key fobs at the moment on the forum, some with the quite expensive retractable ones which although are very neat they are not original.
So for those who want to keep them original here's a guide on how to do it for around £5. I purchased one from the bay and it is a "Valeo" as the original ones were. After opening up the key fob carefully remove the chip and the PC board with battery. Then remove the key blade from the fob. I managed to pull the old blade out of the plastic fob by simply using pliers. 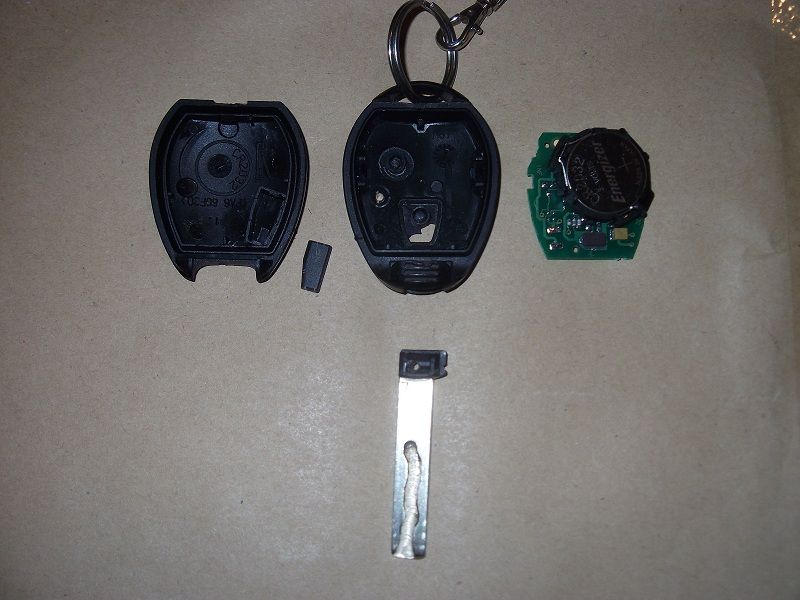 You will note there is a small piece of plastic on the end of the blade. This is separate from the main fob body and is held into the fob body via a small roll pin as shown below. 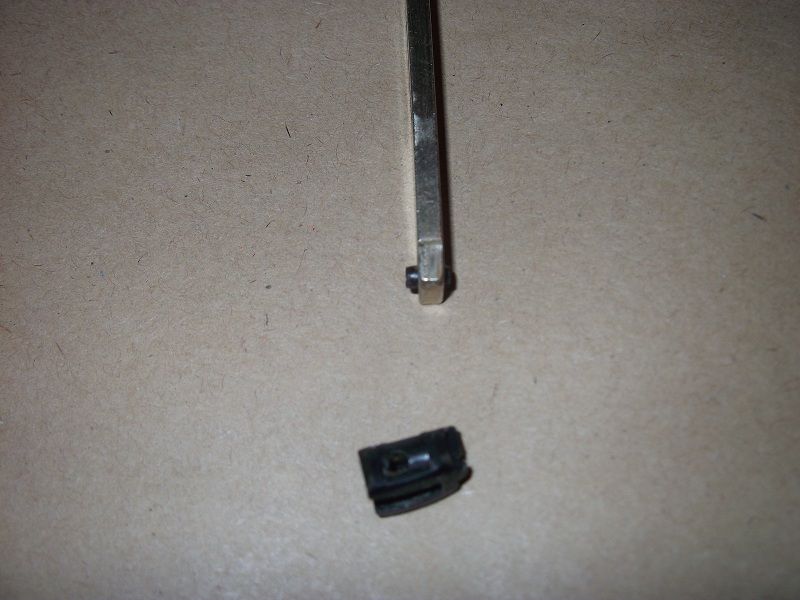 To remove the blank blade from the new key fob I heated the blade using a heat gun. A hair drier may also do the same job then pull the blank blade straight out of the new fob. You will note that with the blade removed from the new fob the hole is the same size as the blade and not like the original fob which had a larger hole to accept the blade and small piece of plastic with roll pin as shown in above photo. The new blade does not have any roll pin and is just moulded into the plastic casing. I removed this small plastic piece and the roll pin from the end of the original blade. Then carefully I drilled a small hole on one side of the new fob to allow the original blade to be located inside the new fob then press the roll pin into the new fob and through the hole in the blade as shown below marked inside circle. 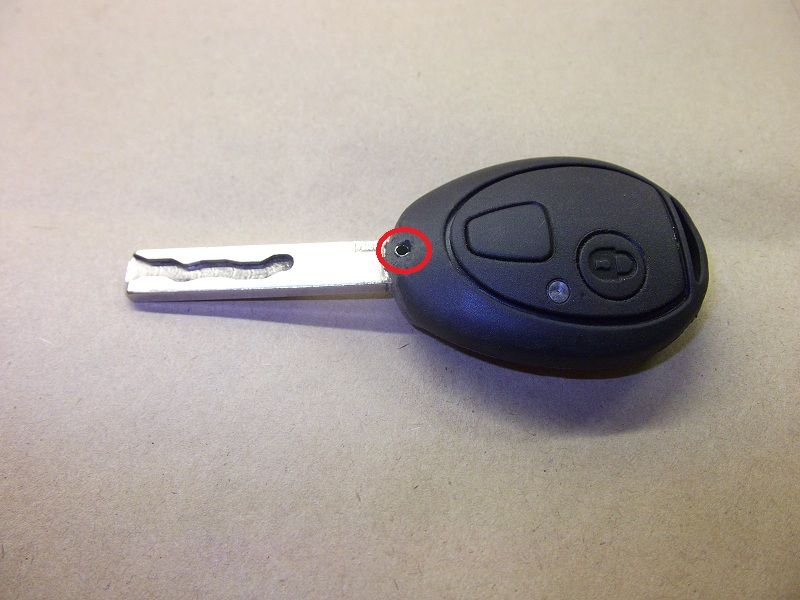 On re assembling I found there was a slight difference in the casings where the PC board was mounted as shown below marked out with red rings. 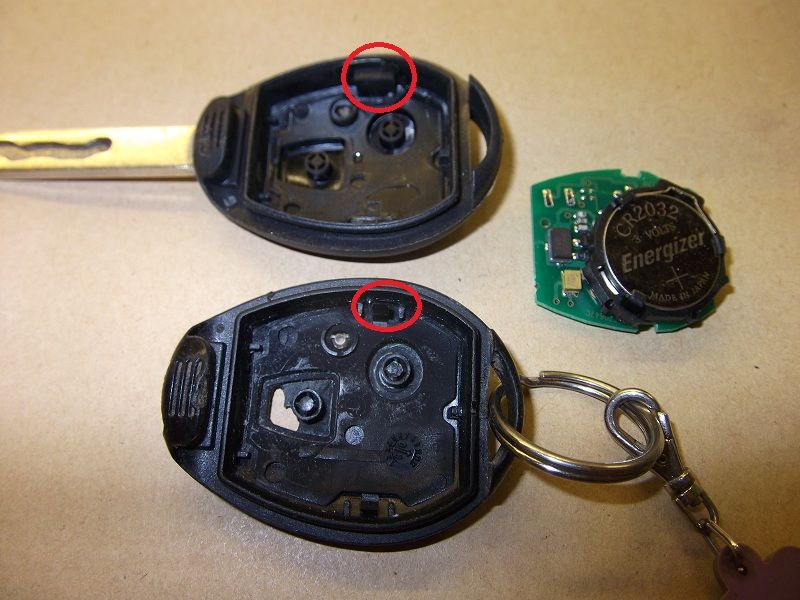 On the new casing (top of photo) the PC board locator is larger than the original one (botom of photo) I simply removed this larger piece using small pliers which then allowed me to re assemble the PC board into the fob. Job done and I am so pleased I have ordered another 2 new fobs as the other one for the diesel is also slightly worn and in due time I'm sure one on the V6 will require replacing. JYJ |

|

|
|
|


 Threaded Mode