
|
|
|
|
|
|
||
|
|
||
 13th April 2010, 10:31
|
#1 |
|
This is my second home
Jaguar XJ 3.0 V6 Auto (X350) & Hyundai Tuscon 2020 Join Date: Oct 2008
Location: Bridgend
Posts: 10,342
Thanks: 69
Thanked 559 Times in 356 Posts
|
Us lucky guys & gals who were part of the last bulk buy I think should be receiving their finishers soon, mine came today and here they are:
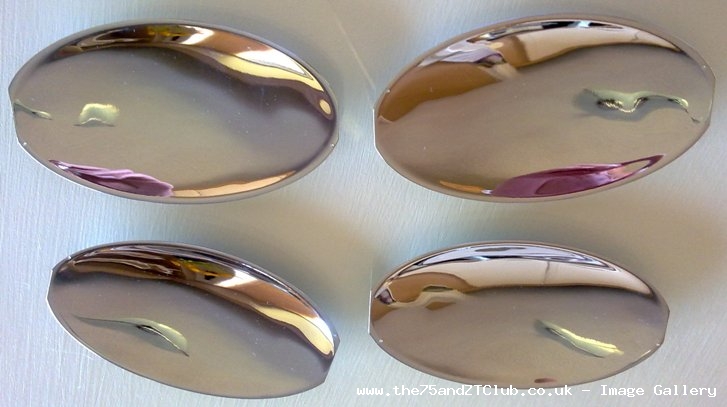 I used the following two products to attached them, a 2mm thick double sided tape (the type I used is from the glazing industry designed to hold double glazed units in place so it's strong but any good quality tape should do it) and a silicone adhesive (this was a mirror adhesive designed to hold mirrors 6' x 4' easily so again strong) no nails should do the trick. Firstly I run a strip of the tape around the outer edge and then put a good golf ball sized 'glob' of the adhesive in the centre.   By using the tape and the adhesive it meant that once the finishers were carefully positioned the adhesion on the tape would securely hold them in place whilst the silicone adhesive has time to cure, no need to wedge something behind the door handle to hold the finishers in place waiting for the silicone to go off. I ensured both the finisher and door were cleaned off in white spirit prior to attaching, then taking the prepared finisher I carefully positioned it to the door (with double sided tape you have one chance to get it right) Once I was happy with the position the finisher was securely pushed against the door, there is no silicone over spill as this gets trapped between the door and finisher and held in place buy the tape. The tape bonds instantly and there you go just sit back enjoy and wait for the silicone adhesive to do it's thing in it's own time. No need to run a bead of silicone around the rim as the tape will stop any water ingress. Total time about 30 minutes and here are the results: 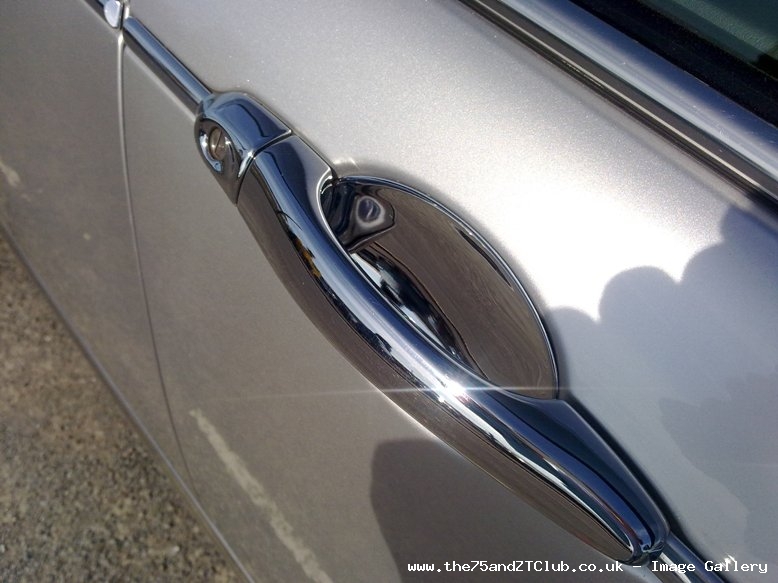  Disclaimer: You are responsible for any work or modifications carried out on your car and you undertake any such work at your own risk. Neither the 75 and ZT Owners Club nor the original authors in this thread can be held liable for anything that may happen as a result of you following this thread's posts. Any modifications should be reported to your insurance company.
__________________
"The only thing to do with good advice is pass it on. It is never any use to oneself" |

|

|
|
|


 Threaded Mode