
|
|
|
|
|
|
||
|
|
||
 8th April 2013, 17:18
|
#1 |
|
Newbie
Rover 75 Saloon Join Date: Dec 2011
Location: Southampton
Posts: 2
Thanks: 0
Thanked 0 Times in 0 Posts
|
Hello good people, my old Rover has failed an MOT due to "nearside headlight aim too low". Upon inspection I've found that the actual plastic hex unit including the cog has disappeared from the vertical adjuster spindle:
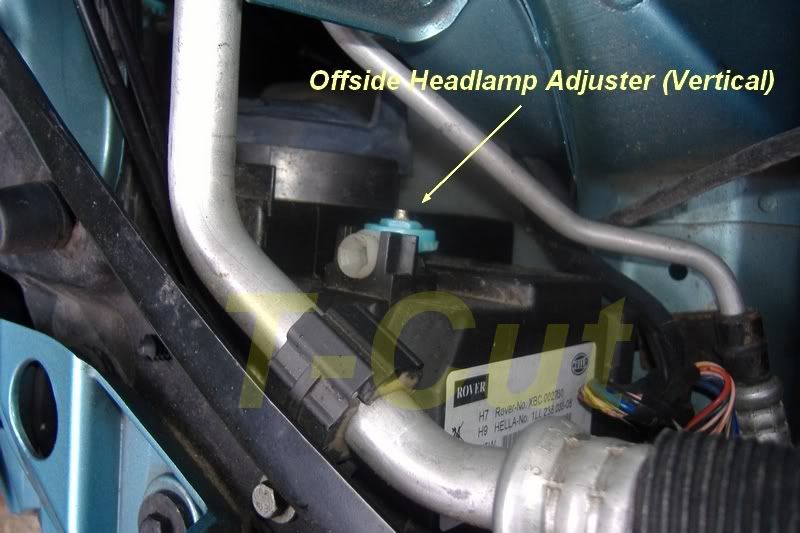 (I've borrowed this image from T-Cut on the MG rovers forum to show which part I'm talking about. I know the photo shows an offside unit but I couldn't find a picture of the nearside one.) Does anyone know if its possible to get a replacement piece or to make some sort of rudimentary fix? I wouldn't want to fork out for a whole new headlight just because of this! Thanks, Matt |

|

|
|
8th April 2013, 19:21
|
#2 |
|
Moderator

MG-ZTT Join Date: Mar 2007
Location: Ware, Herts
Posts: 19,798
Thanks: 161
Thanked 1,249 Times in 1,036 Posts
|
welcome along, I doubt you'll get the cog separately...best bet is to contact all the traders and see if they've got a car with front end / damaged headlight.
To put it on you need a dab of glue, long nose pliers and a long screwdriver. Put the glue in the hole of the cog, pop it over the shaft, and pull the shaft with the pliers and push the cog on with the screwdriver until the glue sets.
__________________
David  Impecunity is the mother of ingenuity Useful how to's for common problems Car Of The Month Jan 2014 [SatNav Power Down] [Coolant Level] [SatNav Repair] [Diesel Non Starting] [Paint Codes] [Rear Light Seals] [Reversing Light Switch] [Bleeding Brakes][Sunroof Drain] [Early ZT's][Instrument Pack Diagnostics][ATC Diagnostics] |
|
|
|
|
8th April 2013, 19:36
|
#3 |
|
Avid contributor
ZT-T 135 Join Date: Mar 2011
Location: Crewe
Posts: 102
Thanks: 0
Thanked 14 Times in 8 Posts
|
Not sure if you can get the cogs separately, but when the adjuster worked loose on mine I did a 'quick fix' using the inside of a cable terminal block like this...
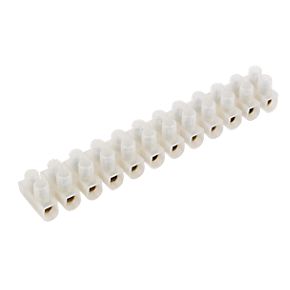 You just need the inside of one connector, then cut it in half so you have a short hollow block with a single screw in it. Slip it over the end of the adjuster rod and then use a pair of pliers to pull the adjuster rod out of the back of the lamp until it's at the correct height (line the beam up against a wall and compare it with the other side). Once it's in the correct position tighted the screw so that the rod is held in place. It's just about do-able single handed, but easier if you can get someone else to tighten up the screw while you keep the light in position. BTW - The 'quick fix' is still there 6 momths later! |
|
|
|
|
8th April 2013, 20:29
|
#4 |
|
This is my second home
Rover 75 CDT Manual Connoisseur SE, Rover 75 CDT Automatic Connoisseur SE & a Freelander Td4. Join Date: Jul 2009
Location: Hampshire
Posts: 11,550
Thanks: 3,470
Thanked 3,119 Times in 2,247 Posts
|
You can pick up a headlamp unit from the scrappy cheap enough if you search around, but I also did a quick fix on mine about 3 years ago and it is still fine.
With the headlamps shining onto the garage door I pulled the gear wheel rod out until both headlamps were level and then wedged it in that position. |
|
|
|
|
11th April 2013, 18:52
|
#5 |
|
Newbie
Rover 75 Saloon Join Date: Dec 2011
Location: Southampton
Posts: 2
Thanks: 0
Thanked 0 Times in 0 Posts
|
Thanks for all your advice. I actually printed out your suggestions, took them in to the garage and Dave M's cable connector idea proved to be a winner! That little beauty got me through the MOT and the garage asked if they could keep the print out so they'd remember the fix for any other cars that could use it!
|
|
|
|
|
1st June 2022, 17:21
|
#6 |
|
Loves to post

Rover 75 Tourer Join Date: Jun 2009
Location: Nr Telford, Shropshire
Posts: 375
Thanks: 6
Thanked 15 Times in 15 Posts
|
Hi folks, I don't see how this works.
I have the same issue - the adjuster cog fell off and dropped into the engine bay somewhere. I assume the plastic has disintegrated. You say you pull the spindle with pliers, but to me it looks like it rotates rather than goes in and out. Fixing the connector block inner to it won't do much because it would just spin round. Maybe mine is different, or maybe I'm missing something. BTW, my lights are Xenons. I have a spare set of halogen lights that were originally on the car. I've tried to remove the cog off one of those and they won't budge. I don't really want to damage the light unit either - even though it's not used, it's in excellent condition. |
|
|
|
|
1st June 2022, 17:43
|
#7 | |
|
This is my second home
ZT260 #243 (resting) Join Date: May 2010
Location: Prestonpans
Posts: 22,484
Thanks: 650
Thanked 4,624 Times in 3,358 Posts
|
Quote:
The cogs are a press fit onto the shaft, once they come off (usually due to corrosion on the shaft) they're impossible to secure again. |
|
|
|
|
|
5th June 2022, 21:06
|
#8 |
|
Loves to post
Rover 75 Tourer Join Date: Jun 2009
Location: Nr Telford, Shropshire
Posts: 375
Thanks: 6
Thanked 15 Times in 15 Posts
|
Thanks for the help on this folks. I've sorted the light alignment using the connector block method. 🥳
|
|
|
|
|
5th June 2022, 21:19
|
#9 |
|
Posted a thing or two
rover 75 club se Join Date: Apr 2011
Location: Leicester
Posts: 1,660
Thanks: 358
Thanked 419 Times in 310 Posts
|
the big problem occurs when the other end ( the claw ) pulls away and separates from the rear of the light. i have put them back on pushing through from the back of the light and using the up/down switch levelling , but very difficult. if no joy,then in this case you will need to remove the headlight and repair. good luck.
|
|
|
|
|
5th June 2022, 21:44
|
#10 |
|
Gets stuck in
Rover 75 Tourer Join Date: Mar 2022
Location: Chesterfield
Posts: 677
Thanks: 206
Thanked 69 Times in 53 Posts
|
My headlights are out at the moment. I'd better check them before they go back in.
|
|
|
|
 |
|
|


 Linear Mode

