
|
|
|
|
|
|
||
|
|
||
 11th August 2013, 20:29
|
#1 |
|
Avid contributor
MG ZT CDTI Join Date: Oct 2012
Location: Wallsend
Posts: 117
Thanks: 8
Thanked 2 Times in 2 Posts
|
I tried to fit a auto dim mirror today but failed. I had a look on the postes on here and thought I would give it ago. Trouble started when I took the a pillar cover of an fount the white plug near the dash mine only has 14 pins with 8 in use not like anything I have read on here
 all the colours and positions of the pins are not the same as How To's. I got out the multimeter and found that pins 7 & 9 are permenent live, 11 is switched live, 1, 2, and 6 push out .02 volts all the time. I am totaly confused at which wires I connect to which wires on the mirror plug  If anybody has come across this wiring or know what goes where I would be most greatful.
__________________
Once owned a 2004 MG ZT CDTI. Royal blue Now own a Nissan X-Trail |

|

|
|
11th August 2013, 20:57
|
#2 |
|
This is my second home

75 Join Date: Nov 2006
Location: Leeds
Posts: 8,432
Thanks: 176
Thanked 907 Times in 716 Posts
|
In your white plug will be a black wire. Connect the black from the mirror to this black.
Some members have connected the black from the mirror to an earth point located behind the interior light. Use a test meter to find a ignition live. Connect the white/yellow to this ignition live. You can use your meter to find the connector that has the reverse live by selecting reverse and switching on the ignition. A few members have not bothered with the reverse connection. The mirror will work fine without it. pin 3 = Ground (earth) black cable. pin 11 = ignition live. white/yellow cable. pin 12 = reverse live. Green/brown cable. These are the pin connections in the white plug but always check with a meter. Dave T |
|
|
|
|
11th August 2013, 21:25
|
#3 |
|
Loves to post
Rover 75 CDTi Tourer Connoisseur SE Auto, Also fully restored Mk 2 1966 MG Midget Join Date: Apr 2007
Location: Manchester
Posts: 314
Thanks: 49
Thanked 59 Times in 46 Posts
|
I have been looking at my wiring already fitted earlier today, as I don't believe the dimming is working. I don't get the green tinting.
I have found at least three variations on the wiring. Auto's are different to manuals and there are differences before the facelift and after. I have taken 20 photos of the " A" pillar loose lead connector and it's other half coming from under the fascia. This is very tight and I can't get a good view like yours. I have compared your picture of the tight block connector with my loose one (both white connectors) but the wires don't match up. I have 8 wires entering my "loose half of the block", whereas you appear to have 7, but in different positions. Sorry, but I don't know how to insert a photo. Your three mirror wires should be - Black earth. Yellow - live when reverse is selected Other - live all the time I will have a look in the morning to get as near a similar photo as I can to yours. I will also have a look on the "How to's for adding a photo. I will be back tomorrow. Geoff |
|
|
|
|
12th August 2013, 06:21
|
#4 | ||
|
Vis Whiz

Rover 75 2.5 auto Saloon Join Date: Jun 2007
Location: LEEDS
Posts: 20,591
Thanks: 2,057
Thanked 3,056 Times in 1,621 Posts
|
Quote:
Quote:
 ) )
__________________
Dave...  Lost a few stones and a Gall Bladder and part of a bile duct and all of my dignity in the suppository incident
|
||
|
|
|
|
12th August 2013, 06:33
|
#5 |
|
This is my second home
75 Join Date: Nov 2006
Location: Leeds
Posts: 8,432
Thanks: 176
Thanked 907 Times in 716 Posts
|
When it comes to the white plug I don't think you can rely on the wire colours matching up.
The only sure way is with a meter to find the ignition live. As I said many people when fitting the auto dimming mirror don't bother with the reverse signal. Also they use an earth point near the mirror. This makes it so you only have to find one connection, the ignition live.. To check if your auto dimming mirror is working cover the front sensor on the mirror and shine a torch onto the sensor located in the mirror glass. Dave T |
|
|
|
|
12th August 2013, 06:53
|
#6 |
|
Owners Club Director

Rover 75 Conn SE V6 / MG ZT 260 SE V8 / MG ZT 180 SE V6 Join Date: Feb 2007
Location: Southampton
Posts: 20,942
Thanks: 645
Thanked 6,851 Times in 2,537 Posts
|
This was my experience with fitting one.
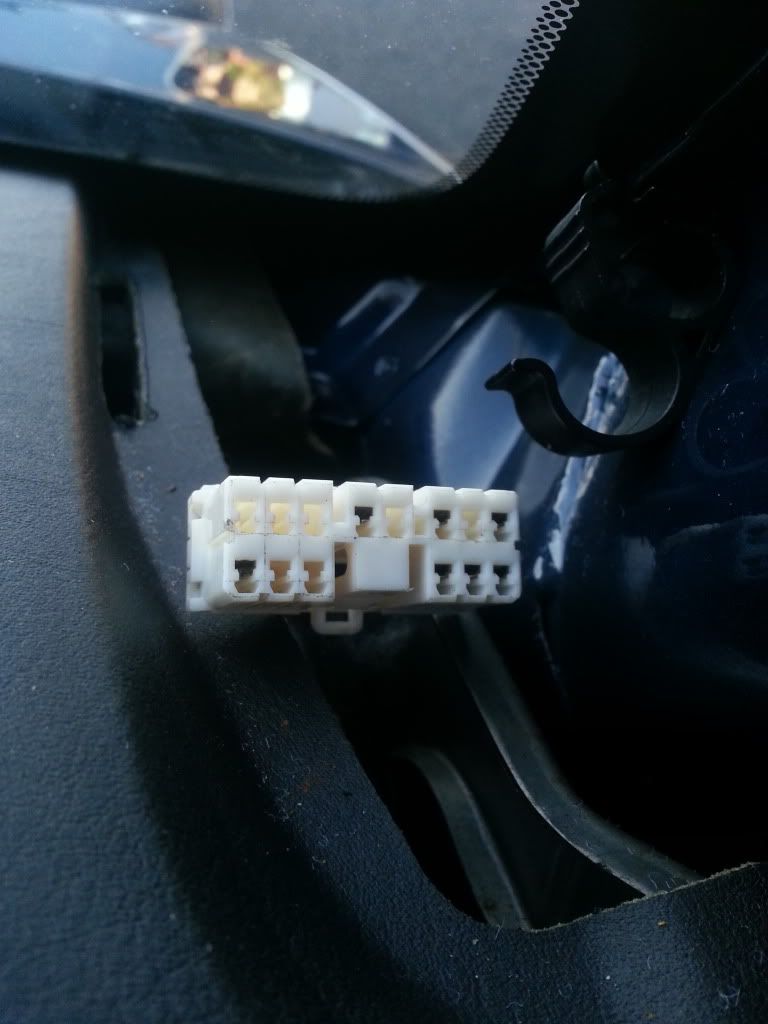
 It was a doddle to do thanks to ml.williams How To, with the valuable foot note from Wideload.  How-To Retrofit the Autodimming rear-view mirror How-To Retrofit the Autodimming rear-view mirrorWhen I got the dimming mirror from the scrap yard, I was also able to remove the wiring harness too, so for me it was just a case of locating the extra cables and transplanting them to the existing loom of my car. As I found my car had the white connector, it was white with yellow on pin 11 (ignition live), and green with brown on pin 12 (reverse gear live). This picture shows the A pillar connector from the donor car at the scrappy that had dimming mirror and rain sensing wipers, the connector to the right was my ZT-T with cables for the interior lighting only. 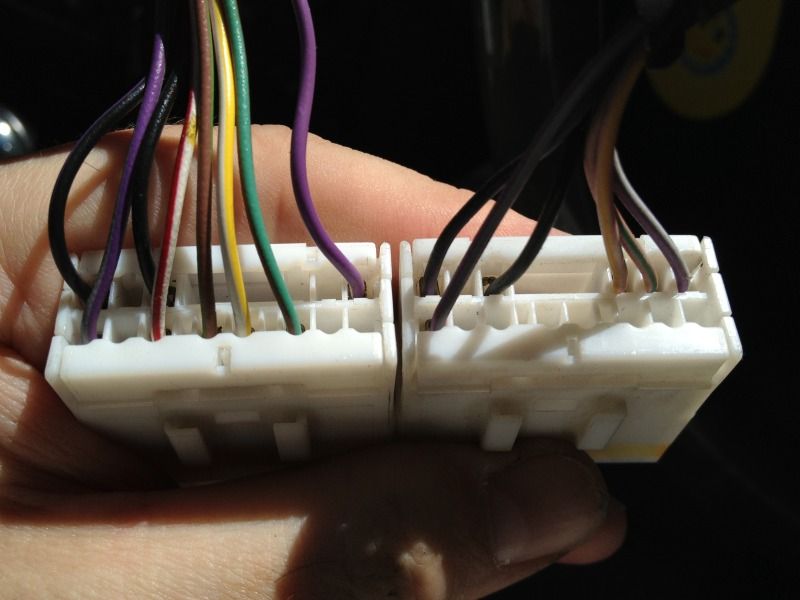 ..and below is the A pillar connector once I had added the white with yellow & green with brown wires.  Like ml.williams, I didn't need to run a black (Pin 3) Earth wire, as the one already there for the interior lights was already being used, so I just spliced into that at the light connector end (first wire) 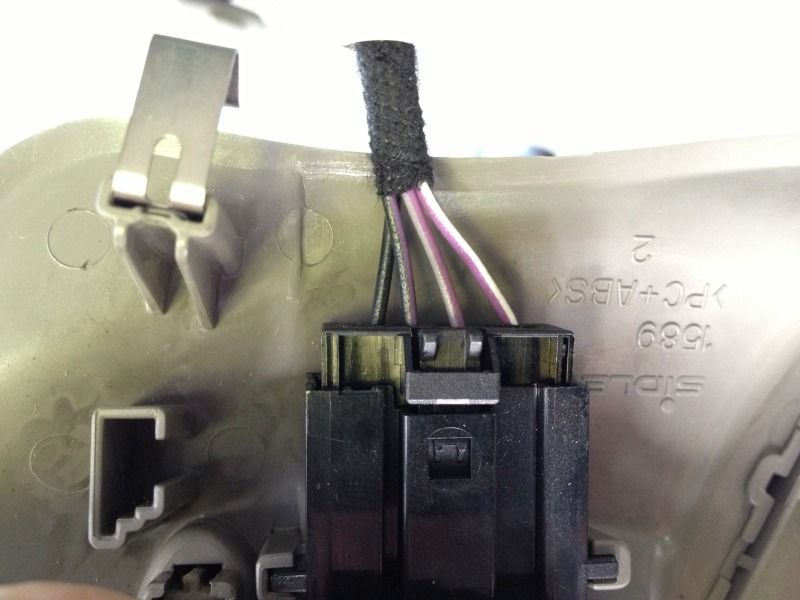 This is where you will find the white (or black) multipin connector which has all the wiring ready to connect to, at the base of the A pillar cover 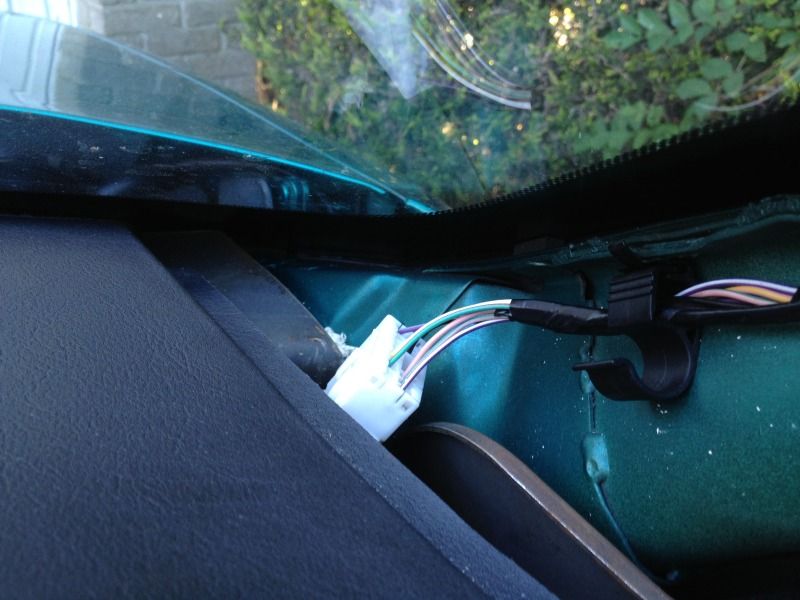 |
|
|
|
|
12th August 2013, 08:21
|
#7 |
|
Avid contributor
MG ZT CDTI Join Date: Oct 2012
Location: Wallsend
Posts: 117
Thanks: 8
Thanked 2 Times in 2 Posts
|
Thanks people. I have tried it with a battery and it works now so will fit it tonight after work. Am I right in thinking the wire for reverse can be left alone or wire it to the reverse switch if I want.
__________________
Once owned a 2004 MG ZT CDTI. Royal blue Now own a Nissan X-Trail |
|
|
|
|
12th August 2013, 09:09
|
#8 | |
|
Moderator

MG-ZTT Join Date: Mar 2007
Location: Ware, Herts
Posts: 19,798
Thanks: 161
Thanked 1,249 Times in 1,036 Posts
|
Quote:
__________________
David  Impecunity is the mother of ingenuity Useful how to's for common problems Car Of The Month Jan 2014 [SatNav Power Down] [Coolant Level] [SatNav Repair] [Diesel Non Starting] [Paint Codes] [Rear Light Seals] [Reversing Light Switch] [Bleeding Brakes][Sunroof Drain] [Early ZT's][Instrument Pack Diagnostics][ATC Diagnostics] |
|
|
|
|
|
12th August 2013, 21:33
|
#9 |
|
Avid contributor
MG ZT CDTI Join Date: Oct 2012
Location: Wallsend
Posts: 117
Thanks: 8
Thanked 2 Times in 2 Posts
|
Thanks for the help people I have fitted the mirror tonight and went for a run to test it. I works great I even found myself slowing down to let cars behind get close enough to test it. Once again Thanks everyone
__________________
Once owned a 2004 MG ZT CDTI. Royal blue Now own a Nissan X-Trail |
|
|
|
|
20th August 2021, 15:11
|
#10 |
|
Loves to post
MGZT Join Date: Aug 2019
Location: Richmond
Posts: 255
Thanks: 26
Thanked 80 Times in 45 Posts
|
Just to say thank you for all the posts about the auto dimming rear view mirror. I tackled doing one on my car today and it works! Thank you so much for all the posts, it made my life so much easier and is appreciated.
I attached my mirror earth wire to a thread hole in the light bracket rather than hitching it another earth wire. Thank you again, Bob Last edited by Bob Walker; 20th August 2021 at 15:12.. Reason: Typo |
|
|
|
 |
|
|


 Linear Mode

