
|
|
|
|
|
|
||
|
|
||
 1st October 2015, 14:31
|
#1 |
|
Posted a thing or two
Wedgewood Connie SE / Black Club SE Join Date: Jan 2014
Location: Ballymoney
Posts: 1,459
Thanks: 542
Thanked 583 Times in 365 Posts
|
The adjuster on my nearside headlight is broken, meaning I can't get it through MOT till it's sorted. Does this necessitate replacement of the whole headlamp unit, or can the adjuster be replaced separately? It's a Mk1 car, pre-facelift.
__________________
My blood brother is an immigrant A beautiful immigrant My blood brother's Freddie Mercury A Nigerian mother of three |

|

|
|
1st October 2015, 14:59
|
#2 | |
|
Posted a thing or two
MG ZT cdti Join Date: Jun 2010
Location: Northants / Bucks border
Posts: 1,815
Thanks: 260
Thanked 204 Times in 182 Posts
|
Quote:
klarzy-dials.com he did mine last year really helpful chap I took the car over there and he did it in his workshop they can be replaced but you have to split the casing there are plenty of threads on here how to do it but mine were Xenons and I didnt want to risk it lol
__________________
now with ZT Diesel power after killing the connie and the zt180 combusting |
|
|
|
|
|
2nd October 2015, 08:13
|
#3 |
|
Gets stuck in
NOW a Club Tourer was 1999 - 75 2.0Ltr Connoisseur SE petrol Saloon Join Date: Jan 2012
Location: Iwerne Minster, Dorset
Posts: 552
Thanks: 63
Thanked 54 Times in 47 Posts
|
Had the same issue. Carefully prise open the front of the h/light around where you can see the seal. Inside you will see a small gear wheel pinion. unfortunately its plastic and all my ones were slipping on the shaft. Araldite will glue it all together but take care not to get any on the cogs..
Then its just a case of a thorough clean of all the reflector and plastic cover front parts then with some clear silicone adhesive sealant put it all back together, making sure that it is a tight seal. you don't want water inside! I allowed a couple of days to let the internals stay very dry, cleaning and allowing for the glue to cure properly. Its not rocket science just patience and methodical working. You will only need a couple of PK/PZ screw drivers and a sharp knife. Hope this helps.
__________________
Chuck Nth. Dorset. UK Membership #1896 Don't take life so seriously.... it is not permanent! 
|
|
|
|
|
2nd October 2015, 11:37
|
#4 | |
|
This is my second home
ZT260 #243 (resting) Join Date: May 2010
Location: Prestonpans
Posts: 22,459
Thanks: 650
Thanked 4,624 Times in 3,358 Posts
|
What is actually broken? If its a case that the adjuster cogs have come adrift some have had success regluing using epoxy, if that fails there is a fix, allegedly temporary but my 1.8T has gone through two MOTs with it!
Quote:
Last edited by stevestrat; 2nd October 2015 at 11:40.. |
|
|
|
|
|
2nd October 2015, 11:41
|
#5 | |
|
This is my second home
none but not gone Join Date: Mar 2013
Location: March, Cambs
Posts: 16,437
Thanks: 894
Thanked 4,247 Times in 3,025 Posts
|
Quote:
__________________
 [SIGPIC][/SIGPIC]
.All praise Bananaswan
. [SIGPIC][/SIGPIC]
.All praise Bananaswan
.
|
|
|
|
|
|
2nd October 2015, 11:45
|
#6 |
|
This is my second home
ZT260 #243 (resting) Join Date: May 2010
Location: Prestonpans
Posts: 22,459
Thanks: 650
Thanked 4,624 Times in 3,358 Posts
|
With mine corrosion got between the shaft and the blue cog so the cog had no grip on the shaft. Tried cleaning it up and regluing but that wasn't successful, think it was to do with the type of plastic used for the cog. I did the fix I added to my post above and never looked back!
|
|
|
|
|
2nd October 2015, 11:53
|
#7 |
|
This is my second home
Rover75 and Mreg Corsa. Join Date: Nov 2006
Location: Sumweer onat mote o'dust (Sagin)
Posts: 21,751
Thanks: 341
Thanked 3,660 Times in 2,924 Posts
|
The basic problem with the blue cogs is rusting of the knurled spindle where the cog was pressed on. If the corrosion isn't too severe, I found getting a good quality Superglue into the joint works well. Apply grease after curing. When I bought my Connoisseur, the spindles were still bright steel, so I've ensured the ends are always well greased. If the adjuster arm inside the lamp has failed, then opening up the case is the only way to fix it.
TC |
|
|
|
|
2nd October 2015, 12:12
|
#8 |
|
Posted a thing or two
Wedgewood Connie SE / Black Club SE Join Date: Jan 2014
Location: Ballymoney
Posts: 1,459
Thanks: 542
Thanked 583 Times in 365 Posts
|
Thanks very much for the tips and offers of help folks! I'll take a photo later on and stick it on so the thing can be seen. It looks like it's sort of past it but I'm not knowledgeable enough to know.
Between that and the other headlight being very cloudy, I'm hemming & hawing about replacing them but would only look to do that if the existing ones can't be sorted out.
__________________
My blood brother is an immigrant A beautiful immigrant My blood brother's Freddie Mercury A Nigerian mother of three |
|
|
|
|
5th October 2015, 18:01
|
#9 |
|
Posted a thing or two
Wedgewood Connie SE / Black Club SE Join Date: Jan 2014
Location: Ballymoney
Posts: 1,459
Thanks: 542
Thanked 583 Times in 365 Posts
|
Finally got these uploaded. The first two pics show the rear of the NS headlamp, and the corrosion on the adjuster. Any thoughts as to whether this can be repaired?
The next pics show the level of clouding on the front glass. The offside lights are particularly bad in this regard. Have to admit I'm wondering whether I might be better off replacing them altogether, but haven't decided yet - any thoughts? I don't mind putting in the elbow grease to polish the glass if needs be, but I'm very much in the dark (ahaha) when it comes to taking the light clusters out and taking them apart.
__________________
My blood brother is an immigrant A beautiful immigrant My blood brother's Freddie Mercury A Nigerian mother of three |
|
|
|
|
5th October 2015, 18:47
|
#10 | |
|
This is my second home
Rover75 and Mreg Corsa. Join Date: Nov 2006
Location: Sumweer onat mote o'dust (Sagin)
Posts: 21,751
Thanks: 341
Thanked 3,660 Times in 2,924 Posts
|
Quote:
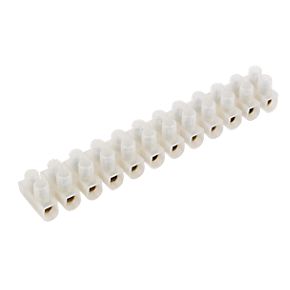
If you can get a connector like the one suggested to actually fix tightly enough, a simple extension will allow you to make a crank or something to enable the spindle to be tuned. Apply lots of penetrating oil to see if it's free. TC Last edited by T-Cut; 5th October 2015 at 18:50.. |
|
|
|
|
 |
| Thread Tools | |
| Display Modes | |
|
|


 Linear Mode

