
|
|
|
|
|
|
||
|
|
||
 11th September 2013, 16:23
|
#1 |
|
Avid contributor
MG ZT 190 Join Date: Aug 2013
Location: Huddersfield
Posts: 150
Thanks: 9
Thanked 4 Times in 4 Posts
|
Well after swooping on Ebay the other day and picking up a new Clarion VZ402E headunit for less then 1/4 of the normal retail price I have been wondering else to improve the sound system inside Blue Thunder. So the first thing I have done is made a start on the sub install.
As we drive to Malaga every year I didnt want a normal sub box in the boot as it limits luggage space and there is the risk of something piercing the sub itself. With that in mind I decided I woudl build a sub into the side of the boot with the amplifier mounted just to the side of it and the other two amps mounted on the other side of the boot. So now that I had the plan in my head I set to work. The first stage was using tin foil to coat the inside of the boot so that I could mold the sub box back and sides from Fibre glass and use 18mm Birch ply for the front. 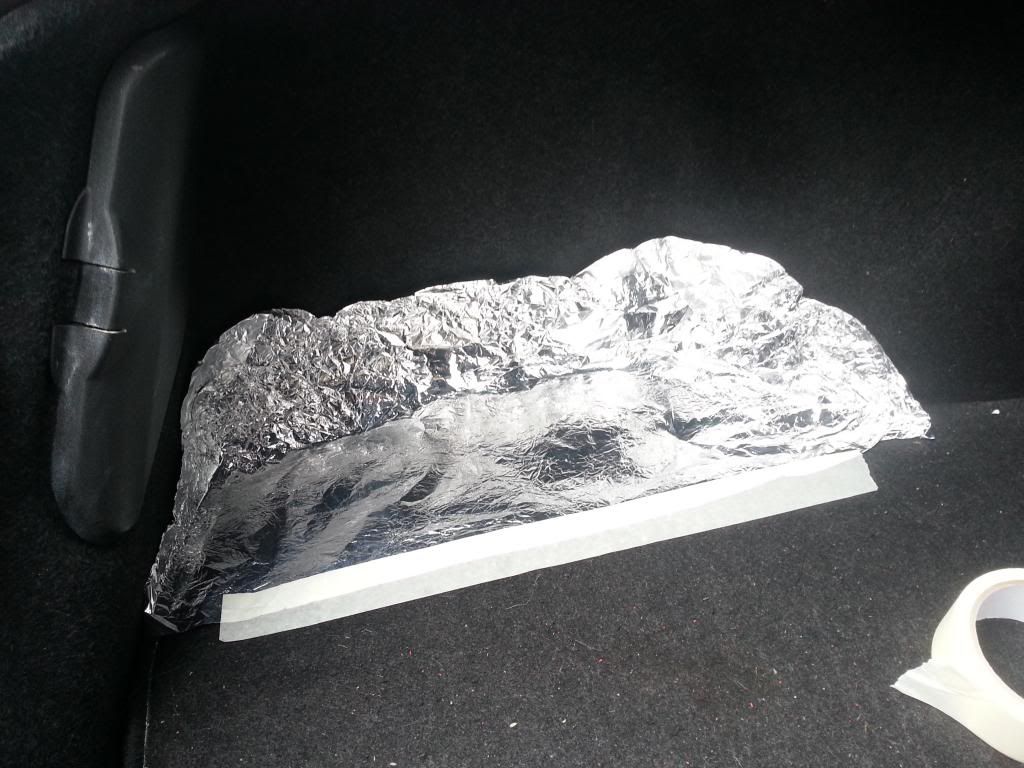 Then it was a case of just adding more foil till I had the entire area covered   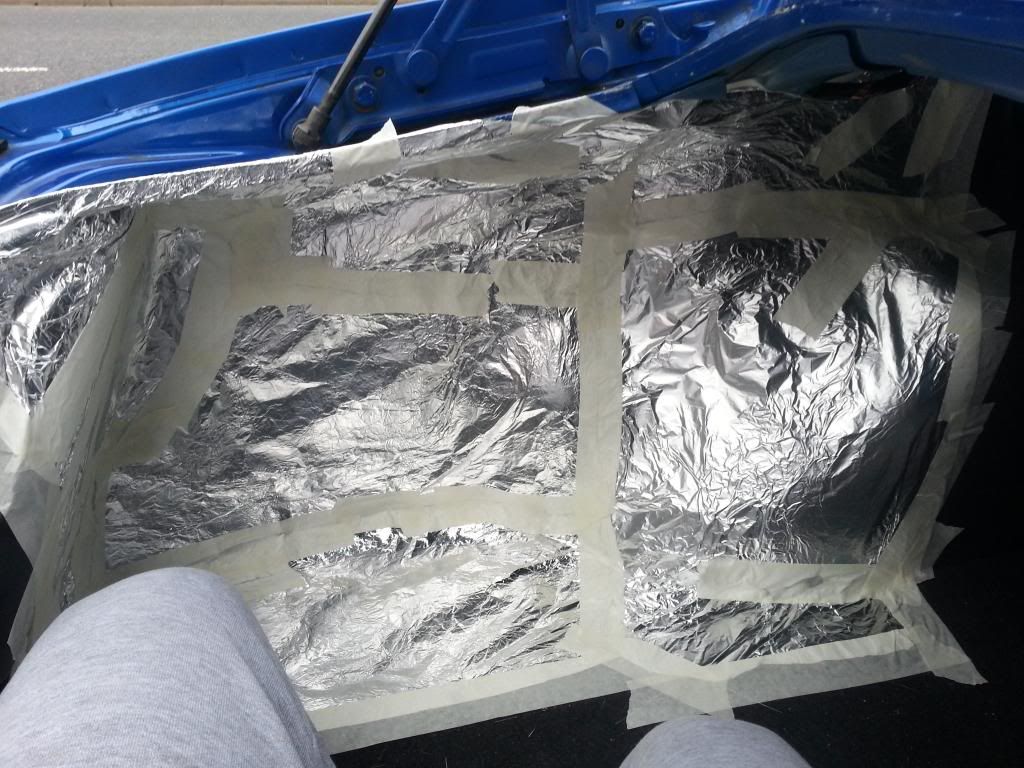 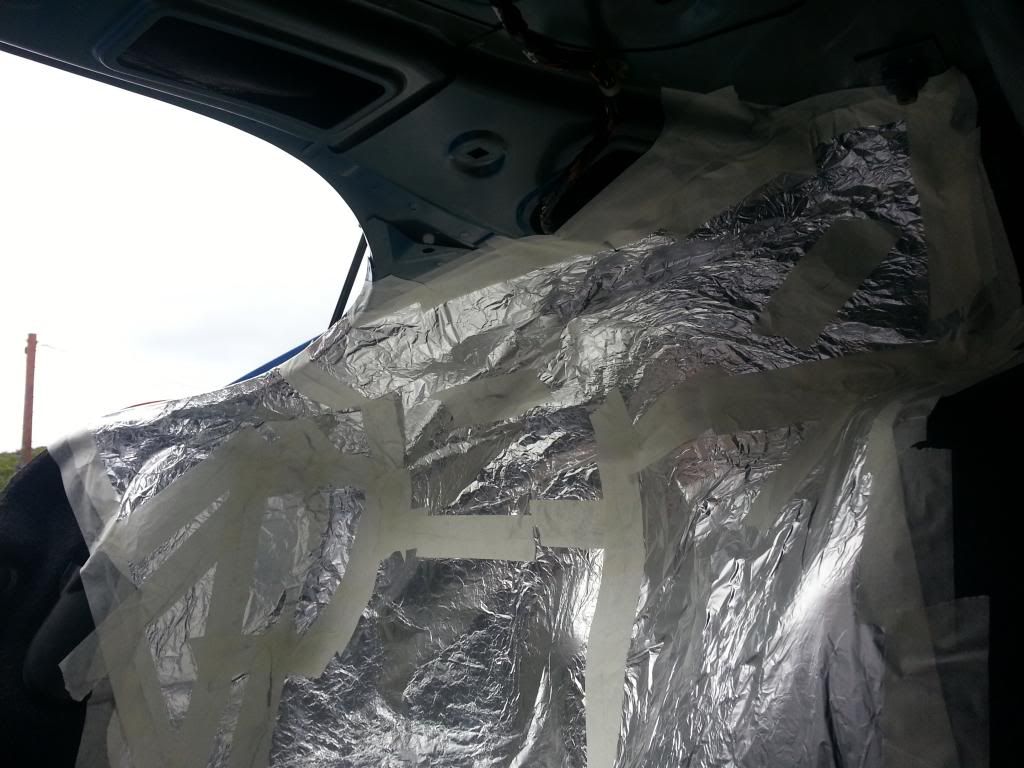 Then onto the front section. So first I got an old piece of scrap wood cut out the sub location and started to shape it to fit.....this took quite some time and many pieces of cardboard where humanely subject to scissor treatment. 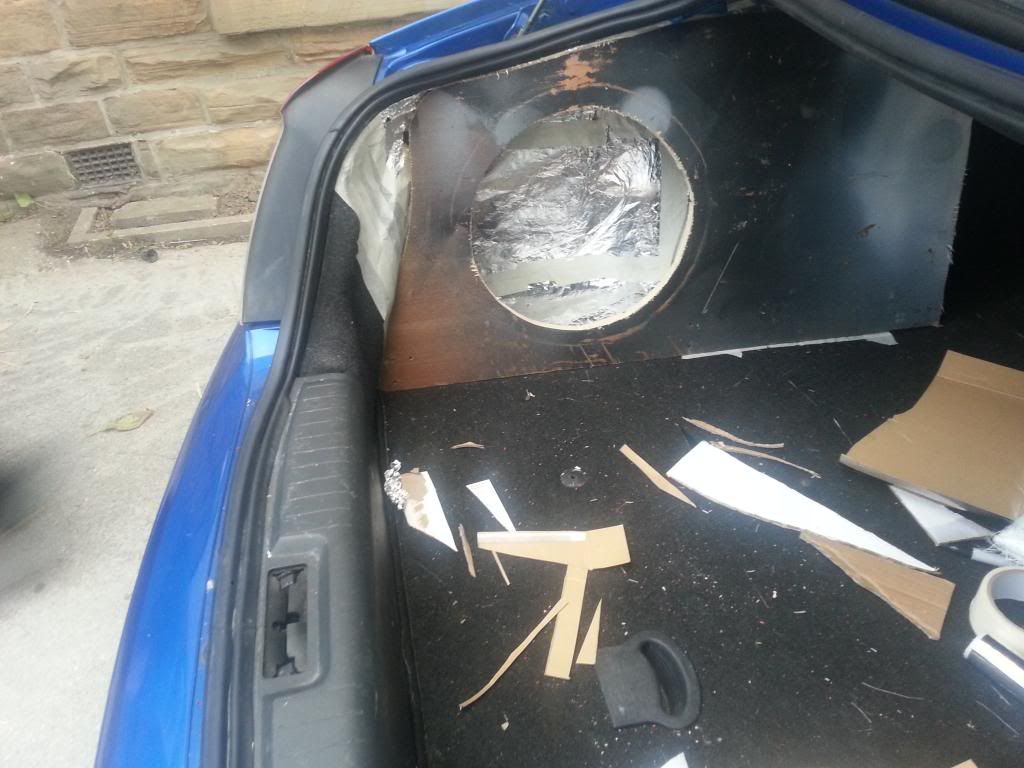 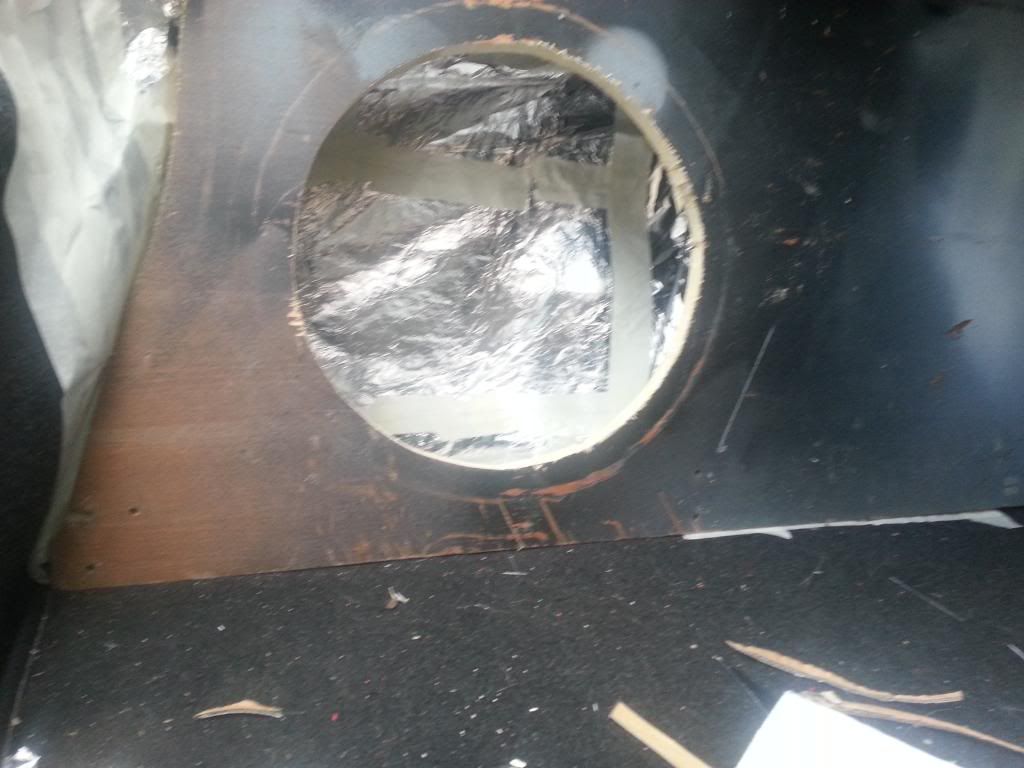 Then came the piece of beech..... 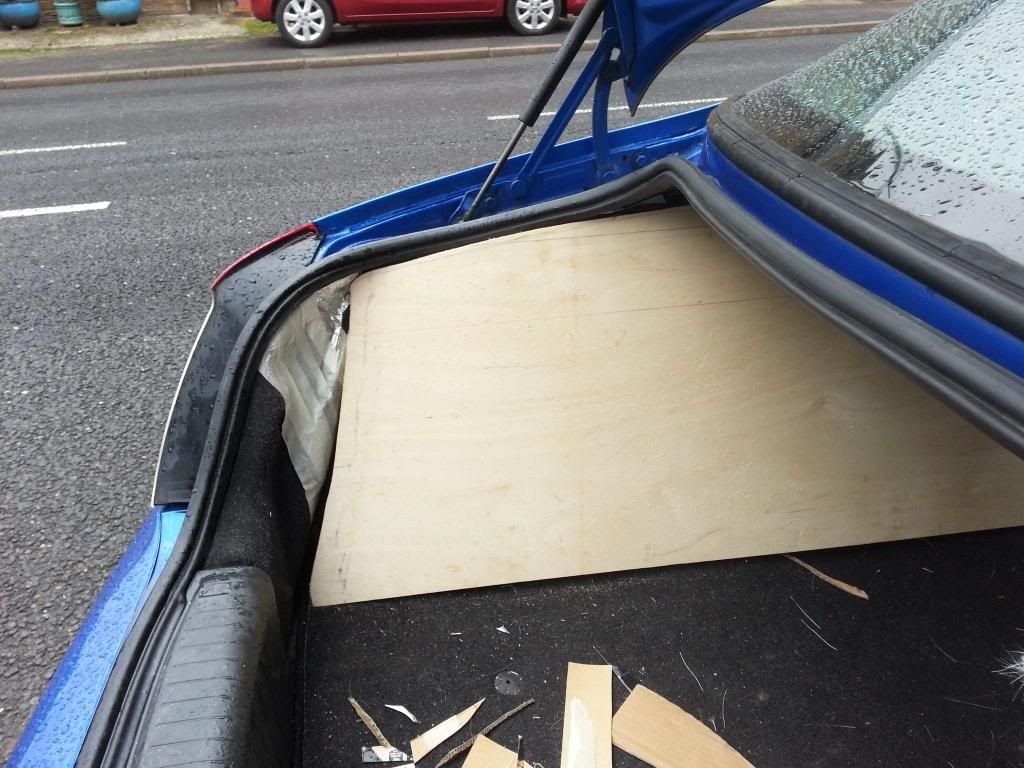 which took some more work before I was happy with the finish ( for now ) .... 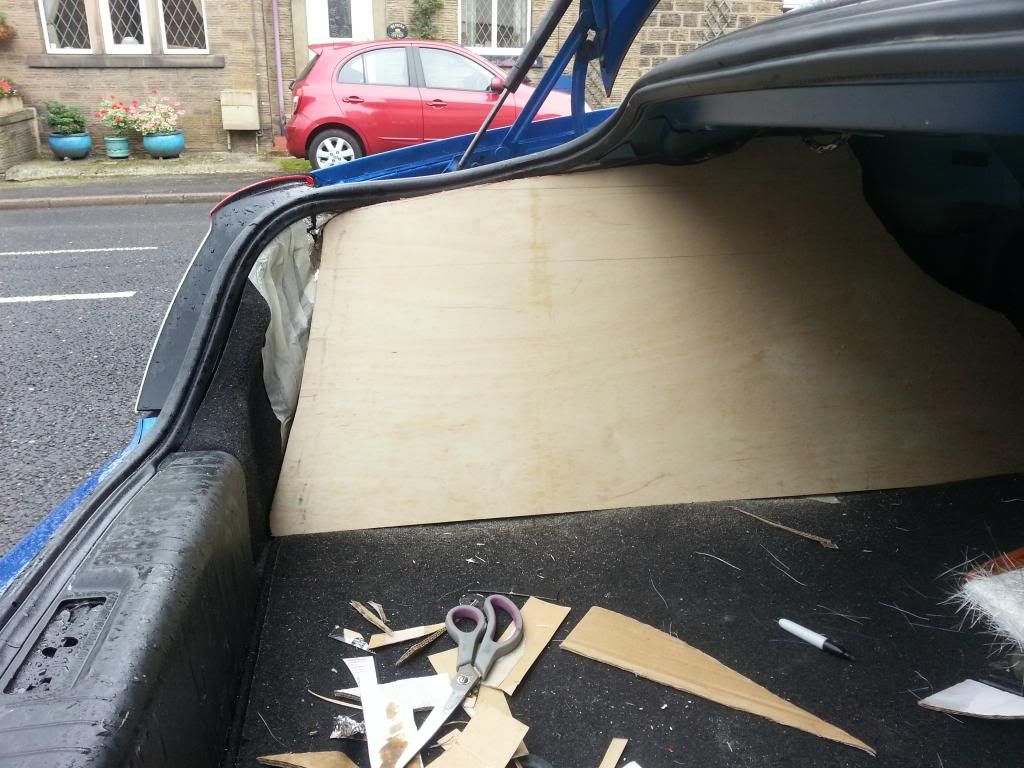 luckily the angle isn't too steep into the luggage area... 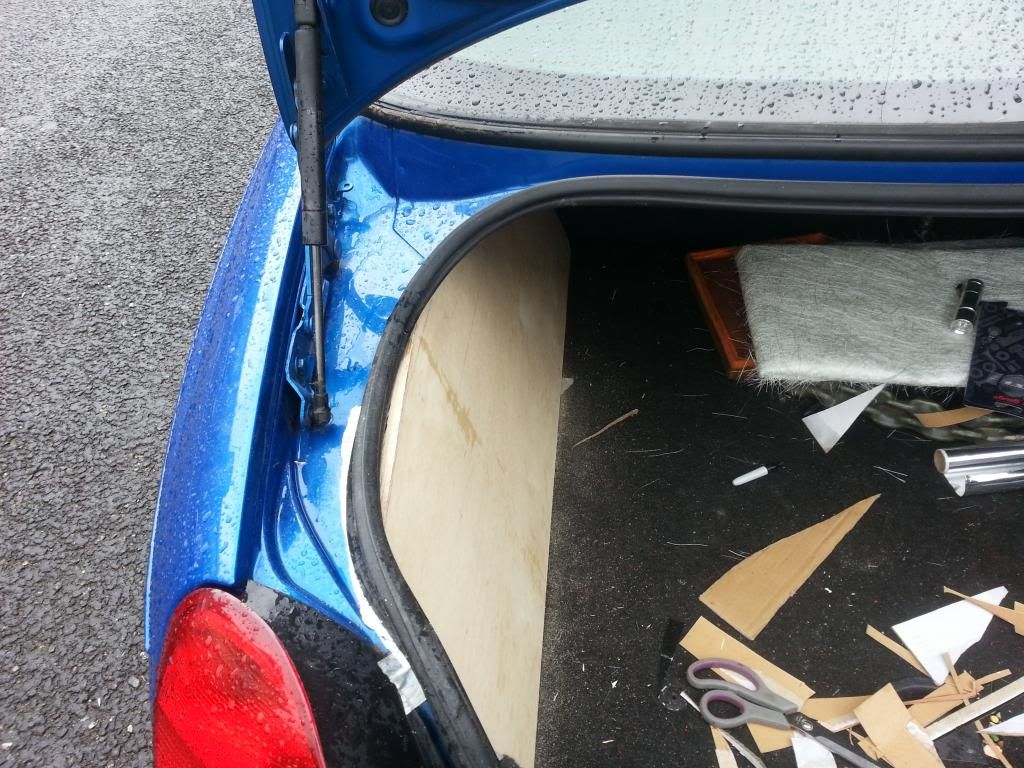 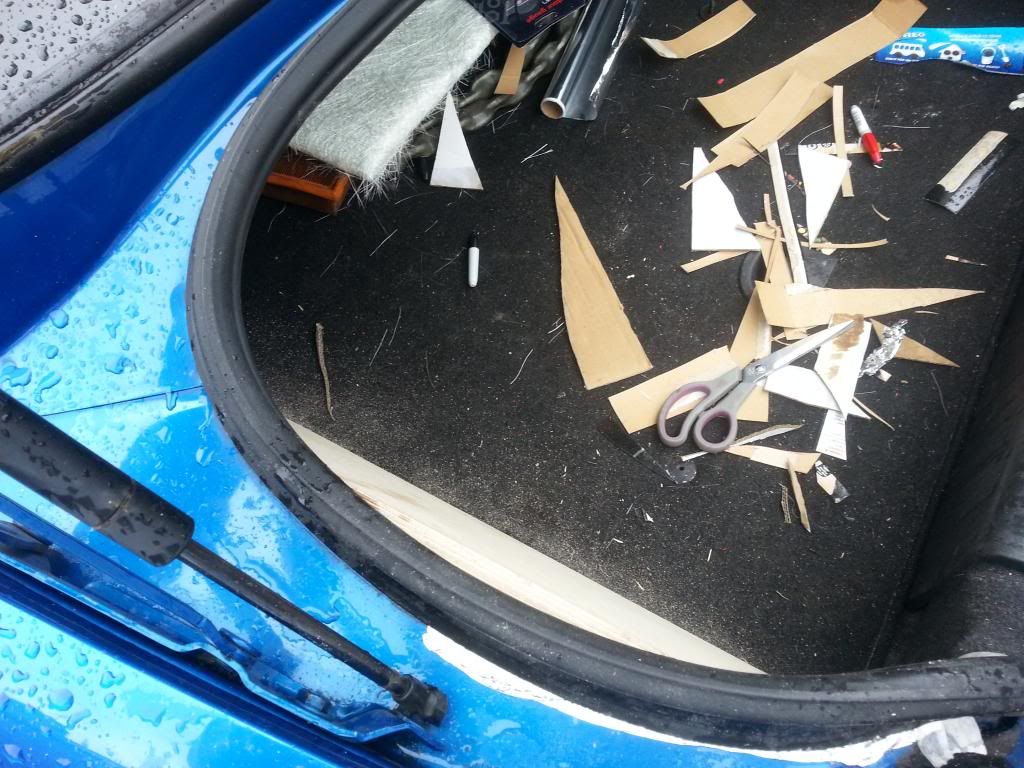 By this time the weather had beaten me and the rain was well and truly coming down ( don't you just love English weather NOT!!! ). Ill mark up the area for the amp on Friday and then start the fibreglassing. Im in two minds as to use the fibre glass to make the back, sides and top then add the wooden front and bond together or to make so much of the sub from fibreglass then drop in the front and build it all in one go with the front in situe so it is all there in one unit.......so until friday folks
__________________
[SIGPIC][/SIGPIC]
www.warriorknightsgaming.com |

|

|
|
11th September 2013, 16:27
|
#2 |
|
I really should get out more.......
MG ZT 180 SE Poseidon, Peugeot 508 GT Sport Tourer Join Date: Oct 2012
Location: Wolverhampton
Posts: 2,509
Thanks: 232
Thanked 266 Times in 185 Posts
|
Nice project but how are you going to change the bulbs up that corner?
|
|
|
|
|
11th September 2013, 16:45
|
#3 |
|
Avid contributor
MG ZT 190 Join Date: Aug 2013
Location: Huddersfield
Posts: 150
Thanks: 9
Thanked 4 Times in 4 Posts
|
I have some industrial hook and loop tape which I will attached to the back of the sub box. That way I can just pull it out of the way and get straight in if I need to change a bulb.
__________________
[SIGPIC][/SIGPIC]
www.warriorknightsgaming.com |
|
|
|
|
11th September 2013, 18:41
|
#4 |
|
Passed Away
MG ZT-T 160 Join Date: Feb 2009
Location: Chester
Posts: 1,307
Thanks: 64
Thanked 222 Times in 145 Posts
|
looking good.
What sub have you gone for and are you making the box to it's volumetric efficiency are just going for as big as you could with the space on offer? Ported or Sealed ? |
|
|
|
|
11th September 2013, 18:46
|
#5 |
|
Avid contributor
MG ZT 190 Join Date: Aug 2013
Location: Huddersfield
Posts: 150
Thanks: 9
Thanked 4 Times in 4 Posts
|
I'm going with a Clarion SW3012 which will be sealed and if my maths is correct the correct size. With me making the entire front from birch If I need to port it then its a 5 minute job

__________________
[SIGPIC][/SIGPIC]
www.warriorknightsgaming.com |
|
|
|
|
14th September 2013, 22:16
|
#6 |
|
Avid contributor
MG ZT 190 Join Date: Aug 2013
Location: Huddersfield
Posts: 150
Thanks: 9
Thanked 4 Times in 4 Posts
|
Well I managed a little bit more work today. I filled in the mold area with fibre glass and resin. Which was a nightmare as due to the weight of the sheets when they had resin on they just fell down. So it was a slow process of mix a little resin, place the sheet and brace it then rinse and repeat until they were all done for the roof.
Unfortunately I didn't take any photos of this stage ( probably due to the air turning blue in frustration lol ). Once that had cured enough to remove the box I then sat about adding the face plate. as I want the sub to sit flush and don't posses a router. To do this I took two sheets of 3mm Ply cut one to shape then cut another one slightly smaller and placed that over the top of it. 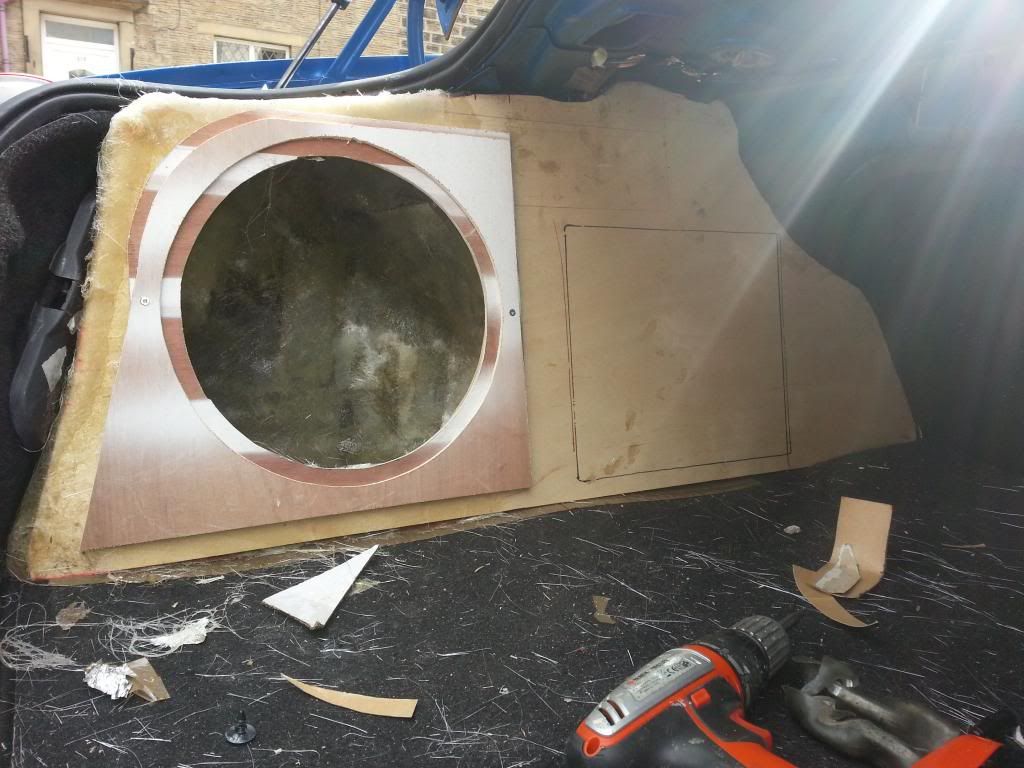 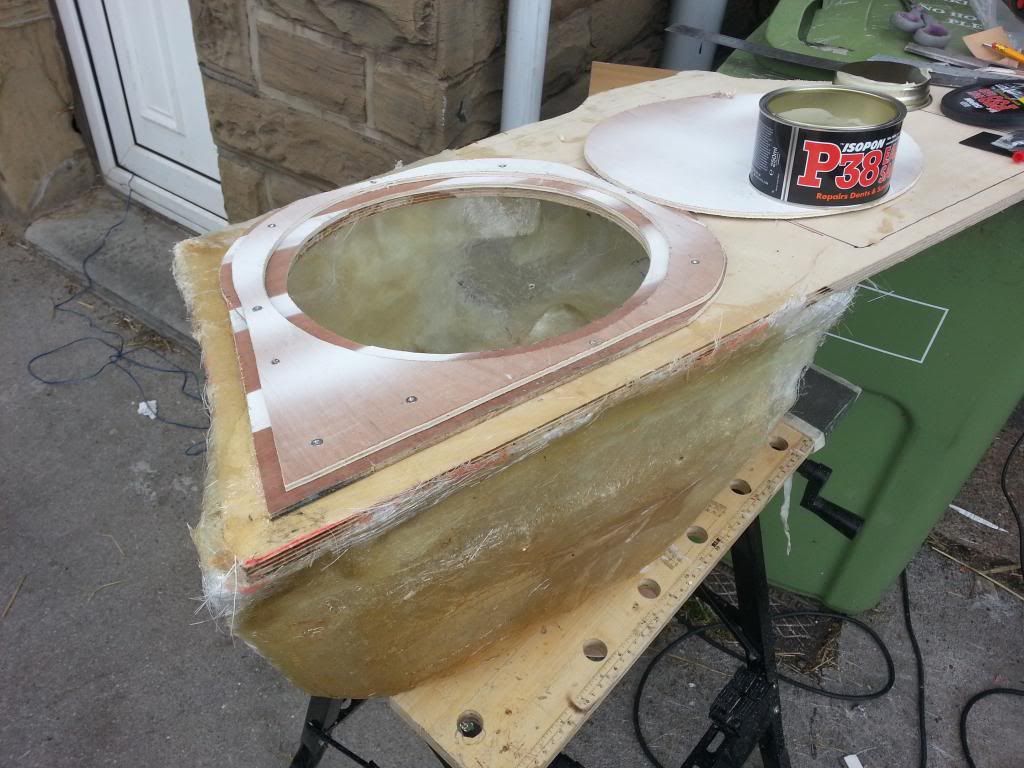 Then it was time to break out the filler to smooth the front off.....  Then it was sanding time..... 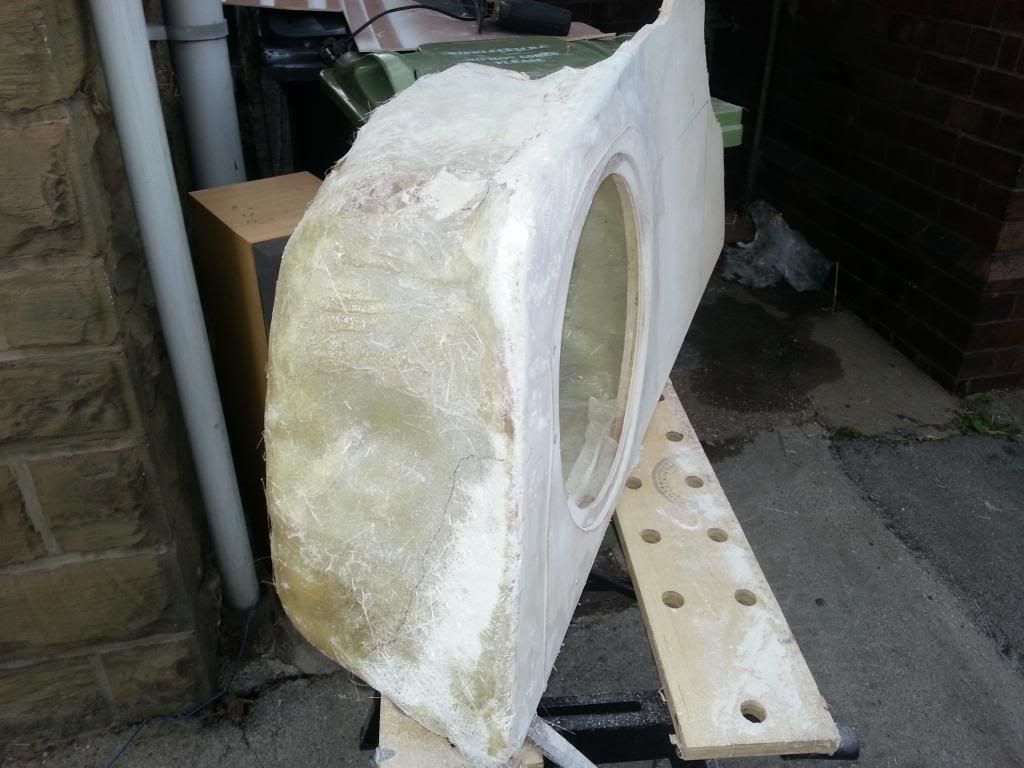 After I had got the shape something like on the front face I did a test fit.... 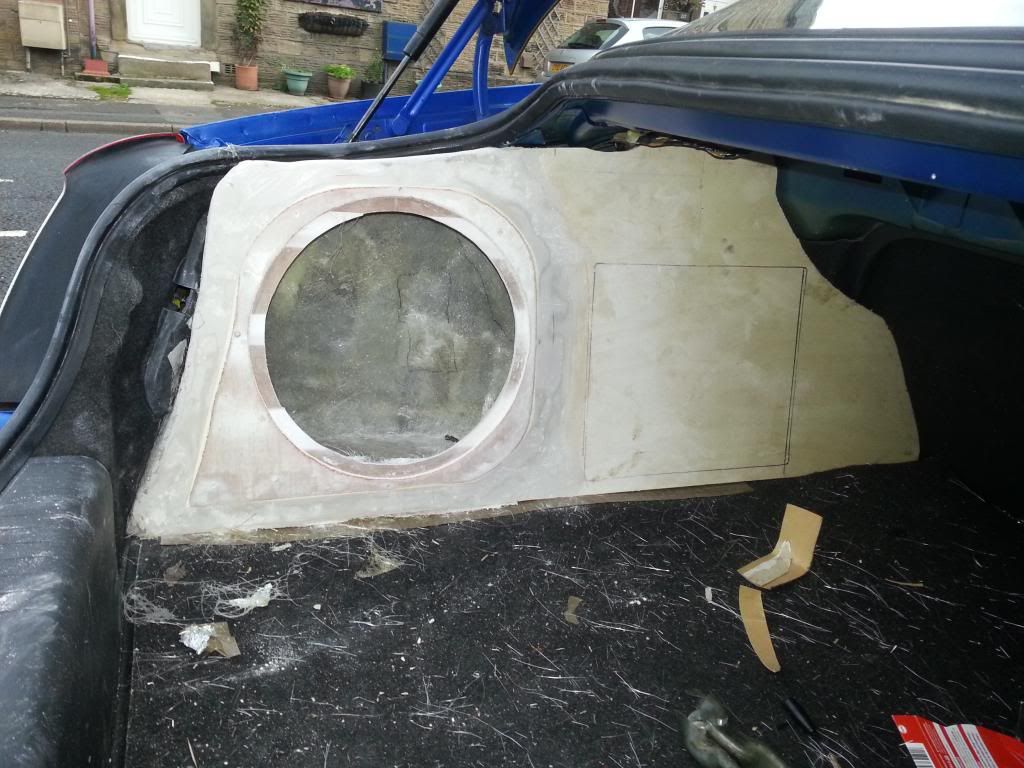 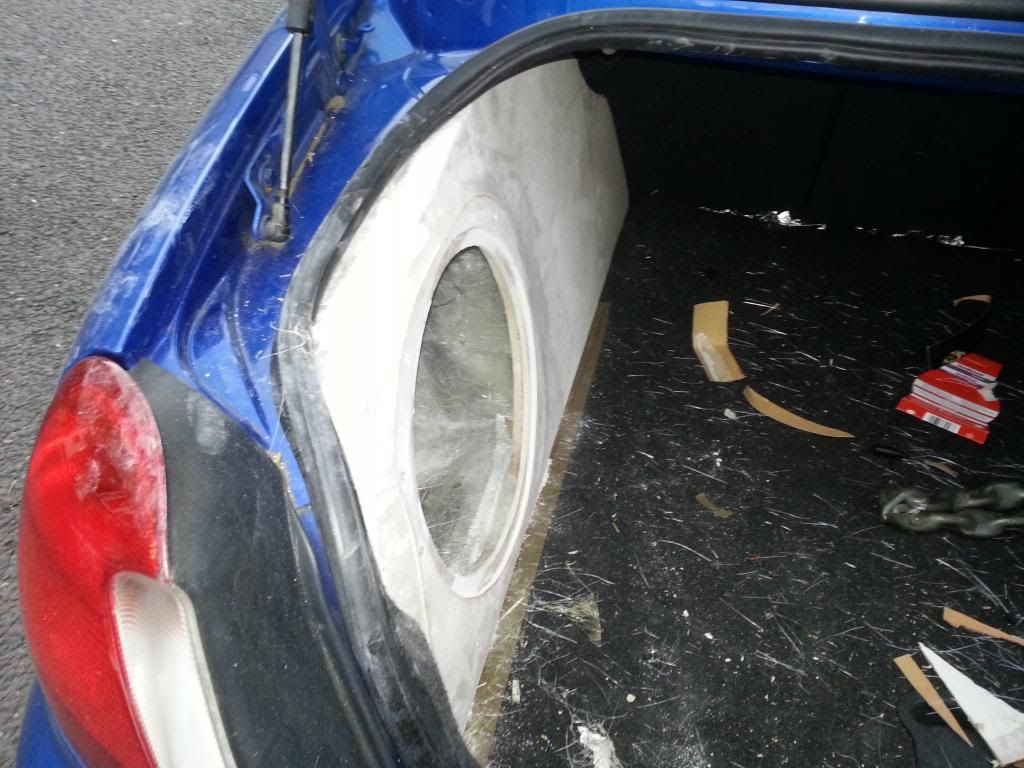 Then I built up a few more layers till it was just right and also almost smooth....I know it will be covered with cloth but it still needs to be smooth or filler could poke through the cloth and also look uneven. I then set to work on making the side and top go flush. After which I ran out of filler lol so ill get some more tomorrow to finish this part off. Here it is for now.... 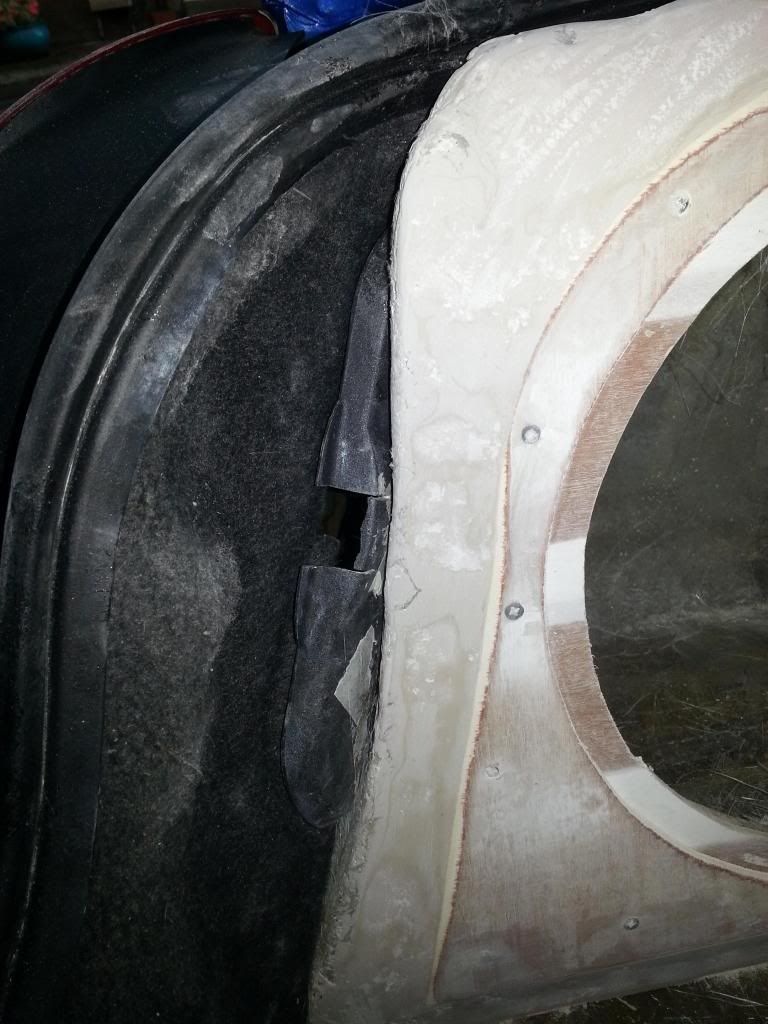 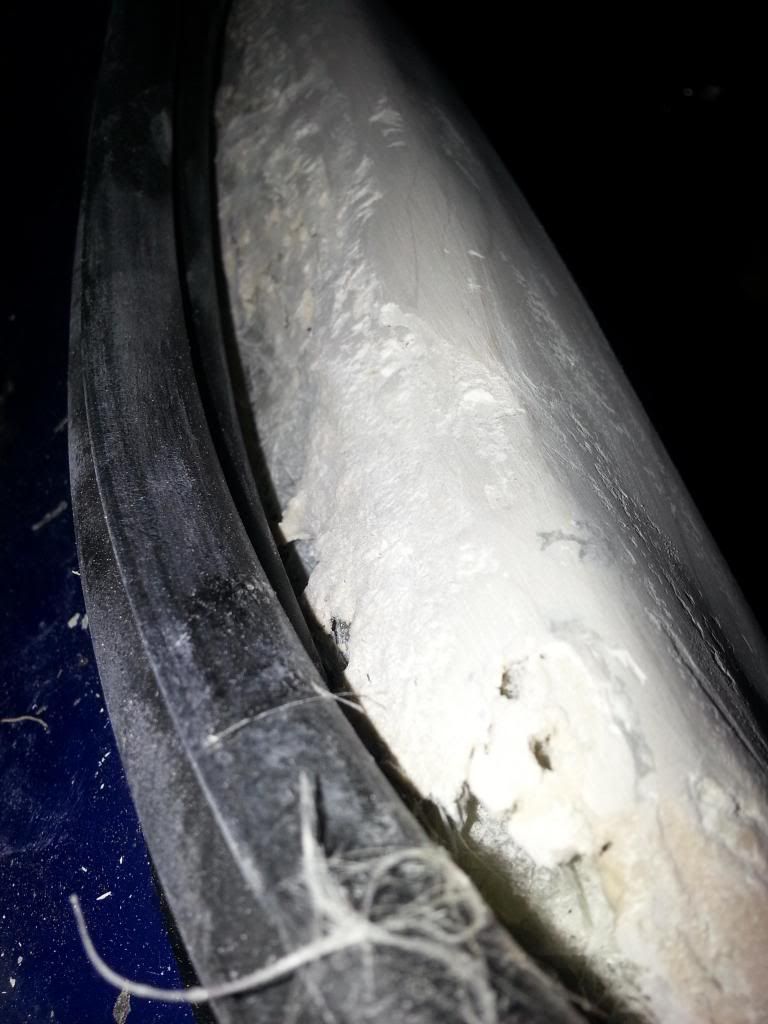 As you can see it needs building up a lot more till it is right but it will get done tomorrow.
__________________
[SIGPIC][/SIGPIC]
www.warriorknightsgaming.com |
|
|
|
|
14th September 2013, 23:31
|
#7 |
|
Gets stuck in
'54 Black MG ZT CDTi + 160 Join Date: Feb 2013
Location: Blackburn
Posts: 749
Thanks: 24
Thanked 21 Times in 17 Posts
|
A great thread & write up, thanks for taking the time to do it. As I've said to other members who done similar things, you should take 1 mould then make a few to sell, I'd buy one!!
Keep up the good work. |
|
|
|
|
14th September 2013, 23:34
|
#8 | |
|
Gets stuck in
MG ZT CDTI +135 Join Date: Feb 2010
Location: Wilmslow
Posts: 566
Thanks: 36
Thanked 57 Times in 51 Posts
|
Quote:
|
|
|
|
|
|
14th September 2013, 23:55
|
#9 |
|
Avid contributor
MG ZT 190 Join Date: Aug 2013
Location: Huddersfield
Posts: 150
Thanks: 9
Thanked 4 Times in 4 Posts
|
Hmmm sounds like an idea. Ill look into getting a latex mold made. Even if its just a rough shape I can then add the MDF etc and bond it. Watch this space
__________________
[SIGPIC][/SIGPIC]
www.warriorknightsgaming.com |
|
|
|
|
15th September 2013, 06:38
|
#10 |
|
Posted a thing or two
ex. MG ZT+ Join Date: May 2013
Location: Northampton-ish
Posts: 1,484
Thanks: 156
Thanked 98 Times in 95 Posts
|
Nice build!
I think I was bidding against you on the 402... If its the same one, have you sourced the missing bits? 
__________________
'03 MG ZT+ 1.8T X-Power Grey with Monogram 'WTD' black alcantara trim. [SIGPIC][/SIGPIC] My project thread HERE
|
|
|
|
 |
|
|


 Linear Mode

