Go Back   The 75 and ZT Owners Club Forums > The 75 and ZT Owners Club Forums > Technical Help Forum
Register FAQ Image Gallery Members List Calendar
Notices

Reply
 
Thread Tools Display Modes
Old 10th November 2017, 13:21   #1
peelaaa
Posted a thing or two
 
peelaaa's Avatar
 
75 cdti 2004 contemporary

Join Date: Apr 2008
Location: meath
Posts: 1,551
Thanks: 272
Thanked 80 Times in 58 Posts
Default Replacing mirrors with powerfolds

I have all the powerfolds bits How are they fitted to a diferent 75 to replace the regular mirrors? Is it a big job or is it a case of just moving parts across?
peelaaa is offline   Reply With Quote
Old 10th November 2017, 14:35   #2
TomRS
Posted a thing or two
 
Mk1 ZT 190 - Mk2 ZS 180 - Mercedes E63 AMG S - Ford Ranger Hawk

Join Date: Mar 2016
Location: Middlesbrough
Posts: 1,456
Thanks: 123
Thanked 409 Times in 281 Posts
Default

They fit like stock... you need the switchpack and im not 100% on the wiring but i think they are plug and play.
TomRS is offline   Reply With Quote
Old 10th November 2017, 14:49   #3
peelaaa
Posted a thing or two
 
peelaaa's Avatar
 
75 cdti 2004 contemporary

Join Date: Apr 2008
Location: meath
Posts: 1,551
Thanks: 272
Thanked 80 Times in 58 Posts
Default

Thanks, when you say switchpack. Is that the switches on the door card?
peelaaa is offline   Reply With Quote
Old 10th November 2017, 15:02   #4
suzublu
This is my second home
 
suzublu's Avatar
 
rover 75 1.8 vvc club se wedgwood blue

Join Date: Aug 2009
Location: Seaton Carew
Posts: 26,922
Thanks: 65
Thanked 7,142 Times in 4,642 Posts
Default

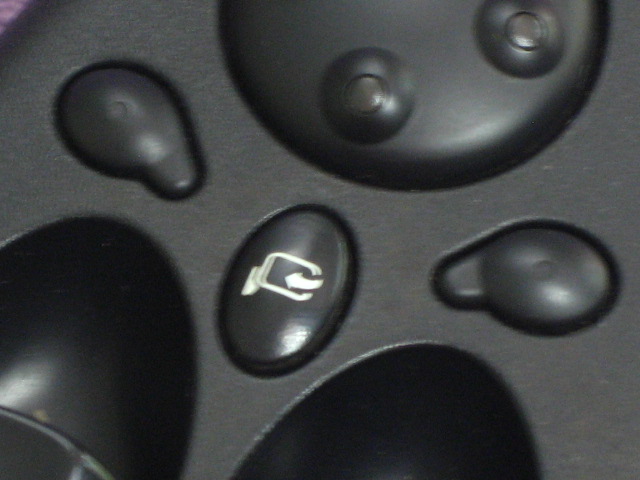
The switches on the arm rest have the extra button for powerfolds
suzublu is offline   Reply With Quote
Old 10th November 2017, 15:06   #5
marinabrian
 
marinabrian's Avatar
 
MG ZT

Join Date: Jan 2011
Location: Newcastle Upon Tyne
Posts: 20,151
Thanks: 3,565
Thanked 10,837 Times in 5,718 Posts
Default

Both front door looms, and possibly the cross car wiring need to be in place to allow powerfold fitting, they won't just plug into the standard wiring and "work"

The powerfold door looms have two extra orange wires in the switchpack loom

Brian
marinabrian is offline   Reply With Quote
Old 10th November 2017, 15:07   #6
peelaaa
Posted a thing or two
 
peelaaa's Avatar
 
75 cdti 2004 contemporary

Join Date: Apr 2008
Location: meath
Posts: 1,551
Thanks: 272
Thanked 80 Times in 58 Posts
Default

Cheers guys,

Now how do I fit them??
peelaaa is offline   Reply With Quote
Old 10th November 2017, 15:17   #7
marinabrian
 
marinabrian's Avatar
 
MG ZT

Join Date: Jan 2011
Location: Newcastle Upon Tyne
Posts: 20,151
Thanks: 3,565
Thanked 10,837 Times in 5,718 Posts
Default

Quote:
Originally Posted by peelaaa View Post
Cheers guys,

Now how do I fit them??
Remove door cards, take off speaker, then water shedder from inner door, then unplug the wiring loom from inside the door.

Unbolt the door check strap, remove the two circlips from the door hing pins, then remove the door and have something to stand it on and an assistant to hold it while you unplug the loom, as there isn't an awful lot of wire to play with.

To unplug the loom from the A pillar of the car, you need to first pry out the square wiring grommet, then the wiring is secured with a sliding latch type connector to the main car harness.

Plug the new powerfold loom into the car harness, and refit the grommet, then remove the old loom from the door, feed in the new harness and refit the grommet.

Now with assistance, refit the door onto it's hinges, route the cable around the inside of the door, and plug everything back in.

Repeat for the passenger side, and test operation of the new mirrors before you refit the speakers, shedder, doorcards etc

Brian
marinabrian is offline   Reply With Quote
Old 10th November 2017, 15:28   #8
stevestrat
This is my second home
 
ZT260 #243 (resting)

Join Date: May 2010
Location: Prestonpans
Posts: 22,488
Thanks: 650
Thanked 4,624 Times in 3,358 Posts
Default

Quote:
Originally Posted by marinabrian View Post
Remove door cards, take off speaker, then water shedder from inner door, then unplug the wiring loom from inside the door.

Unbolt the door check strap, remove the two circlips from the door hing pins, then remove the door and have something to stand it on and an assistant to hold it while you unplug the loom, as there isn't an awful lot of wire to play with.

To unplug the loom from the A pillar of the car, you need to first pry out the square wiring grommet, then the wiring is secured with a sliding latch type connector to the main car harness.

Plug the new powerfold loom into the car harness, and refit the grommet, then remove the old loom from the door, feed in the new harness and refit the grommet.

Now with assistance, refit the door onto it's hinges, route the cable around the inside of the door, and plug everything back in.

Repeat for the passenger side, and test operation of the new mirrors before you refit the speakers, shedder, doorcards etc

Brian
Five minute job That's why the powerfolds I got are still in the box they were delivered in.
__________________
Steve


T4 Location Map
stevestrat is offline   Reply With Quote
Old 10th November 2017, 15:32   #9
peelaaa
Posted a thing or two
 
peelaaa's Avatar
 
75 cdti 2004 contemporary

Join Date: Apr 2008
Location: meath
Posts: 1,551
Thanks: 272
Thanked 80 Times in 58 Posts
Default

I will be moving a set of powerfolds from one car to the next so I am assuming that the looms will be with the powerfold itself. Is that correct?
I haven't dismantled anything yet you see.

Also, what is the orange cable that goes behind the dash I keep reading about?
peelaaa is offline   Reply With Quote
Old 10th November 2017, 15:37   #10
stevestrat
This is my second home
 
ZT260 #243 (resting)

Join Date: May 2010
Location: Prestonpans
Posts: 22,488
Thanks: 650
Thanked 4,624 Times in 3,358 Posts
Default

Quote:
Originally Posted by peelaaa View Post
Also, what is the orange cable that goes behind the dash I keep reading about?
Not all cars have the wiring (coloured orange and orange/red) along under the dash that connects the driver's side door with the passenger side. Have a look at this. Also this post by Russ:

Quote:
Originally Posted by BigRuss View Post
How to wire powerfolds:

Check for the wiring being in place both to the drivers door switch pack and to the connectors of the door wiring/ main loom as described in the details below it will save you a load of grief if at least some of it is there.

Remove both door cards and fit powerfold mirrors.

Run a orange 0.5mm cable from connector C0066 pin 4 (powerfold switch plug) long enough to reach connector C0336 pin 14 (drivers side "A" pillar behind the rubber wiring protector to the door) which may be vacant if the wiring isn't there.

Run a orange/red 0.5mm cable from connector C0066 pin 3 (powerfold switch plug) long enough to reach connector C0336 pin 15 which if the wiring isn't present will also be vacant.

At a suitable point both these cables are joined with a shorter length of the appropriate coloured wire that will go to the drivers mirror connection cavity 1= orange, cavity 2 = orange red.

Have fun trying to get the cables fed through the door and rubber wiring protector.

If you are lucky the opposite pins of connectors 14 and 15 of connector C0336 in blue connector C0459 that it plugs into will be already wired, if not run appropriate coloured wires across to the passenger "A" pillar to similar blue connector C0463 this time its pin 8 = orange and pin 9 = orange/red.

In the opposite plug of this connection in connector C0322 pin 8 orange, pin 9 orange/red, run the cables to the passanger door mirror connection noting that this time pin 1 is orange/red, pin 2 is orange.(the opposite way round, this is important )

Of course the appropriate pins would have to be sourced for any missing from the connector blocks. but doing it this way rather than just running two wires means that if you need to remove a door for any reason it can be done normally without having to cut the wiring.

Not forgetting that wiring up the mirrors causes lots of cursing and swearing grazed knuckles and frayed nerves trying to thread the wires through.

Note. The wiring colours I've used in the description are the original colours and missing cables can be substituted for any colours you wish.

Temporarily fit switch and test operation of the mirrors if all is working well, re-fit the doorcards and enjoy

Russ
__________________
Steve


T4 Location Map

Last edited by stevestrat; 10th November 2017 at 15:41..
stevestrat is offline   Reply With Quote
Reply


Posting Rules
You may not post new threads
You may not post replies
You may not post attachments
You may not edit your posts

BB code is On
Smilies are On
[IMG] code is On
HTML code is Off

Forum Jump


All times are GMT. The time now is 23:51.


Powered by vBulletin® Version 3.8.11
Copyright ©2000 - 2024, vBulletin Solutions Inc.
Copyright © 2006-2023, The Rover 75 & MG ZT Owners Club Ltd