
|
|
|
|
|
|
||
|
|
||
 16th May 2012, 22:09
|
#11 |
|
This is my second home
Rover less ! Join Date: Jun 2011
Location: Tarbolton
Posts: 3,442
Thanks: 393
Thanked 888 Times in 542 Posts
|
It's been a busy week for me on the refurb so here's an update.
This was the parts I got sand blasted courtesy of my son Chris.  And here they are after several coats of primer. 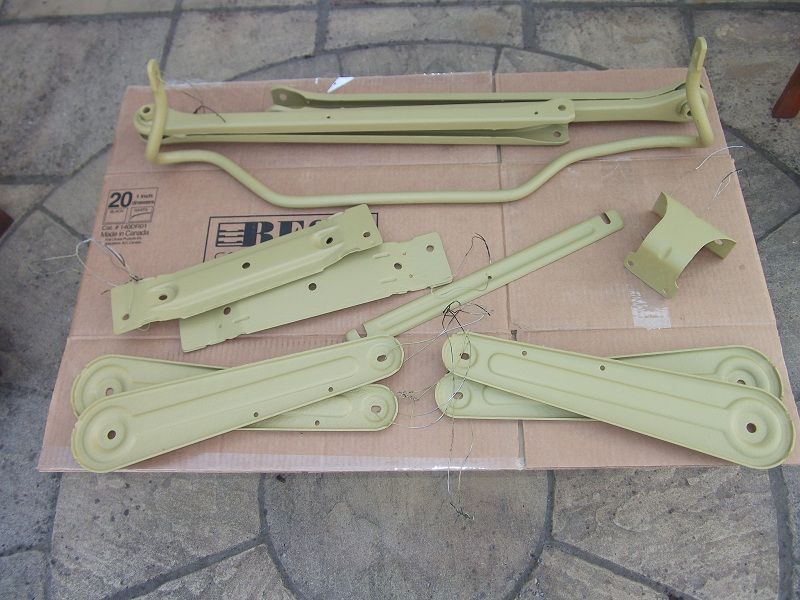 I had a bit of trouble removing one of the bolts from the suspension arm. It had seized solid and I had to grind the nut and the bolt head just to get it out of the sub frame. I really thought I would have to replace it, but not being one to give up I spent almost three hours drilling a hole through the length of the stud then hammering it out. It really was a pain to remove and would have been impossible to do with the subframe still on the car. Here is the offending arm and the remains of the stud. 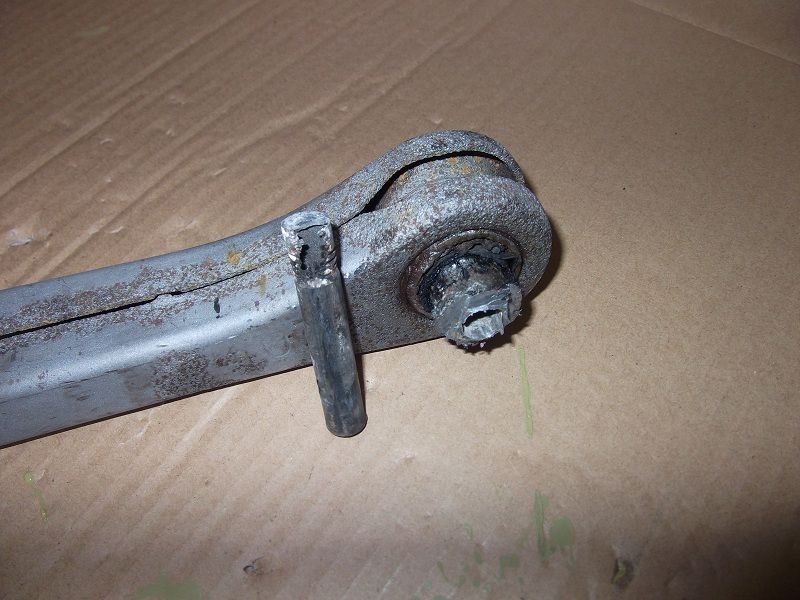 I had to get the subframe sand blasted by a local firm as it was just too big for Chris to do and here it is before priming. 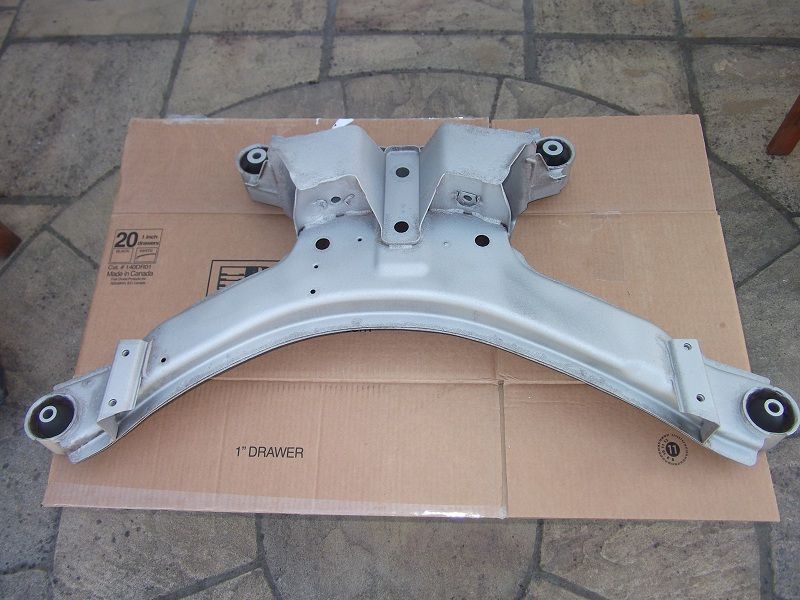 And after spraying it with almost 1 litre of primer. I adjusted the spray gun to a spot spray to get inside the box sections and layed on several coats. 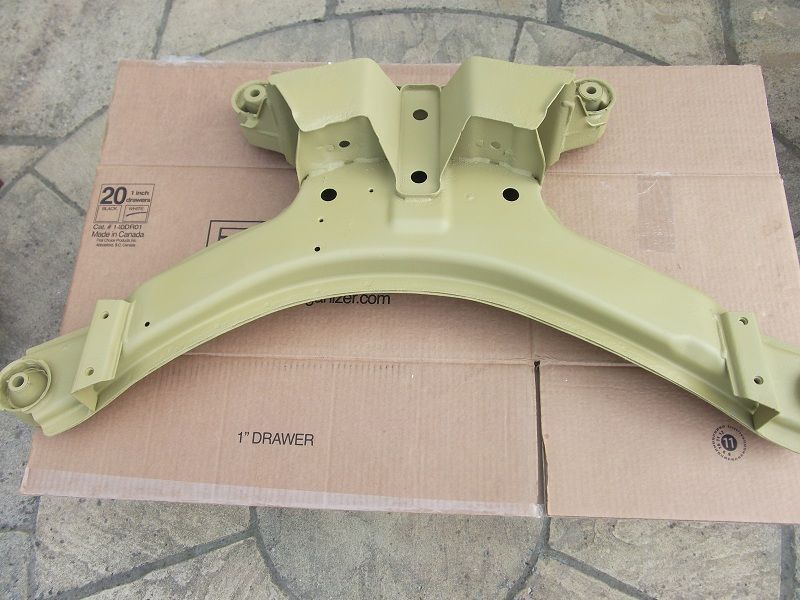 This could be a cause for concern for the future on our 75's namely the fuel tank support bracket. I noticed a few years back it was quite rusty so I cleaned and painted it a bit, but with the exhaust now off it was easy to remove from the car. I sanded all the rust off using the angle grinder then primed it. If you look closely you can just make out some perforations on the metal. 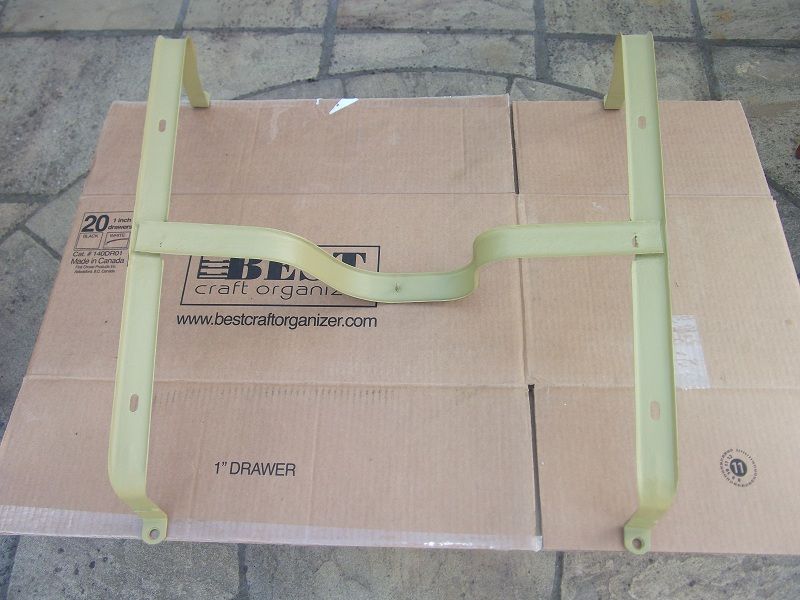 I am now working on the remaining small parts, nuts and bolts etc and I have removed the brackets off the aerofoil for the FBH radiator as they were also very rusty. They will be pop rivetted back on then it will be re assembling all the bits back onto the car. I am replacing the studs on the outer arms where they attach onto the hub assembly and also the small 6mm studs (if I can source some) as they are just too rusty to bother cleaning up. I hope to have the rear suspension completed by the middle of next week then it will be onto the front. JYJ |

|

|
|
17th May 2012, 03:09
|
#12 | |
|
Avid contributor
currently "sans car" Join Date: Apr 2012
Location: Portland, Oregon
Posts: 105
Thanks: 0
Thanked 0 Times in 0 Posts
|
Quote:
 . Seriously though excellent work . Seriously though excellent work  |
|
|
|
|
|
17th May 2012, 07:33
|
#13 | |
|
This is my second home
75 Contemporary SE Mk II 2004 Man. Sal. CDTi 135ps, FBH on red diesel, WinCE6 DD Join Date: May 2010
Location: Leeds
Posts: 17,273
Thanks: 2,160
Thanked 2,061 Times in 1,586 Posts
|
Quote:
__________________
Harry How To's and items I offer for free, or just to cover the cost of my expenses... http://www.the75andztclub.co.uk/foru...40#post1764540 Fix a poor handbrake; DIY ABS diagnostic unit; Loan of the spanner needed to change the CDT belts; free OBD diagnostics +MAF; Correct Bosch MAF cheap; DVB-T install in an ex-hi-line system; DD install with a HK amp; FBH servicing. I've taken a vow of poverty. To annoy me, send money. |
|
|
|
|
|
17th May 2012, 09:58
|
#14 | |
|
This is my second home
Rover less ! Join Date: Jun 2011
Location: Tarbolton
Posts: 3,442
Thanks: 393
Thanked 888 Times in 542 Posts
|
Quote:
 I will still have to remove the radiator as there is a bracket corroded right through, the same bracket I reported to the main dealer when the car was new. JYJ |
|
|
|
|
|
17th May 2012, 10:30
|
#15 | |
|
This is my second home
75 Contemporary SE Mk II 2004 Man. Sal. CDTi 135ps, FBH on red diesel, WinCE6 DD Join Date: May 2010
Location: Leeds
Posts: 17,273
Thanks: 2,160
Thanked 2,061 Times in 1,586 Posts
|
Quote:
__________________
Harry How To's and items I offer for free, or just to cover the cost of my expenses... http://www.the75andztclub.co.uk/foru...40#post1764540 Fix a poor handbrake; DIY ABS diagnostic unit; Loan of the spanner needed to change the CDT belts; free OBD diagnostics +MAF; Correct Bosch MAF cheap; DVB-T install in an ex-hi-line system; DD install with a HK amp; FBH servicing. I've taken a vow of poverty. To annoy me, send money. |
|
|
|
|
|
17th May 2012, 21:15
|
#16 |
|
Retired
rover 75 v6 Auto Conn. SE 54 plate LPG and 2006 Rover 75 v6 Auto LPG , 1.8 r75 Manual Join Date: Aug 2010
Location: London
Posts: 3,379
Thanks: 0
Thanked 6 Times in 6 Posts
|
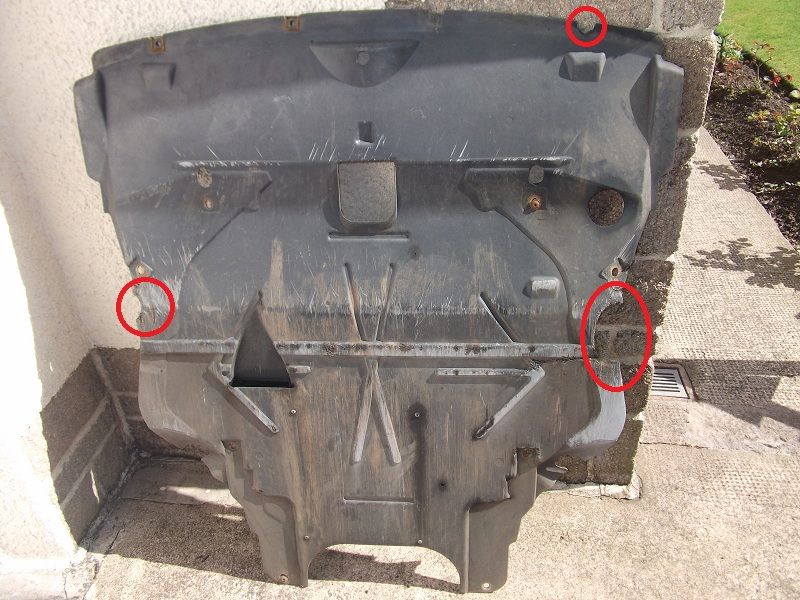
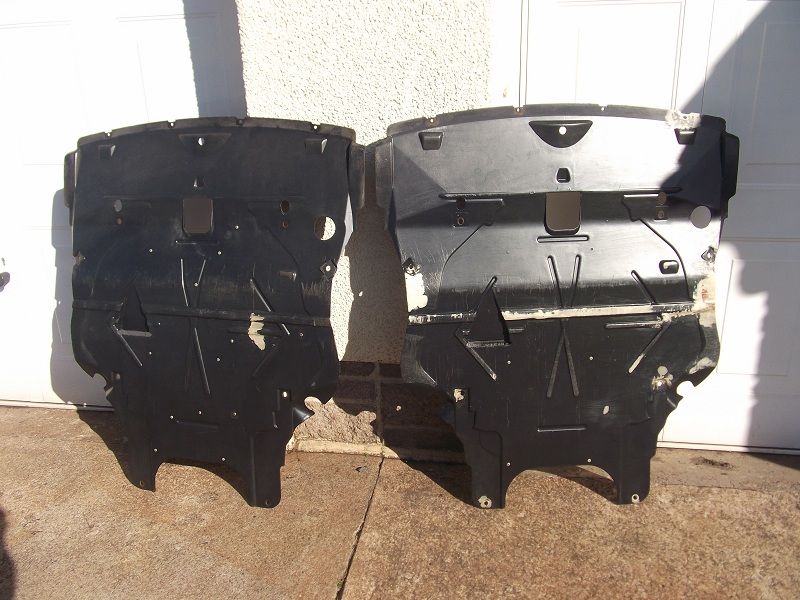
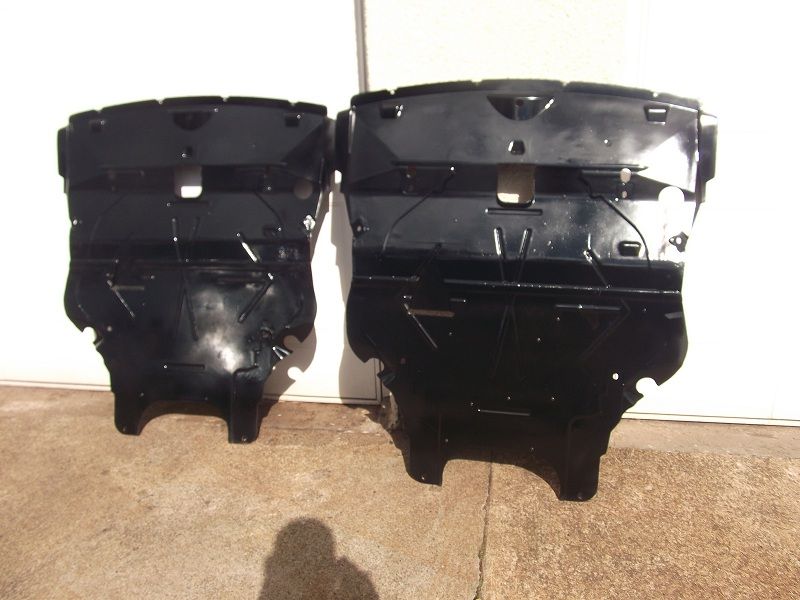
The undertrays really take a battering on these pesky speed humps and councils say they are not too high. The claimed maximum height of these humps is 100mm and the minimum height under a car is meant to be 100mm and that is with nobody in the car. I wish my cars had a raise switch that increased the ride height when I go over these thing.
It is really quite worrying that the subframes are rusting, yet when you look at the carbody underfloor they are generally quite rust free. Looks like something we will all need to do if we want to keep these cars on the road longterm. What finish are you going to use, how about marine epoxy paint followed by overpaintable sill underseal, good for stone chips so it should good protection from water and road dirt. Last edited by rover54; 17th May 2012 at 21:36.. |
|
|
|
|
18th May 2012, 20:46
|
#17 |
|
This is my second home
Rover less ! Join Date: Jun 2011
Location: Tarbolton
Posts: 3,442
Thanks: 393
Thanked 888 Times in 542 Posts
|
It's been a long haul but I'm now about half way, well on the rear anyway.
Today a got most of the parts into black gloss and for this I used Hammerite smooth thinned down for spraying. This was on top of about 3 coats of sealer primer with 2 coats of gloss. I will leave them a few days to cure 100% and in the meantime I can clean up the underside of the car and paint the trailing arms etc but being outside this will be done by brush. Here is the sub frame looking a lot better than it was when removed so it should last for a few years now. 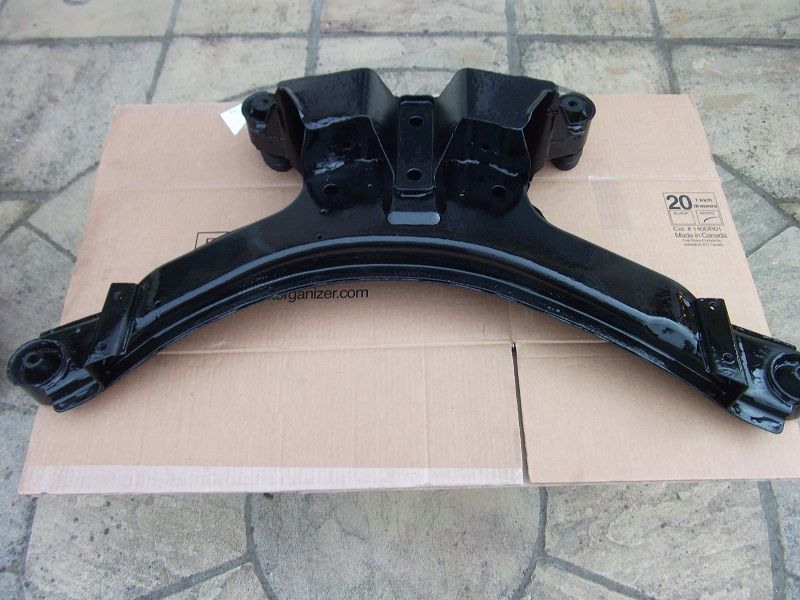 and here are most of the other bits for the rear suspension, showing the aerofoil with newly painted brackets pop riveted back on. Note the odd parts out being the front subrame brace bars. 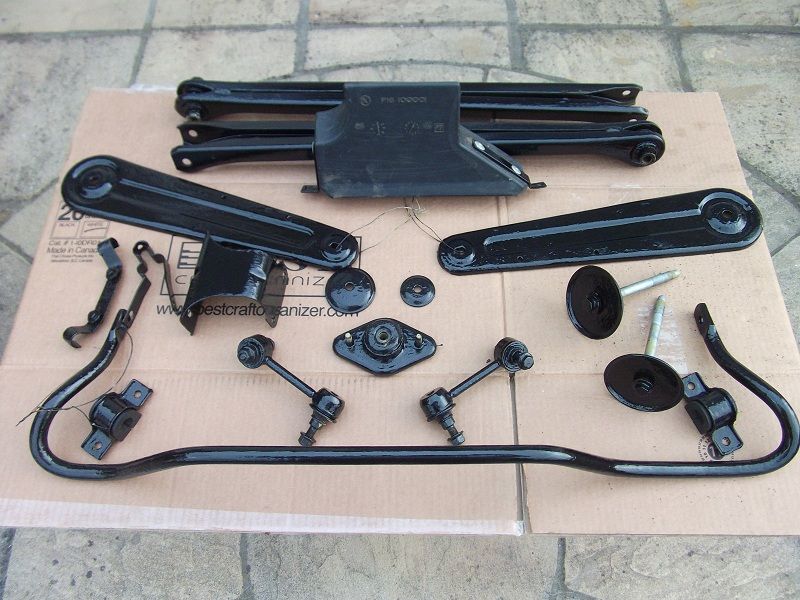 and finally tonight the tank support bracket which will be fitted back in first before re assembly of the rear suspension. 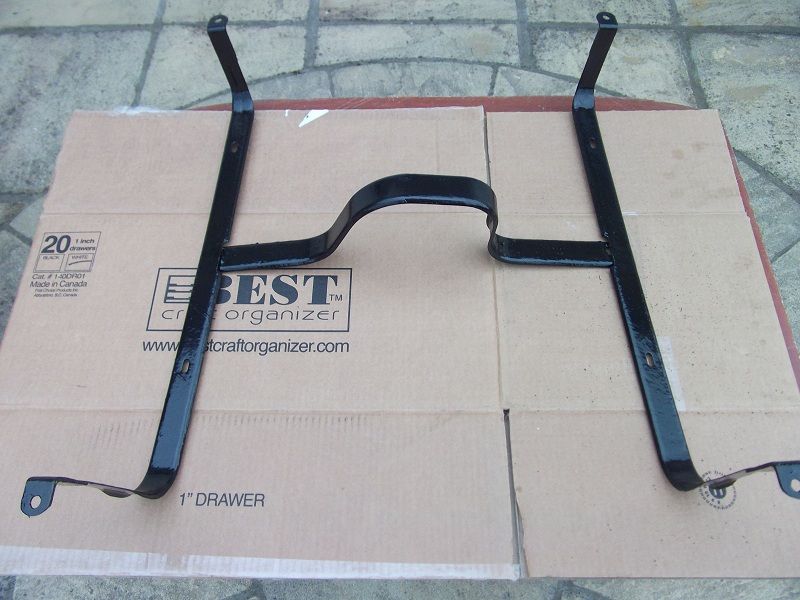 I ordered some parts from Rimmers, mainly new studs etc and some parts for the front suspension which I know will need replacing like the assist springs and rubber gaiters on the front struts. Pity they couldn't offer a discount like some other companies for forum members. I hope the weather is better next week as I will be back outside again to continue with rest of the refurb, but if it's too cold I'm afraid my old joints will be staying indoors. JYJ |
|
|
|
|
18th May 2012, 23:29
|
#18 |
|
This is my second home
None * DROWNED Join Date: Aug 2007
Location: Cardigan
Posts: 33,339
Thanks: 1,257
Thanked 1,664 Times in 1,081 Posts
|
How to updated
__________________
Andrew Ich Dien Problem solving is... lateral thinking SEARCH FIRST ...ASK LATER... |
|
|
|
|
19th May 2012, 23:06
|
#19 |
|
This is my second home
Rover less ! Join Date: Jun 2011
Location: Tarbolton
Posts: 3,442
Thanks: 393
Thanked 888 Times in 542 Posts
|
Thanks Andrew
The Missus was out on her retirement do last night, so I spent some time in the workshop planning the re build and checking everything out, then I realised something was missing. I'm surprised no one spotted it but both lower arms were missing. I searched the workshop but no they were deffinately not there then I checked on the photos I took immediately after returning home and they were not in them. After some frantic phone calls to my son who assured me I must have them and reminding me that I mislaid a speaker in my workshop for three days just recently I began to wonder if I was losing my marbles. This morning the phone rang, it was my son who had just found them in his locker at work. I was just so busy with getting the rest of the parts into paint and getting my V6 duplex exhaust done I just hadn't noticed them missing but they're now back home safely and already in primer. On another point you will remember me noting about the rusty bracket adjacent to the fuel cooler at the back. I had complained to the Main Dealer about this when the car was new so today I set about removing it. I have never seen a bracket so rusty in all my life, it simply crumbled up into little pieces. I will post a photo next week showing just how bad it was and in the meantime I've got a new L bracket made which is much simpler in design and I will give this a few coats of paint to prevent any further corrosion. JYJ |
|
|
|
|
19th May 2012, 23:39
|
#20 | |
|
This is my second home
None * DROWNED Join Date: Aug 2007
Location: Cardigan
Posts: 33,339
Thanks: 1,257
Thanked 1,664 Times in 1,081 Posts
|
Quote:
just keep me updated and I will add to the How to
__________________
Andrew Ich Dien Problem solving is... lateral thinking SEARCH FIRST ...ASK LATER... |
|
|
|
|
 |
|
|


 Linear Mode

