
|
|
|
|
|
|
||
|
|
||
 25th February 2011, 01:07
|
#1 |
|
NI/ROI RS

ZT-T 190 / 75 Diesel x3 / 6 door limo / 216 Cabby / Rover 25 van Join Date: May 2009
Location: Antrim
Posts: 8,102
Thanks: 299
Thanked 1,046 Times in 568 Posts
|
Images uploaded to the forum 1st October 2021, so they should never dissappear again.
********************* Admin please move this to the how to section if they approve.  A very common issue with a Rover 75 or MG Zt is that over time the door cards will become loose. This can be attributed to three common causes. 1 - Broken door plastic clips 2 - The door has been pulled off its central plastic supports 3 - The door card when re-fitted after attempted repair has been done so incorrectly. The most common visual sign of the door card not fitting correctly is along the top of the door card, beside where the window rail rubber is. Often in the top of it, you will see a gap or be able to push a finger in-between them. Or if you’re like my misses, just clean rip the thing off in bad temper attempting to slam the door. Thus how this guide was born.  This guide will cover the CORRECT procedure for refitting the door to its existing mounts. Before you start, you may wish to buy some ROVER 75 PLASTIC DOOR SCREWS from eBay, do a search using those words and you will find the little plastic screws you are looking for. It will save you a lot of hassle as you can be certain at least one will break! These are the types you want.  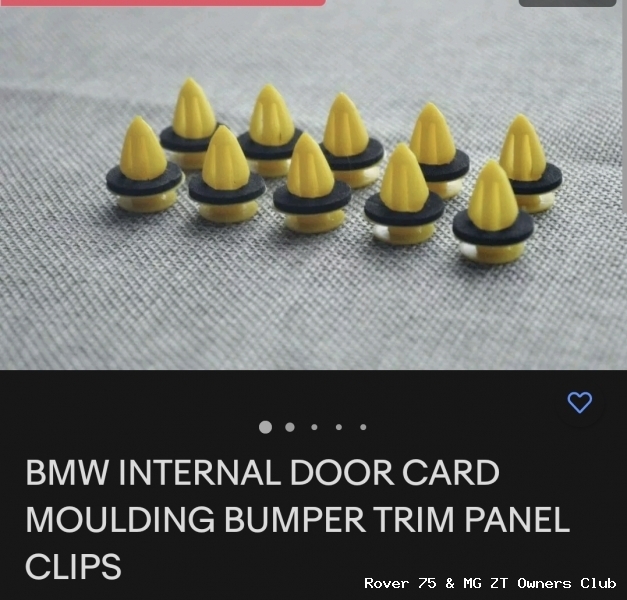 Time taken, first time, as much as an half an hour to understand it, second time 2 minutes when you get the thing in place correctly! Firstly remove the door card. The first photo showing the door card removed. This stage is as complex as it gets. Firstly use a small flat head screw driver to leaver up the window switch unit. This simply unplugs and the wiring is part of the main door unit. In the photo below you will see two blue boxes. This is where you need to remove two star head screws. The right hand side one is visible, the central blue one is typically under a cap that a small flat blade screw driver will pop off, and give you access too.  Remove these screws. All that remains now is for you to pull the door card off, I recommend going around with a flat head screw driver covered in masking tape and gently popping out the plastic caps that hold the door in place at the areas which are circled in white. When you have done this, it is simply a case of pulling the door card up and towards you gently at the same time using the door grab handle so as to lift the door card off the catches highlighted in the yellow boxes. DO NOT PULL HARD, as the door open mechanism and door lock will still be in place. Any plastic screws that pop off grab them as you will need them to refit the door card. They are usually grey or white on most cars. The door lock will simply slide out of position, however the chrome door mechanism will require you to twist it slightly to remove it from the door card. You should be left with the photo below of the door card. (note I had not removed the door opening mechanism in this photo seen at central blue box)  Now you have the door card off, and again its worth noting the positions of things. The white boxes show here the plastic screws fit into (mine are white and red screws as seen in the photo), the blue boxes where the star head screws fit into, the yellow box is where to top door catches that the door card hangs on fits into and the red a boxes are now of interest and most likely the cause of your problems. You will note in both photos there are red boxes, in the photo below you will see a closer up of the area.  On the right is how the metal hook on the main door should look, on the left is the problem most people will be having. The left shows a large plastic surround still attached to the metal hook. This can simply be removed by pushing the top and bottom of the hook in and pulling the black plastic off.  When removed it will look like this. Take note of what direction the plastic is pointed in. Now we take the plastic and fit it to the door card itself. This bit of plastic has most likely not pulled off at some stage when a door card as been removed or attempted repair. The photo below shows where they should be installed on the door card. The one on the left is fitted, the empty space on the right is were this one will go. The are directional and a small tap with a small hammer maybe needed to get it firmly in place.  Your door card should be read for reassembly, replace any plastic clips that have broken (there should be 8 on the door card!) and hoist the door card up to the door roughly. Firstly feed the wiring loom for the window switch through the hole provided. Next simply align the door card beside the door lock popper (the bit that pops up and down), and slide it over, so the door card is correctly over it. Typically you will lock the door doing this, just use centre console button to pop it back up. This will also give you extra 2 cm of clearance on it. Next feed the door handle mechanism through the door but do not fit the chrome mechanism to the door card yet. Well you can do, but it will make the next stage more tricky. Now the hard part. Angling the door card along the top yellow boxed brackets, he door card should slide into place with a little effort. Now bringing the door card down from the angle, use some force on the central door handle gab where the two red boxes are roughly placed but only when it I roughly in place. It should pop into place with a nice click. You will however find that your first few goes, it simply doesn’t, but persist and do it gently. The angling can take a few goes to get right, and you maybe have to move the door card up a few mm here and there to get it in. Tada. It’s in, now before you gently thump the white plastic screws into place again, check your wiring is coming through for the window, check your door lock popper is in the correct place and check you can reach the door lock wire mechanism for refitting the chrome handle. If all this is fine, thumb the plastic screws in, they should pop in with not much effort. Finally gently refit the chrome door handle mechanism. As you finish fitting it, screw the star head screw behind the chrome mechanism into place and cover it with the little cap. Now finally fit the last star head screw (the exposed one at the top right blue box of the first picture). Hopefully this will solve your rattling and badly fitting door cards, and provide a bit more explanation than a Haynes guide offers.
__________________
Cheers, Colin Robson Rover Repair on Youtube DISCOUNTED MTEC BRAKES FOR ALL MG ROVER'S Braided hoses, more coating and pad options for 2024 Last edited by Robson Rover Repair; 2nd October 2021 at 01:23.. |

|

|
|
25th February 2011, 04:07
|
#2 |
|
Loves to post
Rover 75 Contemporary SE 1.8T Join Date: Dec 2010
Location: Newton-Le-Willows
Posts: 285
Thanks: 0
Thanked 0 Times in 0 Posts
|
YOU ARE A GOD (Well maybe)
This is just what I`ve been loooking for, door rattling after garage fixed lock. Think Jim can make use of this too for his speaker install. many thanks. Mike |
|
|
|
|
25th February 2011, 06:46
|
#3 |
|
I really should get out more.......
Billy No Car Join Date: Dec 2010
Location: Bournemouth
Posts: 2,326
Thanks: 70
Thanked 56 Times in 40 Posts
|
Good work, why cant 90% of mechanics be as good and carefull in working things out PROPERLY!
 |
|
|
|
|
25th February 2011, 07:21
|
#4 |
|
Ex Owner
MX-5 ND2 RF Join Date: Sep 2010
Location: Leigh
Posts: 6,574
Thanks: 462
Thanked 799 Times in 524 Posts
|
Cheers Colin you are a Superhero, just what I need, as Mike said I will be fitting some new speakers & my Bullets in the next week or so.
Jim |
|
|
|
|
25th February 2011, 07:23
|
#5 |
|
Gets stuck in
Other (Ex ZT owner) Join Date: Nov 2006
Location: Leyland, Lancs
Posts: 557
Thanks: 0
Thanked 0 Times in 0 Posts
|
Awesome guide, will be using this one on the passenger door.
Might be worth noting to maybe stick a little bit of heat shrink over the door popper (or insulating tape?) just to stop the potential of this rattling about when in situ.
__________________
|
|
|
|
|
25th February 2011, 08:48
|
#6 |
|
Owners Club Director

Rover 75 Conn SE V6 / MG ZT 260 SE V8 / MG ZT 180 SE V6 Join Date: Feb 2007
Location: Southampton
Posts: 20,938
Thanks: 645
Thanked 6,851 Times in 2,537 Posts
|
Good work Colin, and a valuable addition to the How To Guides.
A copy of this guide has been placed in the How To > Car Interior section for reference  How to correctly refit your door cards How to correctly refit your door cards |
|
|
|
|
25th February 2011, 09:29
|
#7 |
|
Loves to post
Ex 2.0 ltr CDT Conn Join Date: Mar 2007
Location: Whickham
Posts: 421
Thanks: 14
Thanked 11 Times in 11 Posts
|
Cheers Mate, nice one.
|
|
|
|
|
25th February 2011, 12:46
|
#8 |
|
I really should get out more.......
Rover 75 CDT Club Tourer Join Date: Nov 2006
Location: Milky Way
Posts: 2,380
Thanks: 105
Thanked 513 Times in 382 Posts
|
Hi Colin a very well detailed how to, I just have one observation, on my car the problem I have is the top part of the card the area highligthed in a yellow box in your how to. I just cannot get this part to catch securely, any pointers, can the small square metal clips that catch the top of the card be moved along the top to a slightly different position, if so how, any help much appreciated, thank you.
|
|
|
|
|
27th February 2011, 06:33
|
#9 |
|
NI/ROI RS
ZT-T 190 / 75 Diesel x3 / 6 door limo / 216 Cabby / Rover 25 van Join Date: May 2009
Location: Antrim
Posts: 8,102
Thanks: 299
Thanked 1,046 Times in 568 Posts
|
It really doesnt catch securely sadly, they more sit in place, you could play with the catches, move them up a bit and see if that helps?
__________________
Cheers, Colin Robson Rover Repair on Youtube DISCOUNTED MTEC BRAKES FOR ALL MG ROVER'S Braided hoses, more coating and pad options for 2024 |
|
|
|
|
27th February 2011, 09:22
|
#10 |
|
Posted a thing or two
R75 Saloon Conn CDT SE, MG ZT190+ Join Date: Nov 2006
Location: Kingston-upon-Hull
Posts: 1,960
Thanks: 823
Thanked 426 Times in 274 Posts
|
Thank you VERY much for taking the time and trouble to do all this, it's members like you who save the rest of us hours of time, skinned knuckles,broken fingernails and broken/lost car parts.
I have a failed door opening mechanism and have obtained a replacement, now I have the confidence to remove the door card do the job and put it back on again  Once again, thanks! maxi_crawf "A moving reflection of motoring perfection" Rover Raver. Last edited by maxi_crawf; 27th February 2011 at 09:39.. |
|
|
|
 |
|
|


 Linear Mode

