
|
|
|
|
|
|
||
|
|
||
 19th February 2013, 06:19
|
#1 |
|
Posted a thing or two
Rover 75 2.0 V6 Auto Join Date: May 2011
Location: Sandnes - Norway
Posts: 1,560
Thanks: 64
Thanked 283 Times in 174 Posts
|
Hi all,
Yesterday, I visited the forum user "General" to take a look at his MG ZT-T which has been standing in his back yard for a while now after it suffered HGF/overheating last summer. The car has done 87500miles and was still on the OEM headgasket. "General" noticed misfiring and startup problems before the car overheated. He and his brother had prepared everything to pull the cylinder head off when I came. The cylinder head was pulled off and everything was inspected with the following findings: - Water in cylinder no 4. - The oil looks OK, but it may contain water for all I know. - No signs of a deformed inlet manifold gasket. - The elastomer had detached from the head gasket around some of the "church windows" - No other visual signs of a "blown head gasket" - No indents from the fire rings in the cylinder head, but some porosity seen in the fire ring areas - Liner protutution measured to be 0-0.0015", considered "as flush". Since the liners are on the low side, we will not go for the MLS solution. The plan is to: - Skim the cylinder head down 0,5mm. - Fit a 0,5mm "gosnay shim", glued with Stag wellseal to the cylinder head. - Fit the latest Payen BW750 elastomer gasket. - Put the rest together "by the book" Hopefully this work will be done before the week ends  |

|

|
|
20th February 2013, 00:00
|
#2 |
|
Regular poster
MG ZT-T Join Date: Apr 2012
Location: Oslo
Posts: 54
Thanks: 5
Thanked 1 Time in 1 Post
|
Hello there.
Yes, the engine bay has been dismantled gradually during Friday and yesterday. Beinet1 very kindly offered advice over the phone before the weekend, and even turned up himself yesterday to inspect and analyse the damaged engine. Head was removed last night and was skimmed today, and was prepared for re-installation this evening. Very annoyingly, one of the camshaft carrier bolts didn't stop during the torque tightening rounds in the end - even though the carrier retaining bolts were tightened with the utmost care which probably took a quarter of an hour just that. We'll check that together with Beinet1 tomorrow night, during head gasket + head saver shim fitment process. Fingers crossed. - - Beinet1 and my brother (on the left) discussing various aspects of the head gasket issues on the K-series engine.   Beinet1 checking the fire rings for indentations.   Fingers crossed.. ! Last edited by General; 20th February 2013 at 00:02.. Reason: Problems getting the photos to appear in the post. |
|
|
|
|
21st February 2013, 12:15
|
#3 |
|
Posted a thing or two
Rover 75 2.0 V6 Auto Join Date: May 2011
Location: Sandnes - Norway
Posts: 1,560
Thanks: 64
Thanked 283 Times in 174 Posts
|
Hi all,
Just want to share the latest update from our HGF repair. I met "General" and his brother yesterday evening to continue the work. The bolt "General" refers to seems to be over tightene as it had clearly streched when we removed it. Luckily the threads in the cylinder head was fine. We replaced the bolt and was ready to proceed. We appliled Stag Wellseal to the newly skimmed cylinder head and "Gosnay" shim, let it cure for 10 mins before we positioned the shim on the head guided with a pair of dowel. Cylinder head was then fitted to the block together with the latest Payen elastomer gasket and the bolts was tigthened according to the procedure. All the other components was put together, oil filled, coolant filled and bleed. The engine was startet and it fired up instantly and ran nicely rigth off. We did a testdrive and the coolant temperature (OBDII) was stable around 90-93deg C all the time. No leaks detected so far. Seems to be another successfull HGF repair done The car do now needs to be used daily to build confidence and the coolant system shall be observed closely for potential leaks and coolant loss. I also showed "General" how to clear the plenum drains as ther was a lot of water in the carpet and boot. Guess what, we found a handfull of sh.t in the drain that came out after roding it. I guess "General" will report back with some pictures soon |
|
|
|
|
21st February 2013, 13:19
|
#4 |
|
Posted a thing or two
MG3 Join Date: Mar 2012
Location: Falkirk
Posts: 1,507
Thanks: 242
Thanked 153 Times in 123 Posts
|
Nice work, well done

__________________
http://i149.photobucket.com/albums/s...5signature.jpg |
|
|
|
|
21st February 2013, 14:18
|
#5 |
|
Regular poster
Rover 75 Join Date: Sep 2011
Location: Mosjøen
Posts: 32
Thanks: 6
Thanked 0 Times in 0 Posts
|
I noticed your both in Norway, a long way south from me, talking of sealing head gaskets, the Mazda importer to Norway had a cure for 929s that would keep the the head gaskets sealed, spray bodyshutz on the gasket before fitting, apparently this worked very well, not tried it, and hopefully never will need to as I have a V6.
Gary Poulton |
|
|
|
|
21st February 2013, 23:50
|
#6 |
|
Regular poster
MG ZT-T Join Date: Apr 2012
Location: Oslo
Posts: 54
Thanks: 5
Thanked 1 Time in 1 Post
|
Well, after three evenings working on the car, we seem to have a very good result indeed! Beinet1 took the 2 hour drive to our garage on Monday and Wednesday evenings and provided invaluable assistance in determining causes and actions. Last night, 4 hours of pretty intense work started with a headless engine and 4 hours later we had a running vehicle! As Beinet1 mentioned above, engine ran faultlessly for about 30 minutes - 20mins of which was spent on a test drive. Temperature readings were normal and no signs of coolant being lost anywhere.
I cannot thank Beinet1 enough for his support ! Without him, his clear head and logical thinking, we'd never ended up using the old style head gasket and skimmed the head 0,5mm and fitted the Gosnay shim. I think the decision to do just this has resulted in an engine good enough for at least 50000 more miles, before changing the Payen head gasket again in a similar fashion (before breakdown this time  ) )Anyway, photos: Sealant being applied:  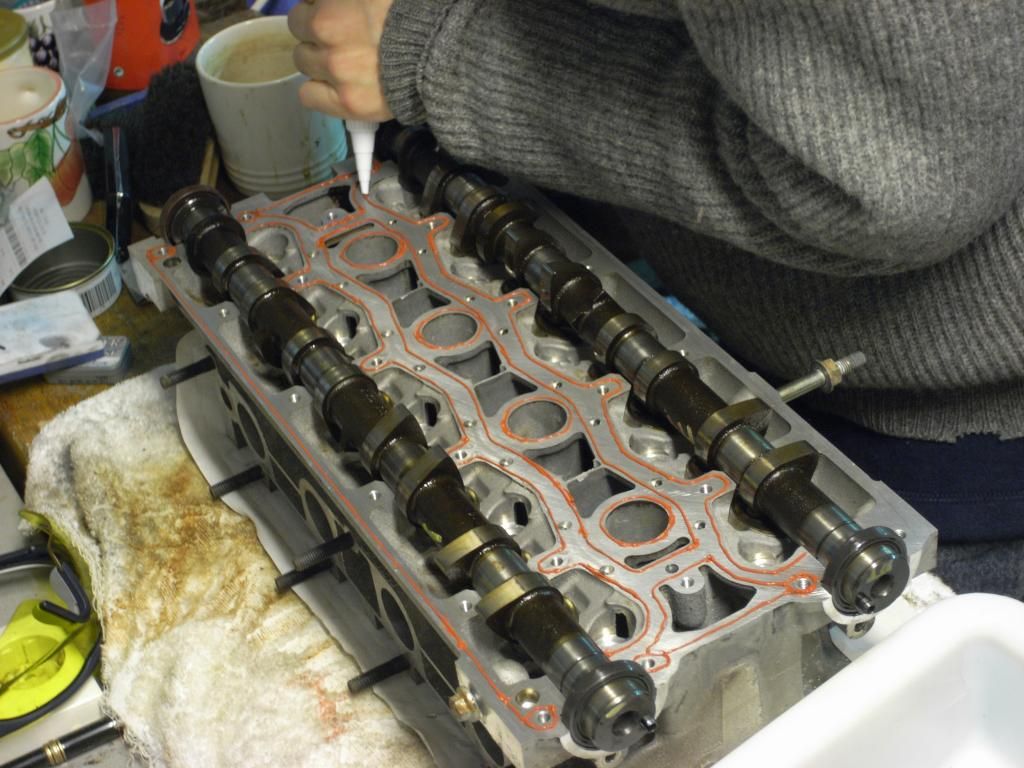 Old exhaust pin bolts changed for these babies..  : : 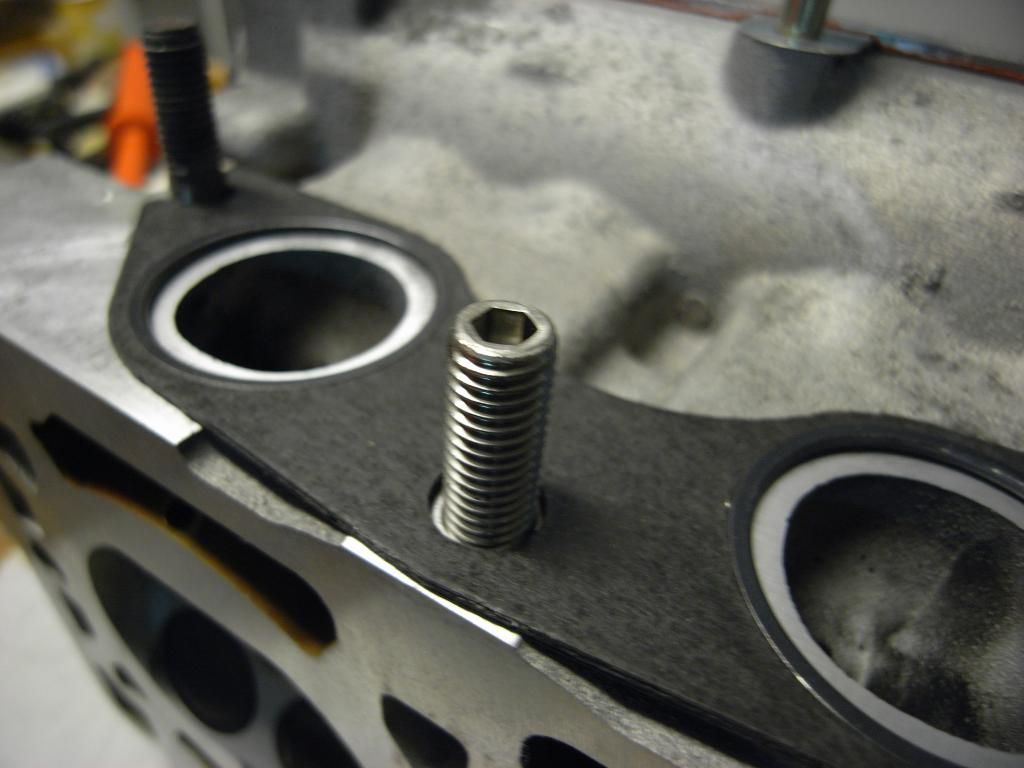 .. and copper plated nuts:  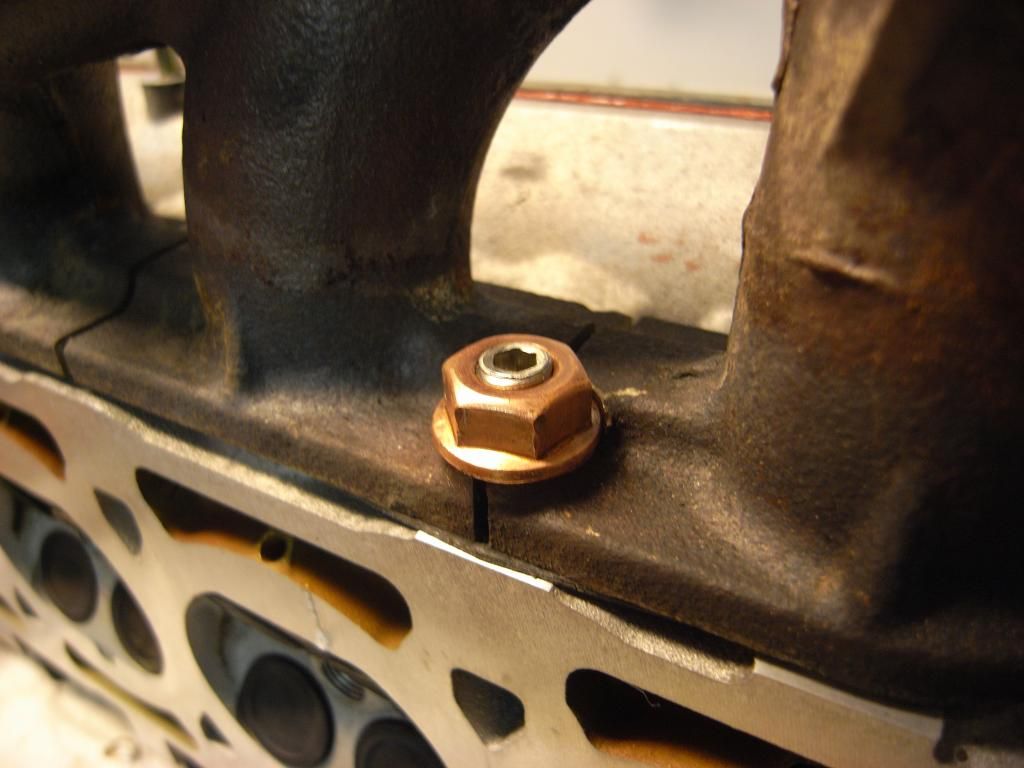 To fix the Gosnay shim to the head, Wellseal is added... :  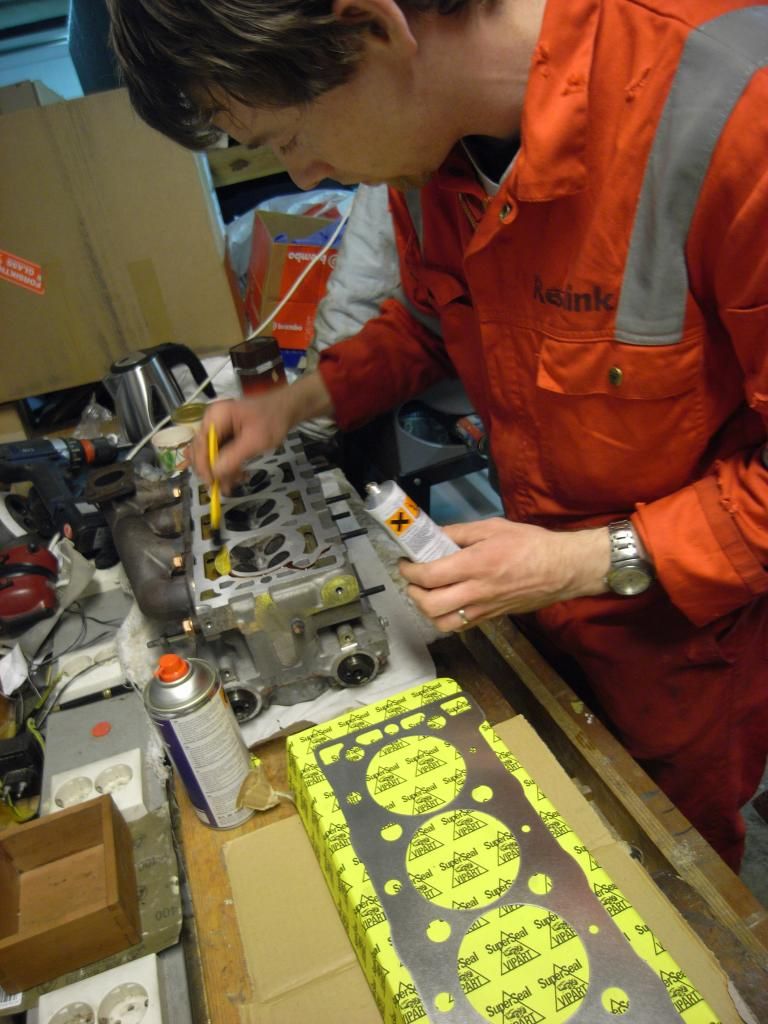 ...as well as to the shim itself:  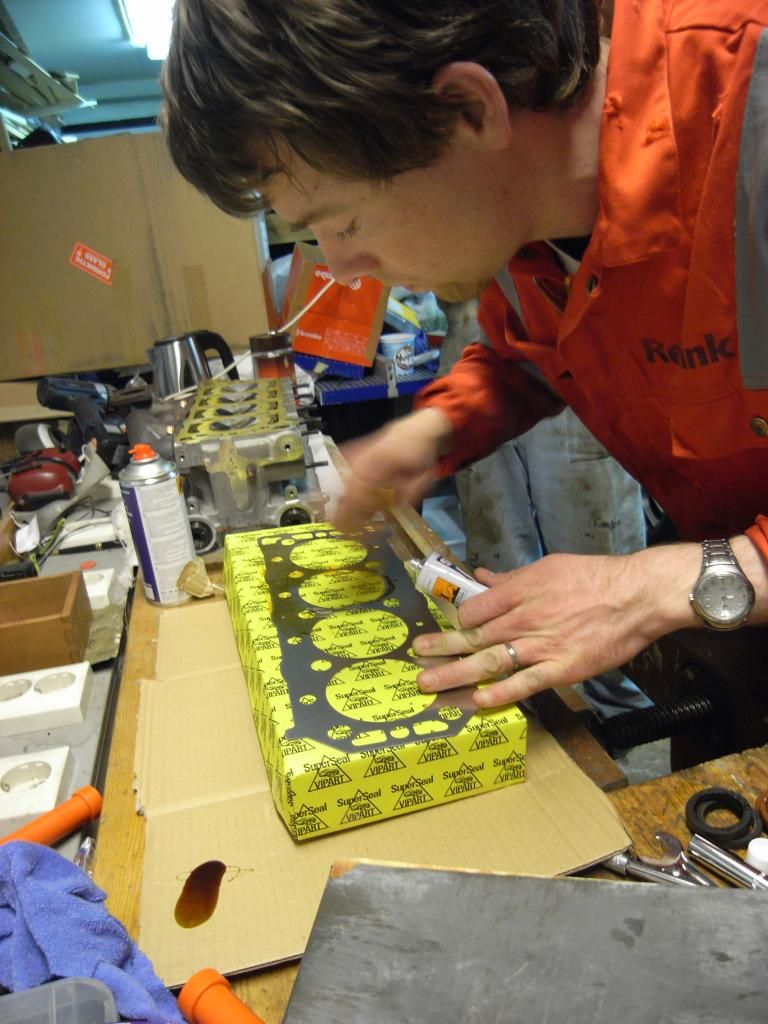 The shim then fitted to the engine head - replacing 0,5mm alloy skimmed off the cast:  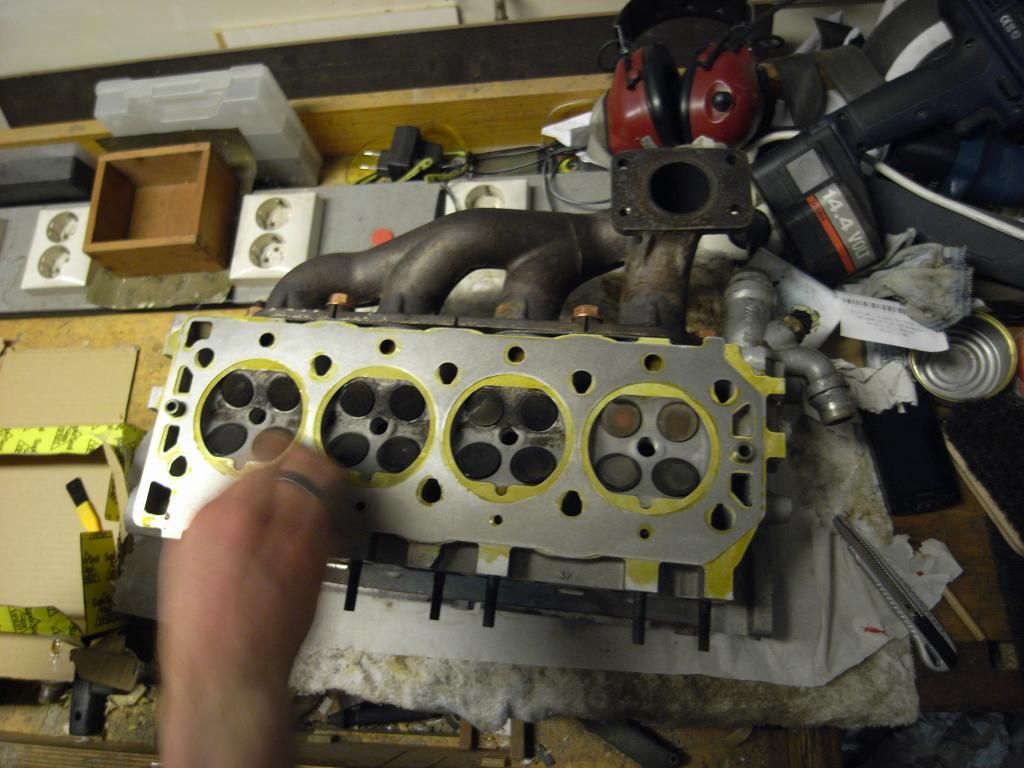 Excess sealant cleaned off all:  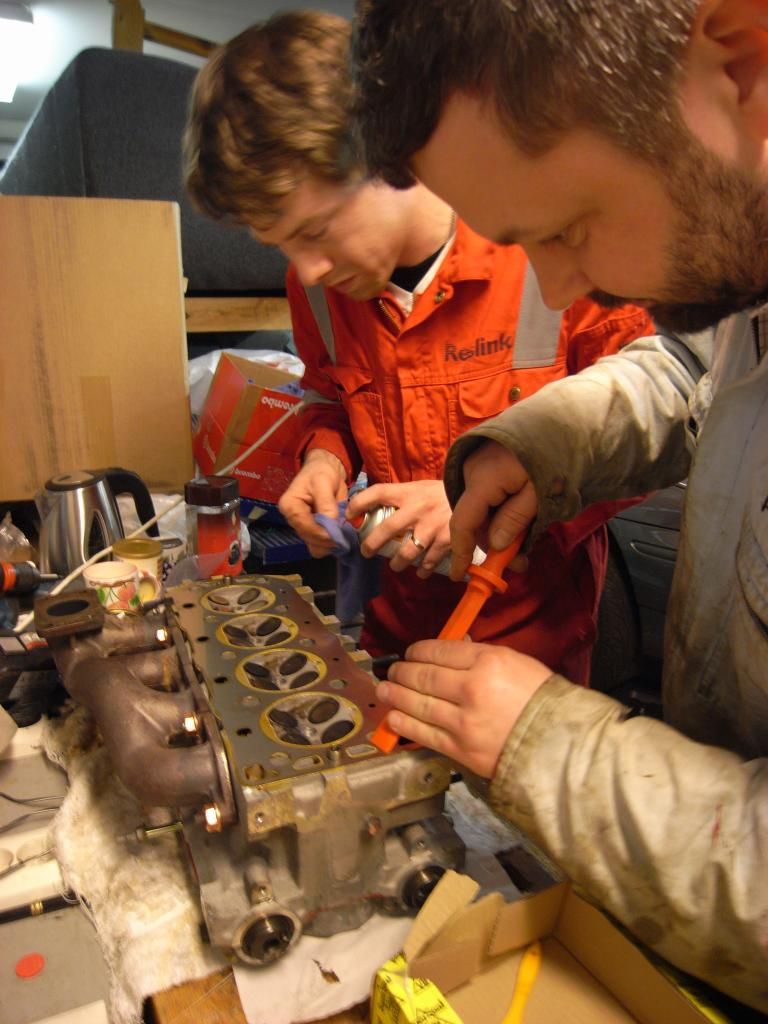 Gosnay 0,5mm saver shim as fitted to the engine head: 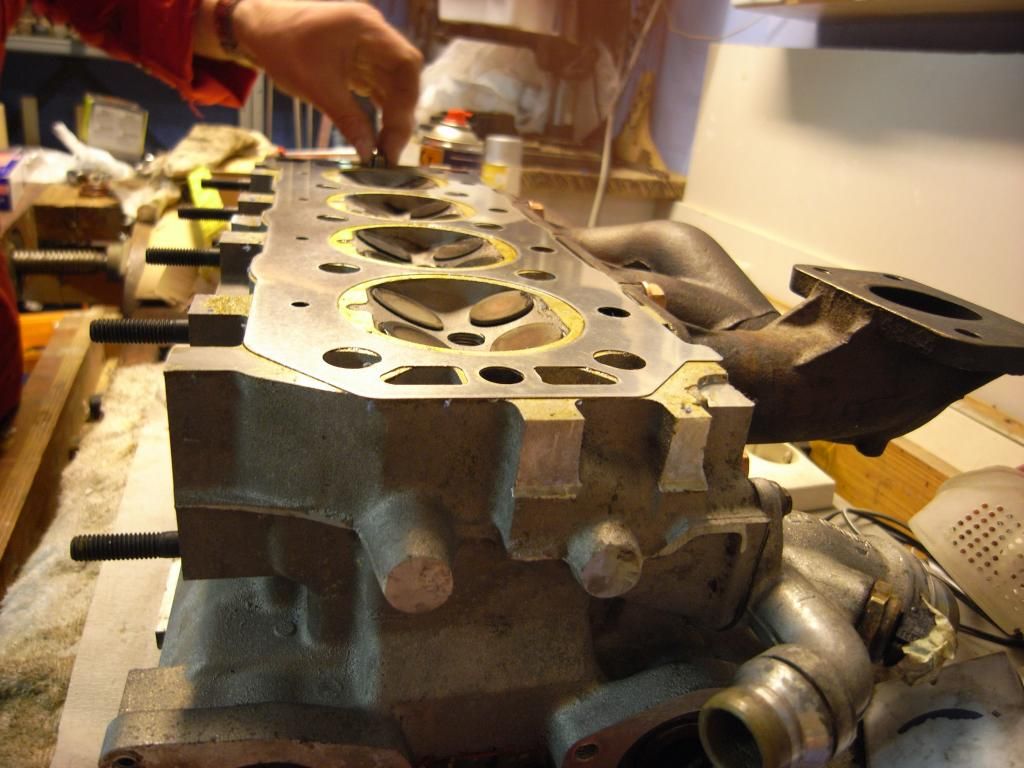 Head fitted to the engine block: 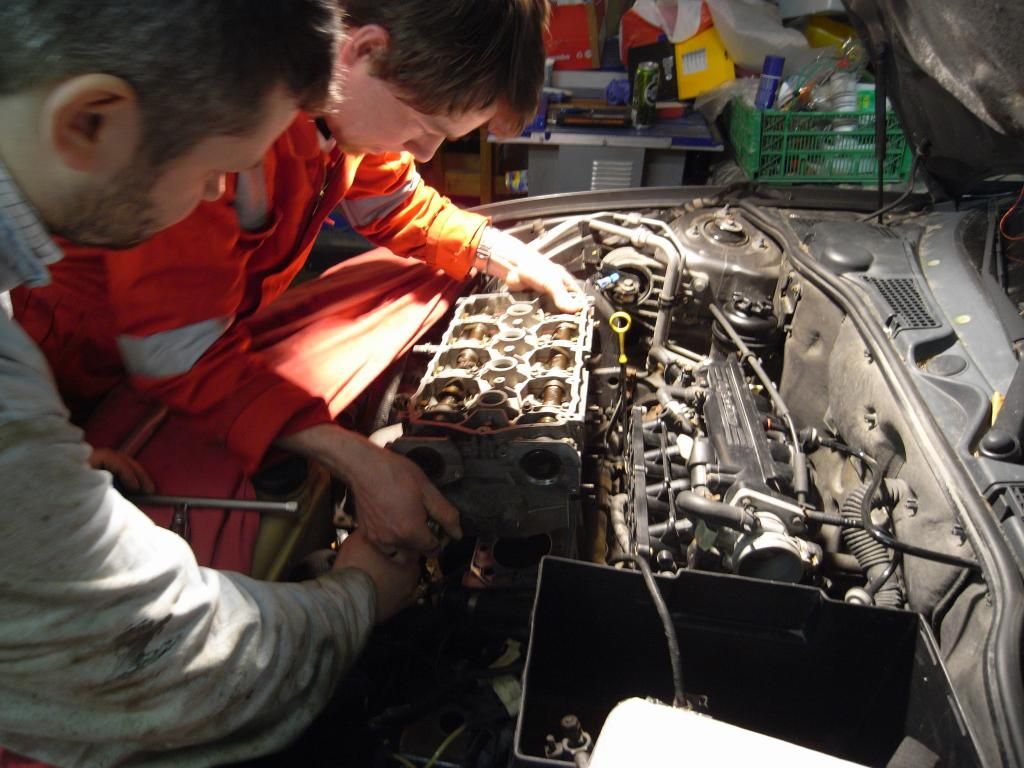 Two of the pin bolts and nuts which hold the Garrett turbocharger onto the exhaust manifold proved to be an irritating problem. Extremely difficult to remove, we ended up buying a kit of "crow's feet" to loosen the nuts. The bolt where the nut is situated below the plate was the worst to get removed, but this crow's foot did the trick (the photo shows one of the bolts on top) ! 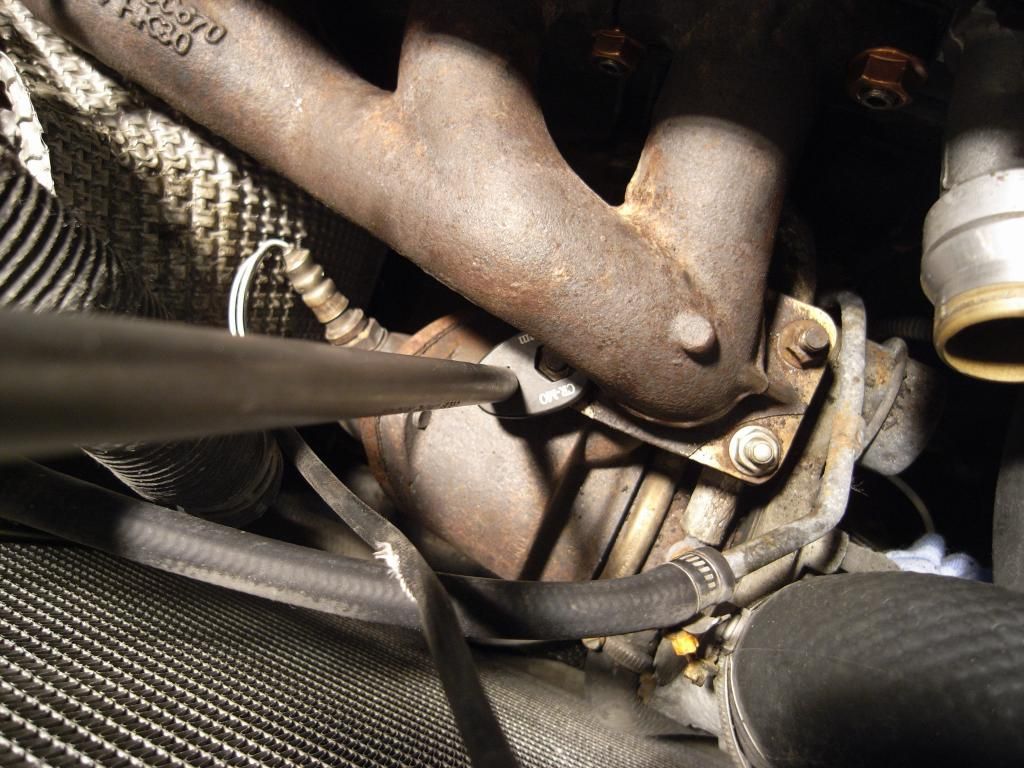 The car is then started and inspected thoroughly, and taken for a test drive. 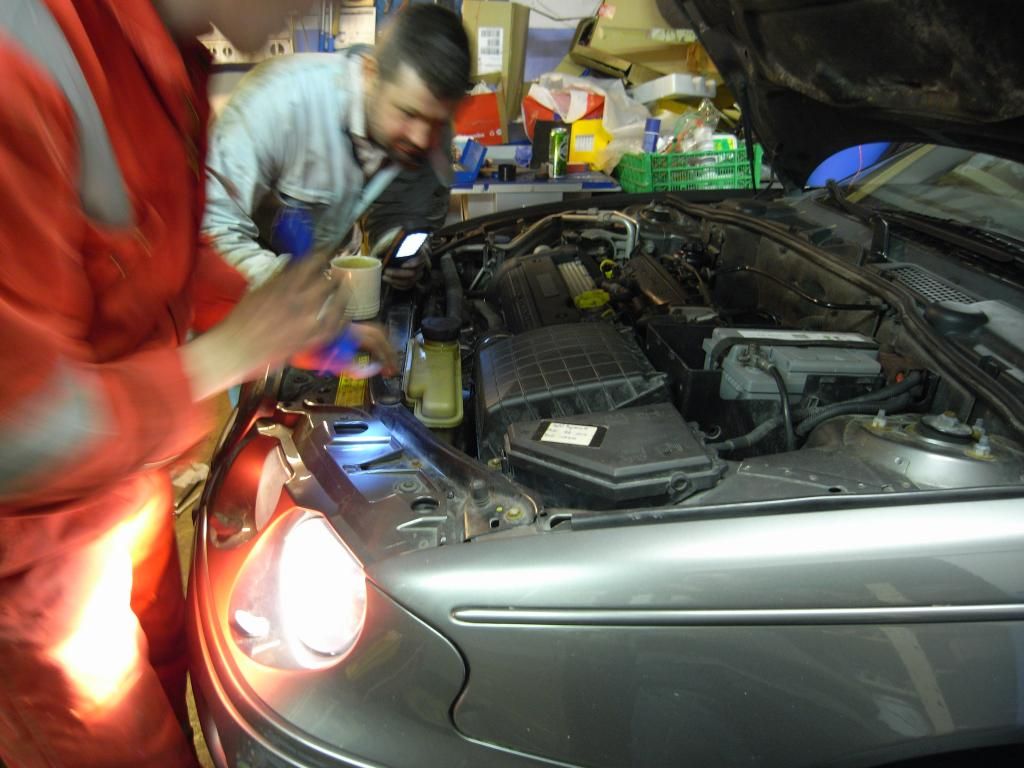 Garage got spacious all of a sudden: 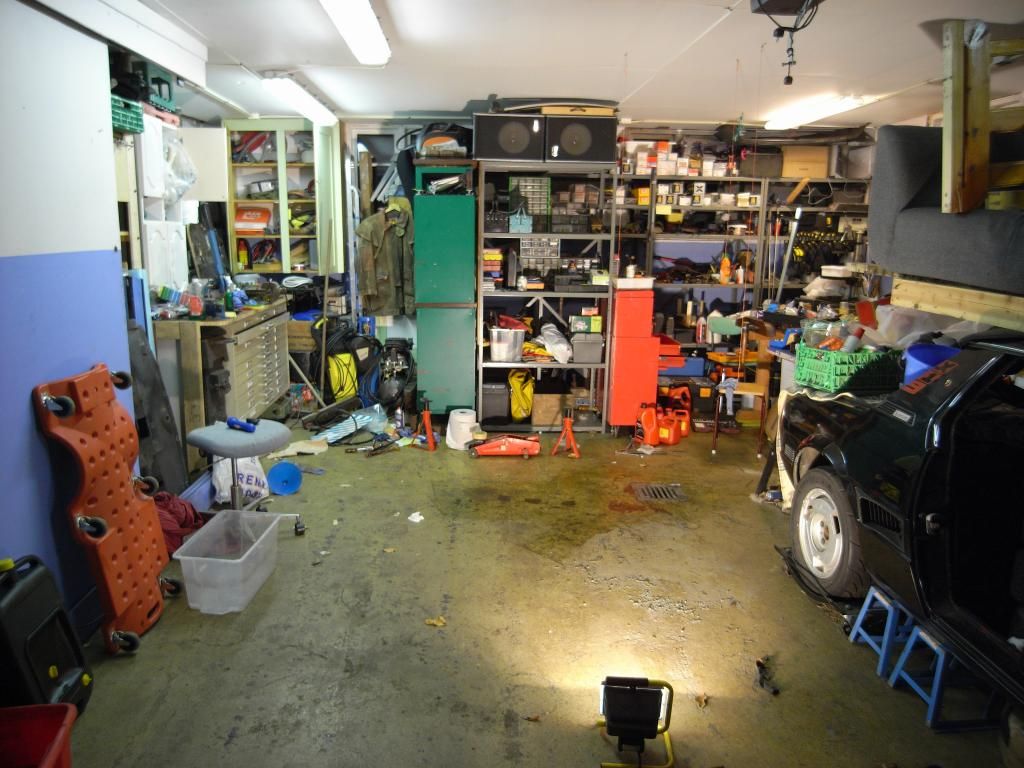 ..and the MG is now sitting outside after test drive:  What a relief ! Last edited by General; 21st February 2013 at 23:53.. Reason: Grammar |
|
|
|
|
22nd February 2013, 07:25
|
#7 |
|
Doesn't do things by halves

Rover 75 2.5 Connoisseur Auto (1999) Dealer launch model. Join Date: Mar 2007
Location: Former Middlesex
Posts: 20,394
Thanks: 1,587
Thanked 3,749 Times in 3,181 Posts
|
That looks a very professional job gents, and beautifully illustrated.
I expect that you've now seen the recently posted Land Rover document on head gasket renewal which states that acceptable liner protrusion is 0 - 0.075 mm above the block surface, so yours were fine. Simon
__________________
"Whatever is rightly done, however humble, is noble." Sir Henry Royce. |
|
|
|
|
22nd February 2013, 07:38
|
#8 | |
|
Posted a thing or two
Rover 75 2.0 V6 Auto Join Date: May 2011
Location: Sandnes - Norway
Posts: 1,560
Thanks: 64
Thanked 283 Times in 174 Posts
|
Quote:
Thanks for that I have seen that document for a while ago and think it is strange that they claim liner protution 0 - 0,75mm is OK for the MLS gasket. As far as I have read a lot of other cases, you should avoid fitting the MLS gasket if the liner protution is below 0,05mm (0.002"). That was one of the reason why I raised the liners with shims on my two other K-repairs to get a protution of 0.003"-0.004". In this case, the low liner protution was the main reason for fitting the elastomer gasket as this one is commonly known to be more tolerant for liner protution. My experience is also that the MLS gasket tends to ligthly weep coolant externally, so watching the coolant level is pretty critical. The elastomer gasket is of a tigther design, rubber-to-metal seals better than metal-to-metal, and I believe that the latest Payen version with the re-enforced silicone beading with the blue (revised) silicone compound will last longer than this car. For the interested ones, here are my two other HGF repairs: http://forums.mg-rover.org/showthread.php?t=431744 http://forums.mg-rover.org/showthread.php?t=406154 Last edited by beinet1; 22nd February 2013 at 07:41.. |
|
|
|
|
|
22nd February 2013, 07:46
|
#9 | |
|
Doesn't do things by halves
Rover 75 2.5 Connoisseur Auto (1999) Dealer launch model. Join Date: Mar 2007
Location: Former Middlesex
Posts: 20,394
Thanks: 1,587
Thanked 3,749 Times in 3,181 Posts
|
Quote:
The document doesn't specify the type of head gasket. There's no mention of MLS at all. Land Rover simply says replace the gasket with a new one!  Is there an official LR or MGR document concerning fitting the MLS gasket? If so, I would like to see it. Simon
__________________
"Whatever is rightly done, however humble, is noble." Sir Henry Royce. |
|
|
|
|
|
22nd February 2013, 07:59
|
#10 | |
|
Posted a thing or two
Rover 75 2.0 V6 Auto Join Date: May 2011
Location: Sandnes - Norway
Posts: 1,560
Thanks: 64
Thanked 283 Times in 174 Posts
|
Quote:
You are absolutely correct... Misunderstanding from my side I see that the LR bulletein 0036 is stating "fit later type head gasket", but I guess they mean the latest type elastomer gasket with re-enforced silicone beading as the bulletin is dated 18. of june 2004. The MLS gasket was introduced in 2006....Thaks for clearing that up LR Bulletin 0036: http://www.mgfcar.de/hgf/freelander_LN_1994_0036.pdf |
|
|
|
|
 |
|
|


 Linear Mode

