
|
|
|
|
|
|
||
|
|
||
 28th February 2013, 13:58
|
#1 |
|
Regular poster
Rover 75 Saloon Join Date: Jan 2013
Location: Wednesbury
Posts: 40
Thanks: 0
Thanked 6 Times in 2 Posts
|
Hi All,
I've been itching to get an Android head unit into my 75, but the current prices are 1: Out of my budget & 2: More than I paid for the car (Almost) After trawling the web I found quite a few Tablet installs, one of which was done in a Beemer, which fits in quite well, as our 75 stereo systems are readily interchangeable with BMW's, and with Android tablets getting cheaper, I decided to go for a generic tablet as a proof of concept, and maybe upgrade to a better one later on. It's at most a couple of hours work, took me around 45 mins in the end after trimming the fascia plate to suit my Tab. From This:[IMG] 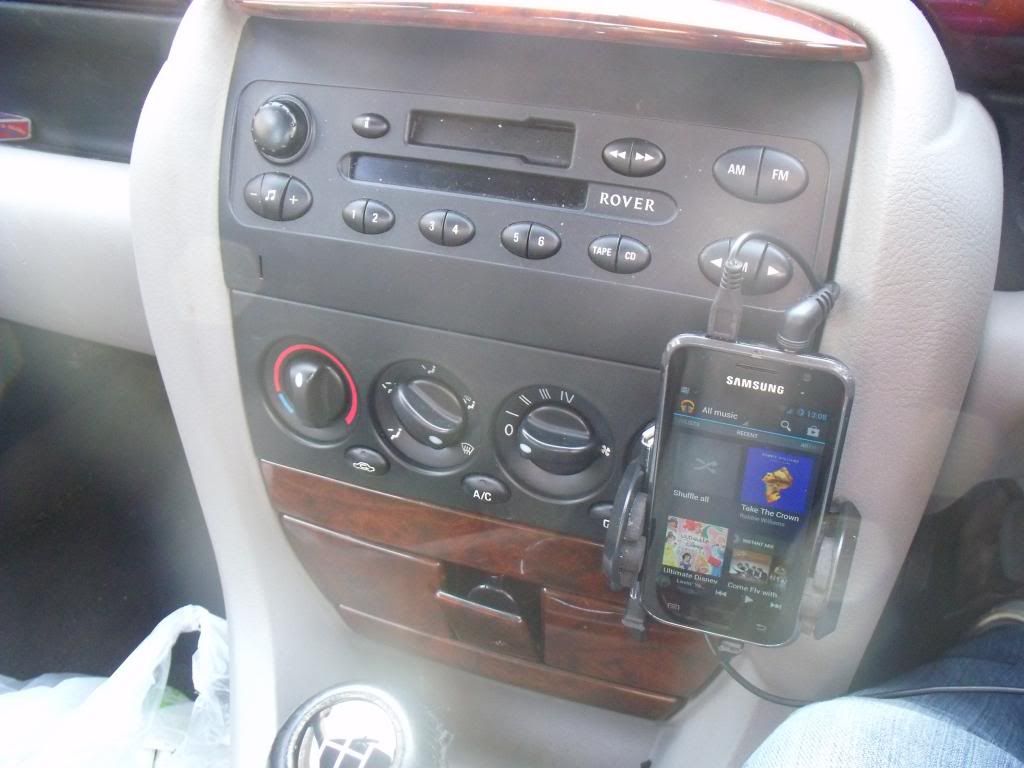 [/IMG] [/IMG]To This:[IMG]  [/IMG] [/IMG]If you want to give this a go you'll need: 7" Android tablet, specs to suit yourself, but anything running Android 4.1 smoothly will do. I'm tethering my Phone to the Tablet so went for a basic model without GPS or Bluetooth (Plenty of apps in the Market to allow for GPS functionality) Standard Double Din Fascia Plate Connects2 Mp3 Adapter to attach to current head unit 12v Ground loop isolator (Didn't realise I'd needed this until I turned on the engine and got a lovely annoying hum from the audio). Radio Code for your Stereo 1: Disconnect the Battery (Obviously!) 2: Connect up the head unit to the MP3 Adaptor, reattach the battery and check it's all working with your steering wheel controls, I used my Phone for audio checks. 3: Remove the top of the radio then remove the 2 retaining screws: [IMG] 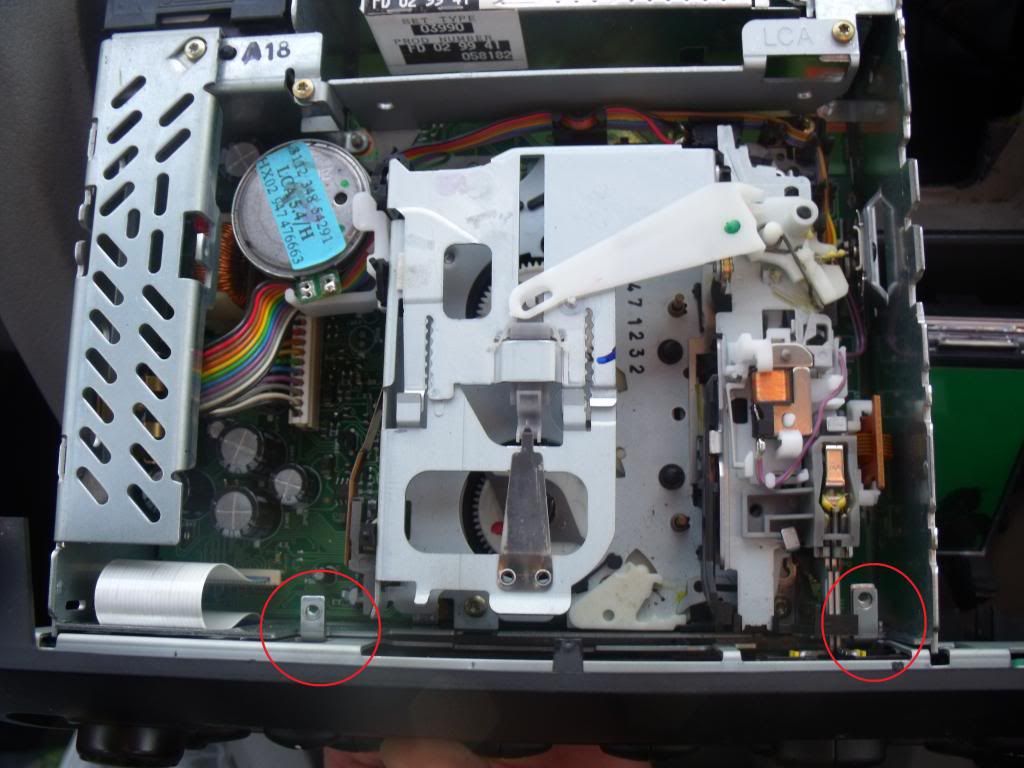 [/IMG] [/IMG]4: Carefully detach the front panel and ribbon, keep it safe, if you remove or disconnect the battery again, you'll need to put it back on briefly to input the code. 5:All the cables are connected up, and will fit nicely into the recess at the left side of the cavity, my Cigarette adaptor is already connected and slipped down the right side:[IMG] 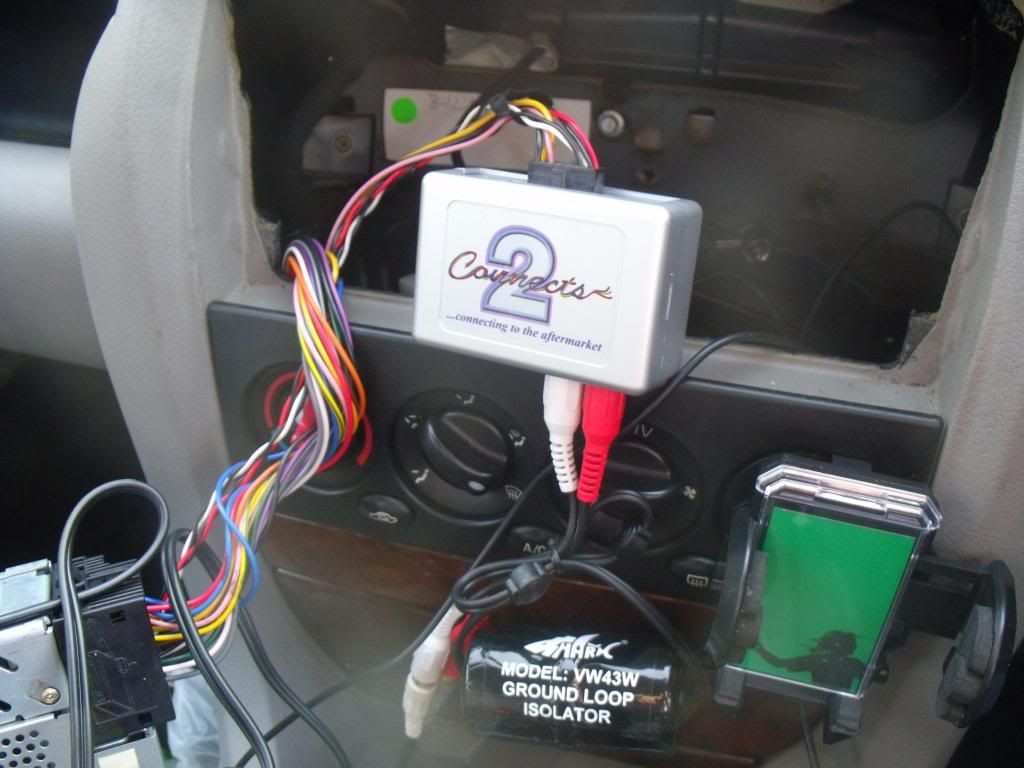 [/IMG] [/IMG]6: Put the radio back into the gap in the dashboard, with a 90 degree turn:[IMG] 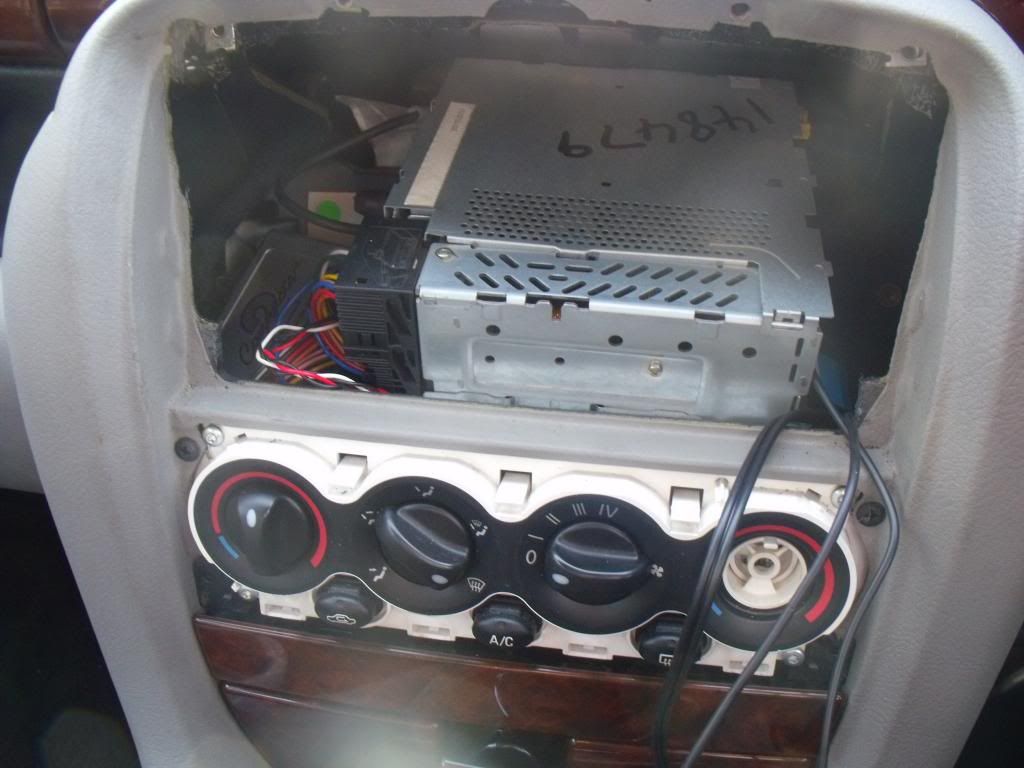 [/IMG] [/IMG]7: Here's the tablet mounted in the Fascia, I took a hot knife to the panel to allow for fitting, and connections,but use whatever you prefer, probably a dremel would be best: 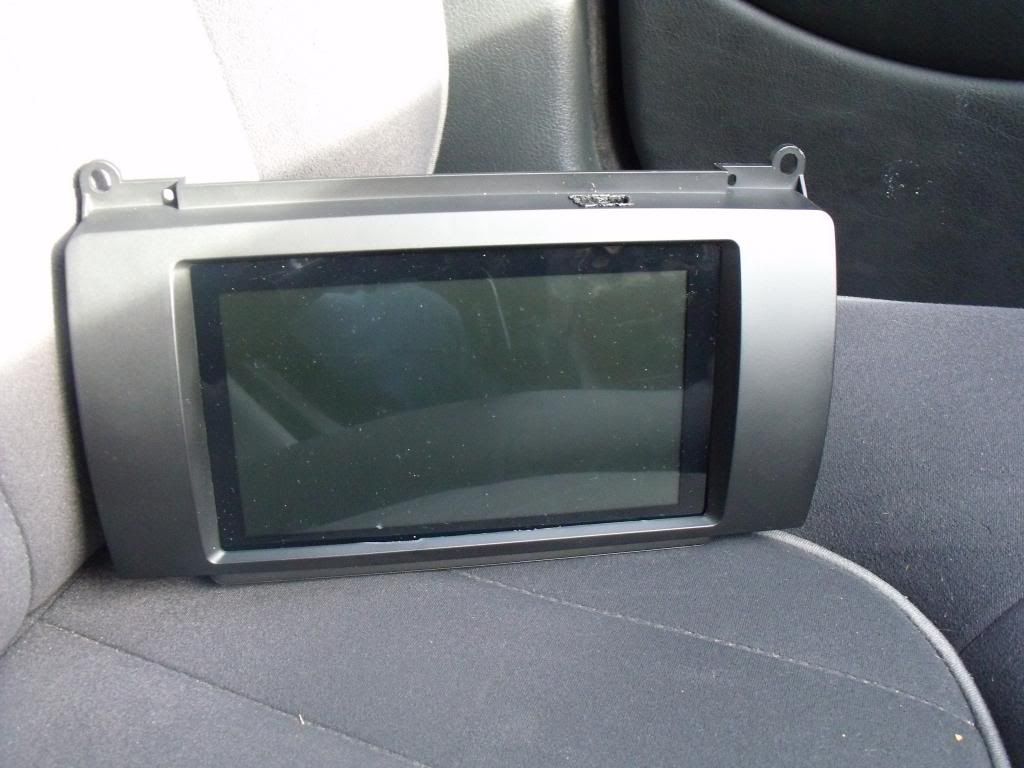 [IMG] [IMG]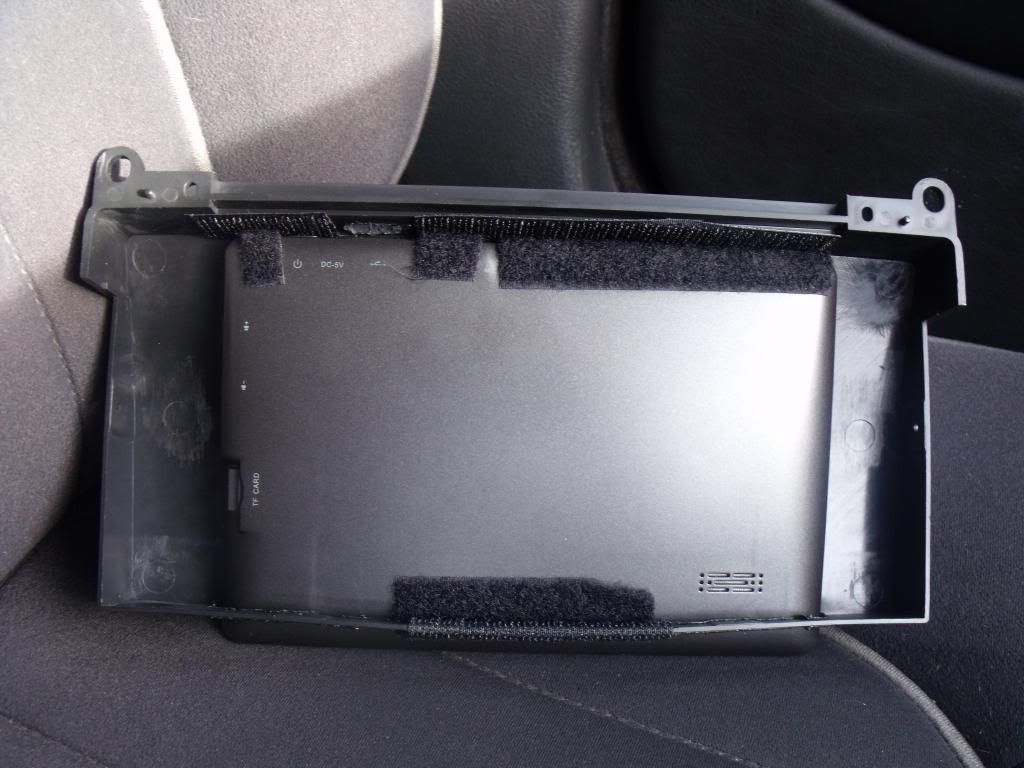 [/IMG] [/IMG]8:Slip the fascia and tablet into place, and screw into position. There's a slight gap below which supports the tablet nicely, and is out of sight behind the climate control faceplate:[IMG] 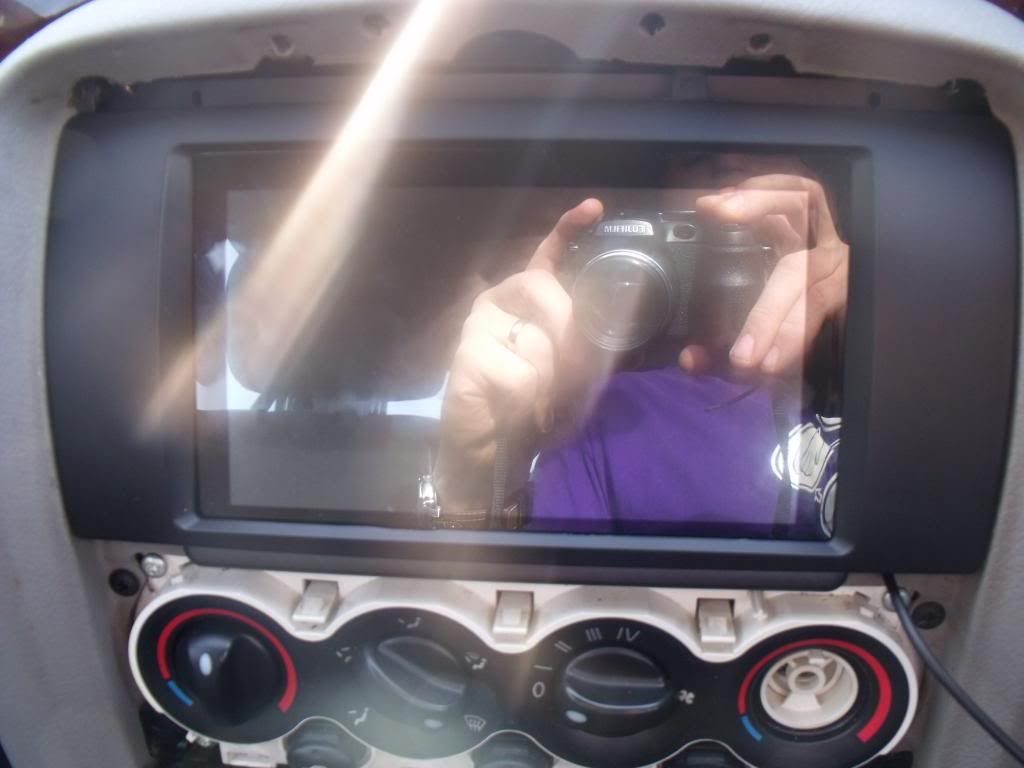 [/IMG] [/IMG]9: Put all the various panels back, climate control, eyebrow etc, and you're done:[IMG] 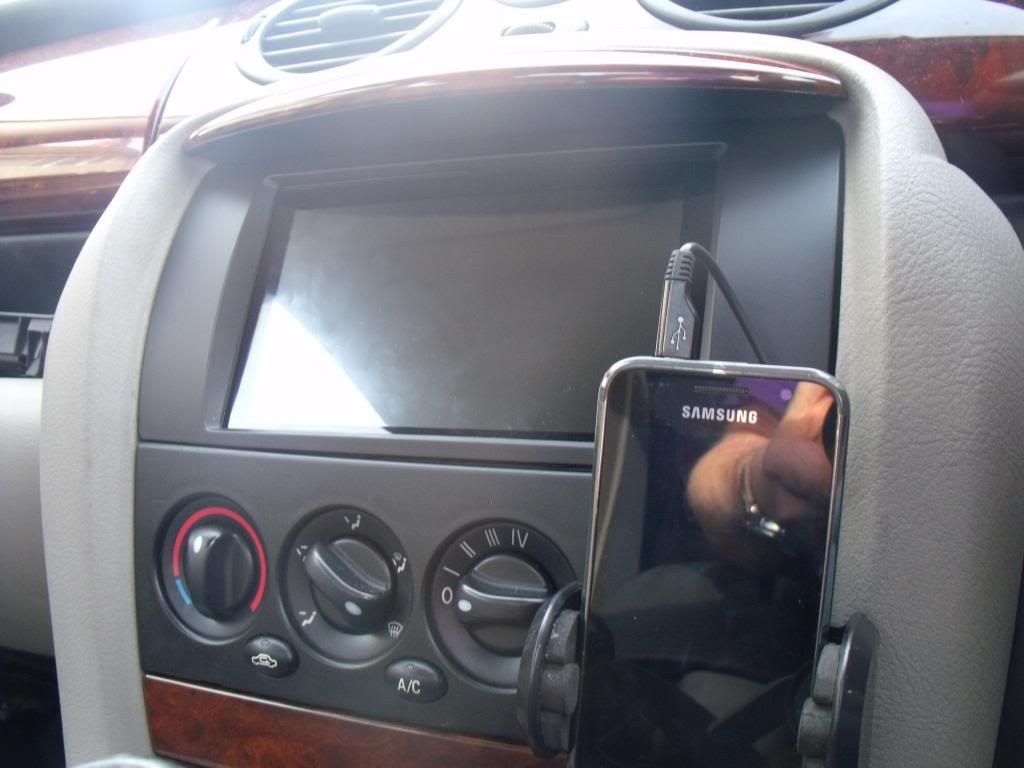 [/IMG] [/IMG]10:Enjoy your budget Android system! [IMG] 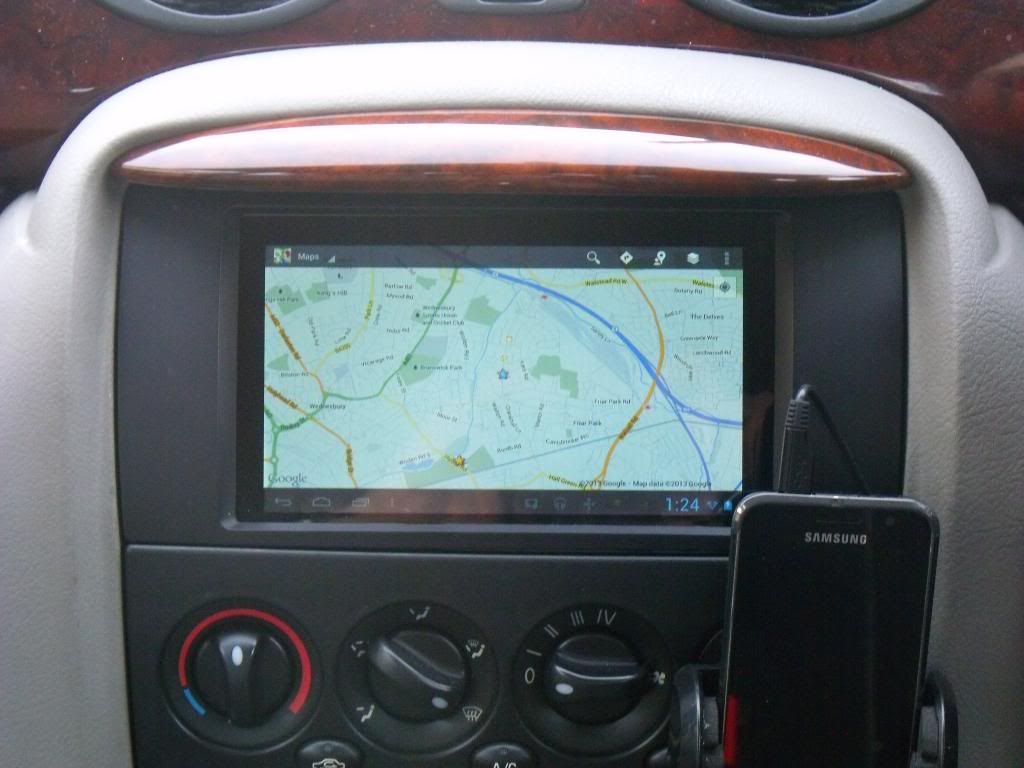 [/IMG][IMG] [/IMG][IMG]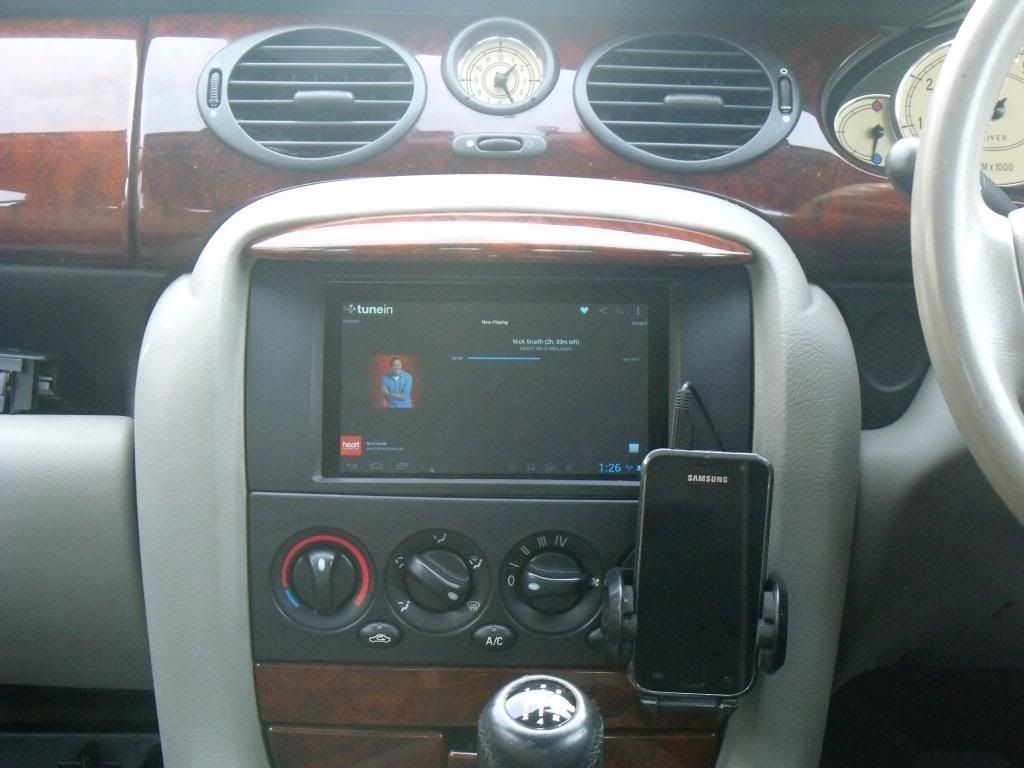 [/IMG][IMG] [/IMG][IMG]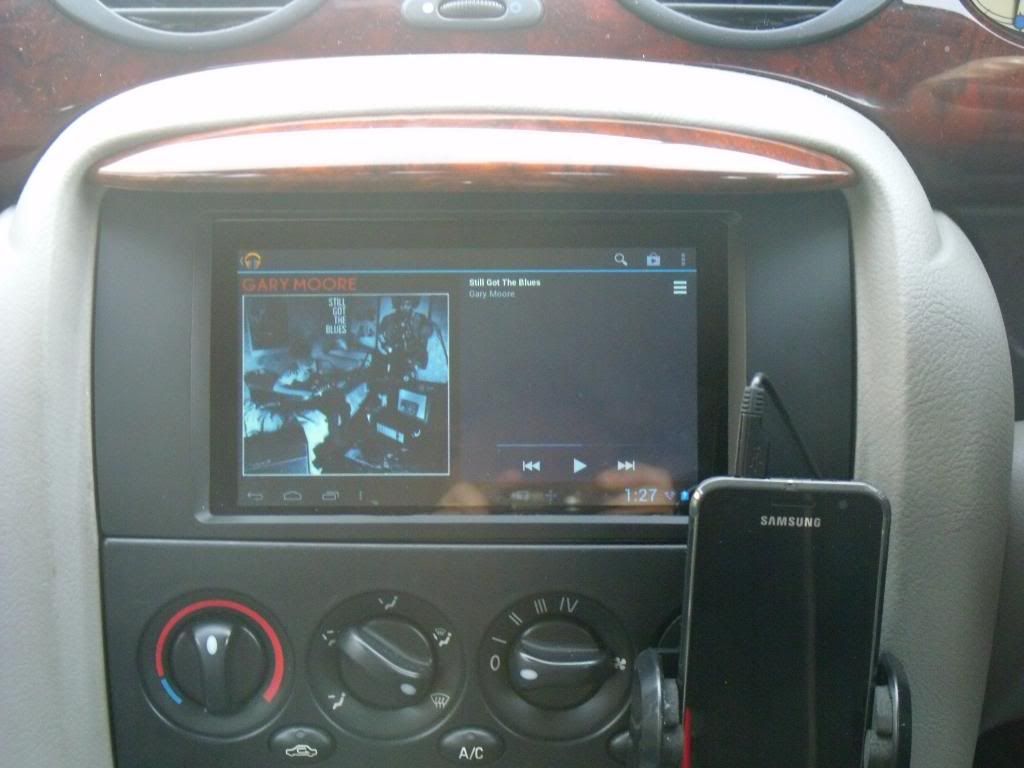 [/IMG] [/IMG]Hope you all like it!  Disclaimer: You are responsible for any work or modifications carried out on your car and you undertake any such work at your own risk. The 75 and ZT Owners Club nor the original author of this How-To can be held liable for anything that may happen as a result of you following this How-To. Last edited by Dragrad; 6th March 2013 at 22:57.. Reason: Disclaimer added as per Club Rules |

|

|
|
28th February 2013, 14:00
|
#2 |
|
This is my second home
Jaguar XJ 3.0 V6 Auto (X350) & Hyundai Tuscon 2020 Join Date: Oct 2008
Location: Bridgend
Posts: 10,342
Thanks: 69
Thanked 559 Times in 356 Posts
|
Your pics don't work?
__________________
"The only thing to do with good advice is pass it on. It is never any use to oneself" |
|
|
|
|
28th February 2013, 14:37
|
#3 | |
|
Regular poster
Rover 75 Saloon Join Date: Jan 2013
Location: Wednesbury
Posts: 40
Thanks: 0
Thanked 6 Times in 2 Posts
|
Quote:
 |
|
|
|
|
|
28th February 2013, 14:44
|
#4 |
|
Avid contributor
MG ZT+ 1.8T Join Date: Oct 2012
Location: West Lothian
Posts: 249
Thanks: 0
Thanked 1 Time in 1 Post
|
Very tidy install, can you still use the radio of the original headunit or is it just being used for the amplifier?

__________________
"Understeer" is when you hit the wall with the front of the car. "Oversteer" is when you hit the wall with the rear of the car. "Horsepower" is how fast you hit the wall. "Torque" is how far you take the wall with you. |
|
|
|
|
28th February 2013, 14:49
|
#5 | |
|
Regular poster
Rover 75 Saloon Join Date: Jan 2013
Location: Wednesbury
Posts: 40
Thanks: 0
Thanked 6 Times in 2 Posts
|
Quote:
Last edited by pedrovader; 28th February 2013 at 14:51.. Reason: typo |
|
|
|
|
|
28th February 2013, 16:50
|
#6 |
|
Loves to post
MG ZT 190, Rover 75 CDTi, Honda VFR 750, Honda CB550F Join Date: Aug 2010
Location: Derby
Posts: 394
Thanks: 75
Thanked 36 Times in 28 Posts
|
Very nice looking unit, where did you get the Rover logo?
|
|
|
|
|
28th February 2013, 16:52
|
#7 |
|
Banned
MG ZT+ V6 190 Join Date: Nov 2011
Location: Spalding
Posts: 13,245
Thanks: 369
Thanked 1,196 Times in 818 Posts
|
I'd be more embarrassed to let people know that you have "Ultimate Disney" on your phone!
  |
|
|
|
|
28th February 2013, 17:06
|
#8 |
|
This is my second home
Jaguar XJ 3.0 V6 Auto (X350) & Hyundai Tuscon 2020 Join Date: Oct 2008
Location: Bridgend
Posts: 10,342
Thanks: 69
Thanked 559 Times in 356 Posts
|
Certainly looks a nice neat job, would like to see this mod in the flesh, oooohhh misses
Great work and a fraction of the cost as you say
__________________
"The only thing to do with good advice is pass it on. It is never any use to oneself" |
|
|
|
|
28th February 2013, 18:01
|
#9 | |
|
Regular poster
Rover 75 Saloon Join Date: Jan 2013
Location: Wednesbury
Posts: 40
Thanks: 0
Thanked 6 Times in 2 Posts
|
Quote:
 - http://www.the75andztclub.co.uk/foru...ad.php?t=57394 - http://www.the75andztclub.co.uk/foru...ad.php?t=57394 |
|
|
|
|
|
28th February 2013, 18:04
|
#10 | |
|
Regular poster
Rover 75 Saloon Join Date: Jan 2013
Location: Wednesbury
Posts: 40
Thanks: 0
Thanked 6 Times in 2 Posts
|
Quote:
 Must've slipped through the net on the Google Music upload, for the kids you know how it is...ahem *Gonna be a mighty King........*  |
|
|
|
|
 |
|
|


 Linear Mode

